## Step 1: Use AdMob to create a new ad unit variant for testing
|---|
| Introduction: [Test new AdMob ad format adoption using Firebase](https://firebase.google.com/docs/tutorials/test-ad-format-adoption.md.txt) |
| **Step 1: Use AdMob to create a new ad unit variant for testing**
|
| Step 2: [Set up an A/B test in the Firebase console](https://firebase.google.com/docs/tutorials/test-ad-format-adoption/step-2.md.txt) |
| Step 3: [Handle Remote Config parameter values in your app's code](https://firebase.google.com/docs/tutorials/test-ad-format-adoption/step-3.md.txt) |
| Step 4: [Start the A/B test and review the test results in the Firebase console](https://firebase.google.com/docs/tutorials/test-ad-format-adoption/step-4.md.txt) |
| Step 5: [Decide whether to roll out the new ad format](https://firebase.google.com/docs/tutorials/test-ad-format-adoption/step-5.md.txt) |
To get started, you first need to create a new ad unit and then implement the ad
in your app's code.
This tutorial uses the [rewarded
interstitial](https://support.google.com/admob/answer/9884467) ad
format as the new format being tested for adoption. When reading this tutorial,
though, keep in mind that you could follow similar steps to implement and test
any other ad format.
**Make sure you have the prerequisites for this tutorial**
- Your own app (iOS, Android, or Unity project)
- Your app registered as a Firebase App that's linked to an AdMob App
([learn more](https://support.google.com/admob/answer/6383165))
- Access to your app's associated AdMob account, with permissions to create
new ad units
- Access to your app's associated Firebase project, with permissions to create
and manage Remote Config and A/B Testing as well as to view
Google Analytics
- Your preferred IDE
### **Create an ad unit**
In your AdMob account, create the ad unit that you want to test with your
users.
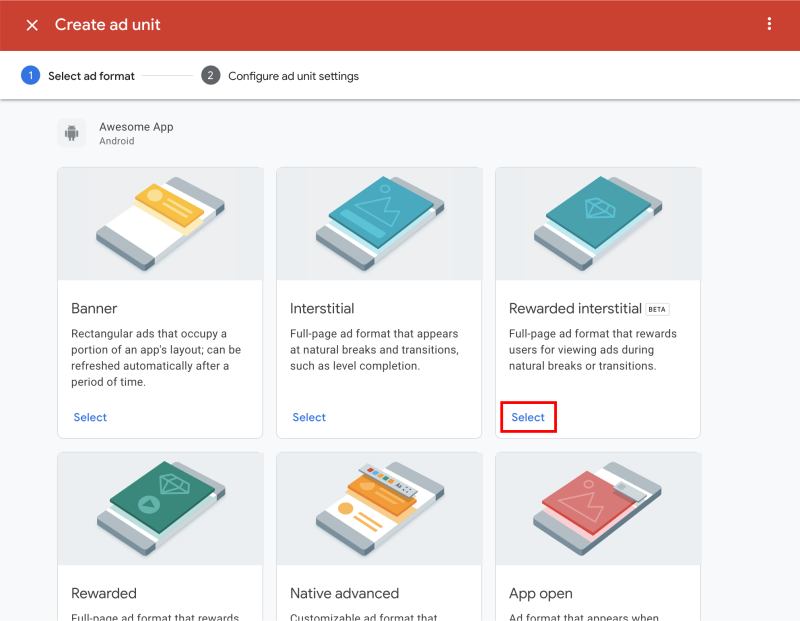
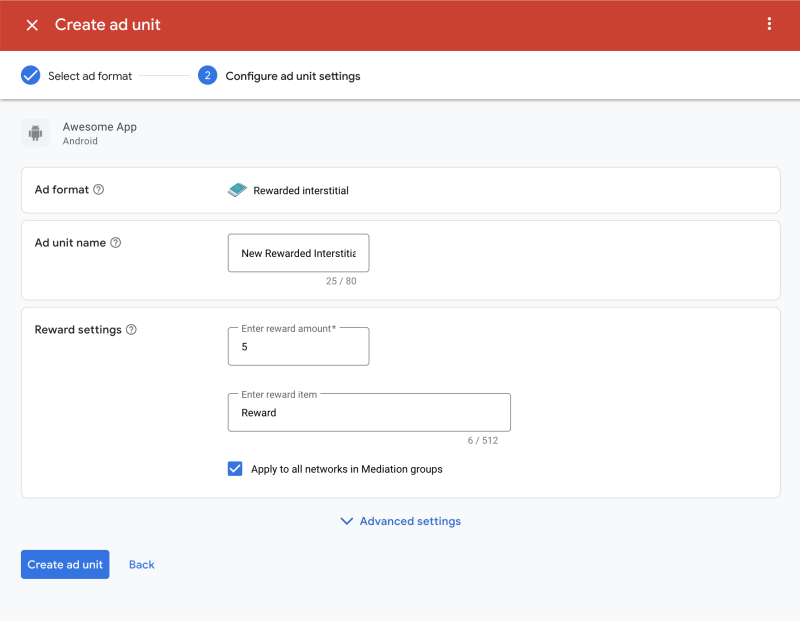
For this tutorial, create a single new *Rewarded interstitial* ad unit. The
other ad unit settings aren't important for this particular tutorial, so select
settings that are appropriate for your app.
![
### **Implement the ad unit**
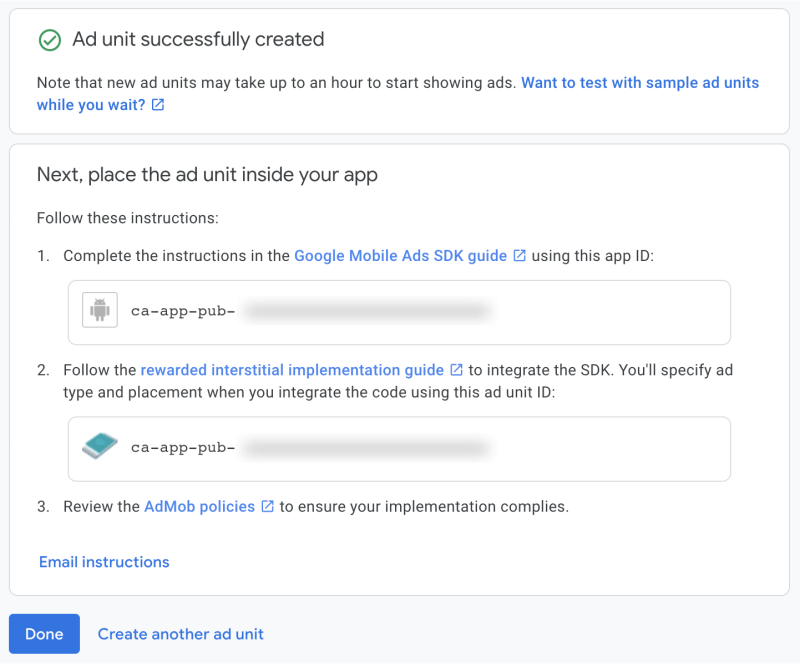
After you create the ad unit, AdMob provides you with the ad unit's unique
**ad unit ID** . Remember where to find this ad unit ID in your AdMob account
as you'll need it to implement the ad into your app.
Follow the on-screen instructions to integrate the
Google Mobile Ads (AdMob) SDK and to implement the new ad unit into your app.
After creating a new rewarded interstitial ad unit, you should now have two ad
units listed in your AdMob account for this specific app. In the next steps
of this tutorial, you'll configure Firebase to use each of these ad units in an
A/B test using the *same ad placement*.
*** ** * ** ***
[**Introduction**](https://firebase.google.com/docs/tutorials/test-ad-format-adoption.md.txt)
[**Step 2** : Set up an A/B test in the Firebase console](https://firebase.google.com/docs/tutorials/test-ad-format-adoption/step-2.md.txt)
*** ** * ** ***