
1. 事前準備
在本程式碼研究室中,您將瞭解 Firebase 的一些基本概念,以便為 Android 和 iOS 建立 Flutter 行動應用程式。
事前準備
- 熟悉 Flutter
- Flutter SDK
- 您選擇的文字編輯器
課程內容
- 瞭解如何使用 Flutter 在 Android、iOS、網頁和 macOS 上建構活動回覆和留言簿即時通訊應用程式。
- 如何使用 Firebase 驗證驗證使用者,並使用 Firestore 同步處理資料。
|
|
|
|
事前準備
下列任一裝置:
- 已連線至電腦並設為開發人員模式的實體 Android 或 iOS 裝置。
- iOS 模擬器 (需要 Xcode 工具)。
- Android 模擬器 (需在 Android Studio 中設定)。
此外,您還需要:
- 你選擇的瀏覽器,例如 Google Chrome。
- 您選擇的 IDE 或文字編輯器,並設定 Dart 和 Flutter 外掛程式,例如 Android Studio 或 Visual Studio Code。
- 最新
stable版的 Flutter,或beta(如果您喜歡使用最新技術)。 - 用於建立及管理 Firebase 專案的 Google 帳戶。
FirebaseCLI 已登入您的 Google 帳戶。
2. 取得程式碼範例
從 GitHub 下載專案的初始版本:
- 從指令列將 GitHub 存放區複製到
flutter-codelabs目錄:
git clone https://github.com/flutter/codelabs.git flutter-codelabs
flutter-codelabs 目錄包含一系列程式碼研究室的程式碼。本程式碼研究室的程式碼位於 flutter-codelabs/firebase-get-to-know-flutter 目錄中。這個目錄包含一系列快照,顯示專案在每個步驟結束時的樣貌。舉例來說,假設你目前在第二個步驟。
- 找出第二個步驟的相符檔案:
cd flutter-codelabs/firebase-get-to-know-flutter/step_02
如要略過步驟或查看某個步驟完成後的結果,請在以您感興趣的步驟命名的目錄中尋找。
匯入範例應用程式
- 在想用的 IDE 中開啟或匯入
flutter-codelabs/firebase-get-to-know-flutter/step_02目錄。這個目錄包含程式碼研究室的範例程式碼,也就是尚未運作的 Flutter 聚會應用程式。在 IDE 中開啟應用程式時,您會發現編譯時間錯誤,這些錯誤會在步驟 4 中修正。
找出需要處理的檔案
這個應用程式的程式碼分布在多個目錄中。這種功能劃分方式可依功能將程式碼分組,因此工作會更輕鬆。
- 找出下列檔案:
lib/main.dart:這個檔案包含主要進入點和應用程式小工具。lib/home_page.dart:這個檔案包含首頁小工具。lib/src/widgets.dart:這個檔案包含一些小工具,有助於標準化應用程式的樣式。這些小工具會組成入門應用程式的畫面。lib/src/authentication.dart:這個檔案包含 Authentication 的部分實作項目,以及一組小工具,可為 Firebase 電子郵件驗證建立使用者登入體驗。這些驗證流程的小工具尚未在入門應用程式中使用,但您很快就會新增這些小工具。
視需要新增其他檔案,建構應用程式的其餘部分。
查看 lib/main.dart 檔案
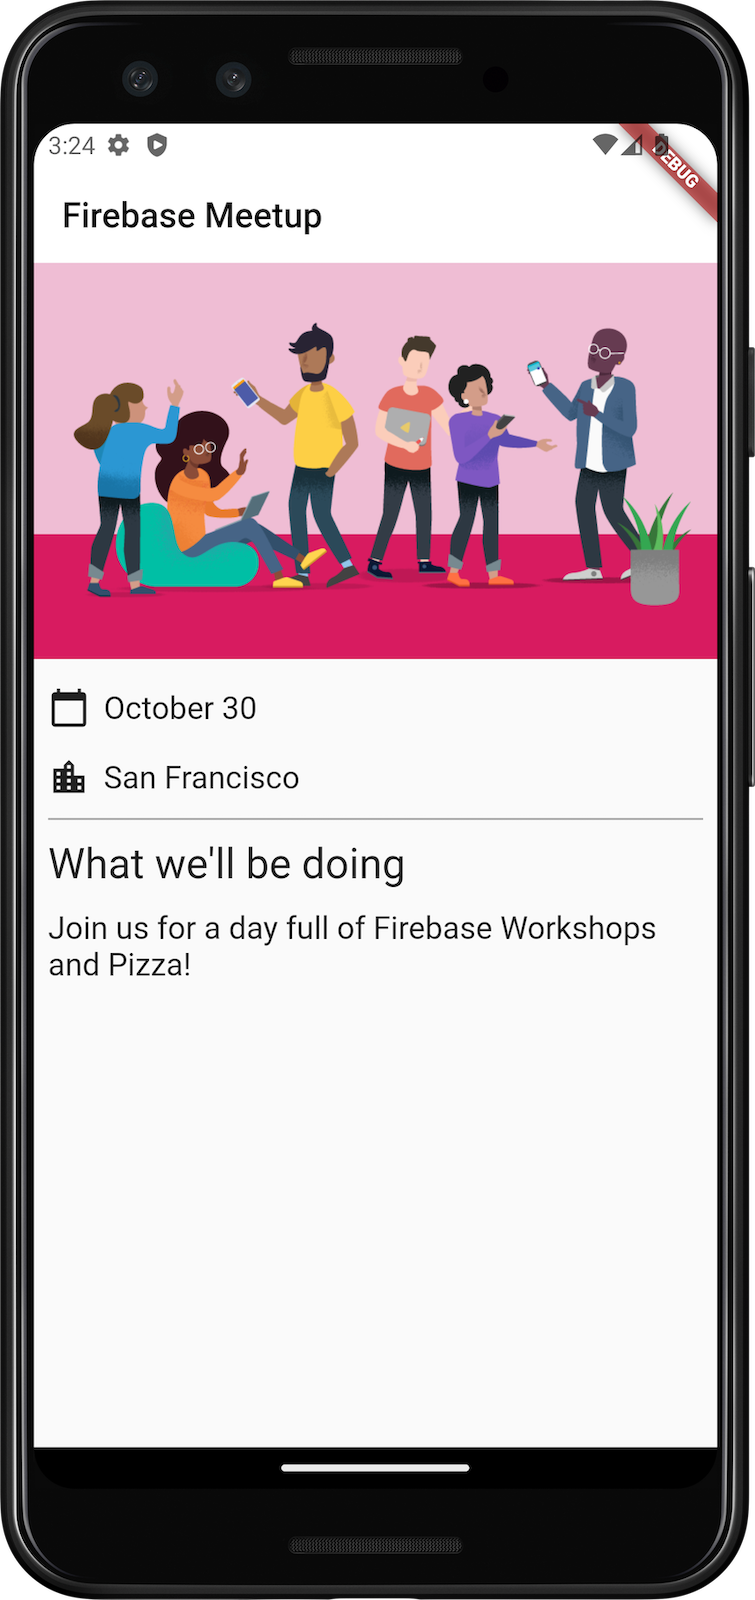
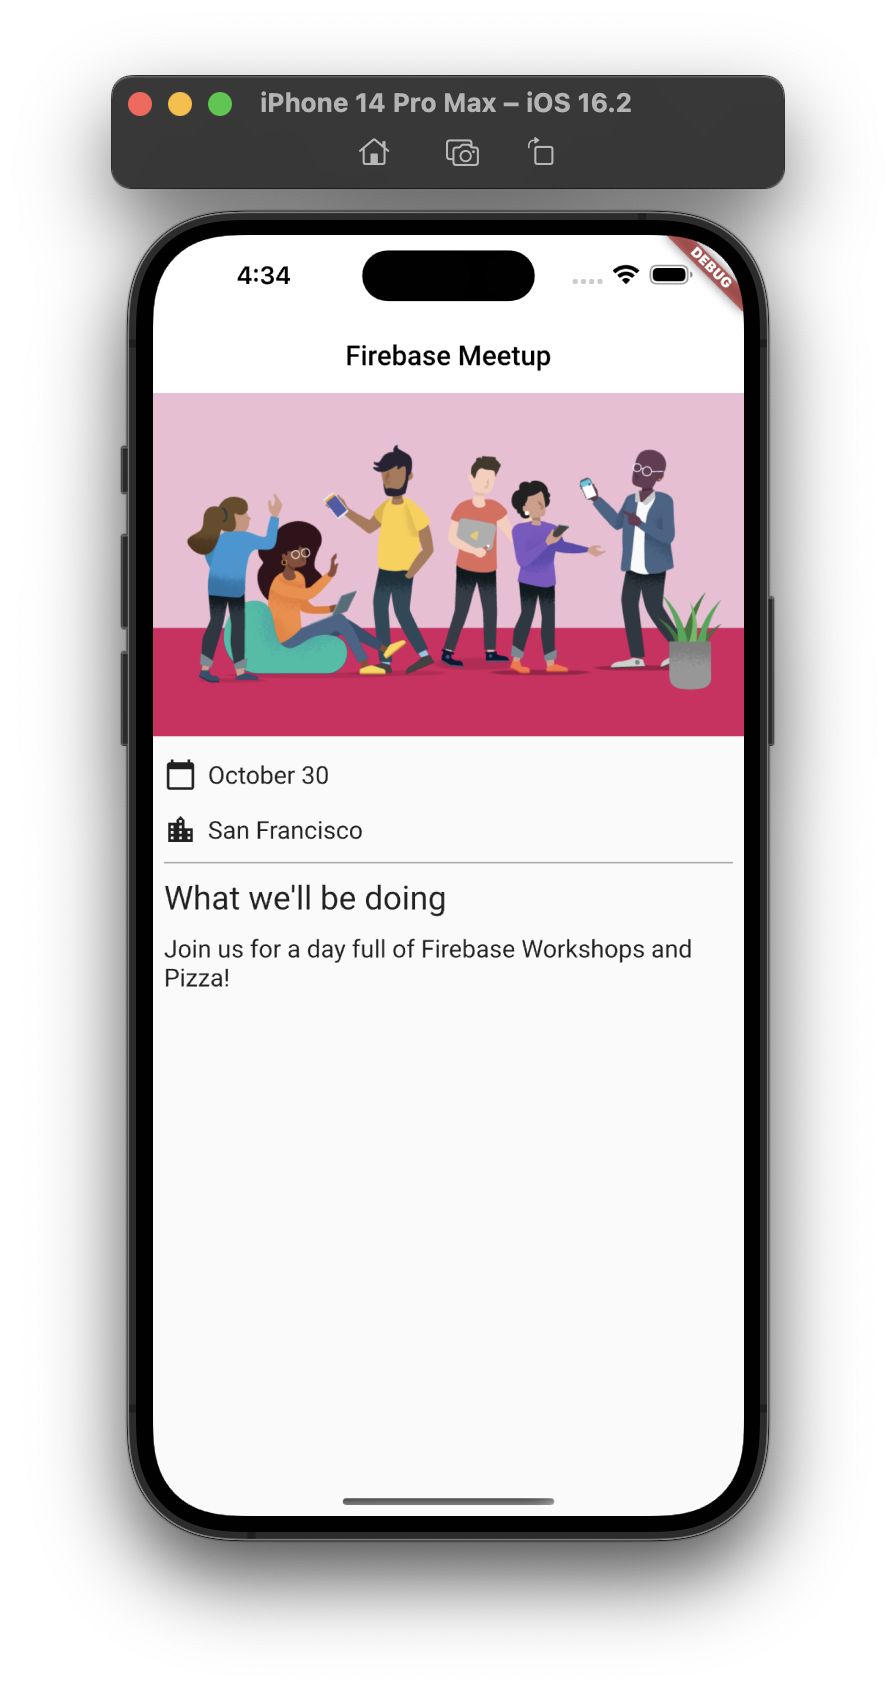
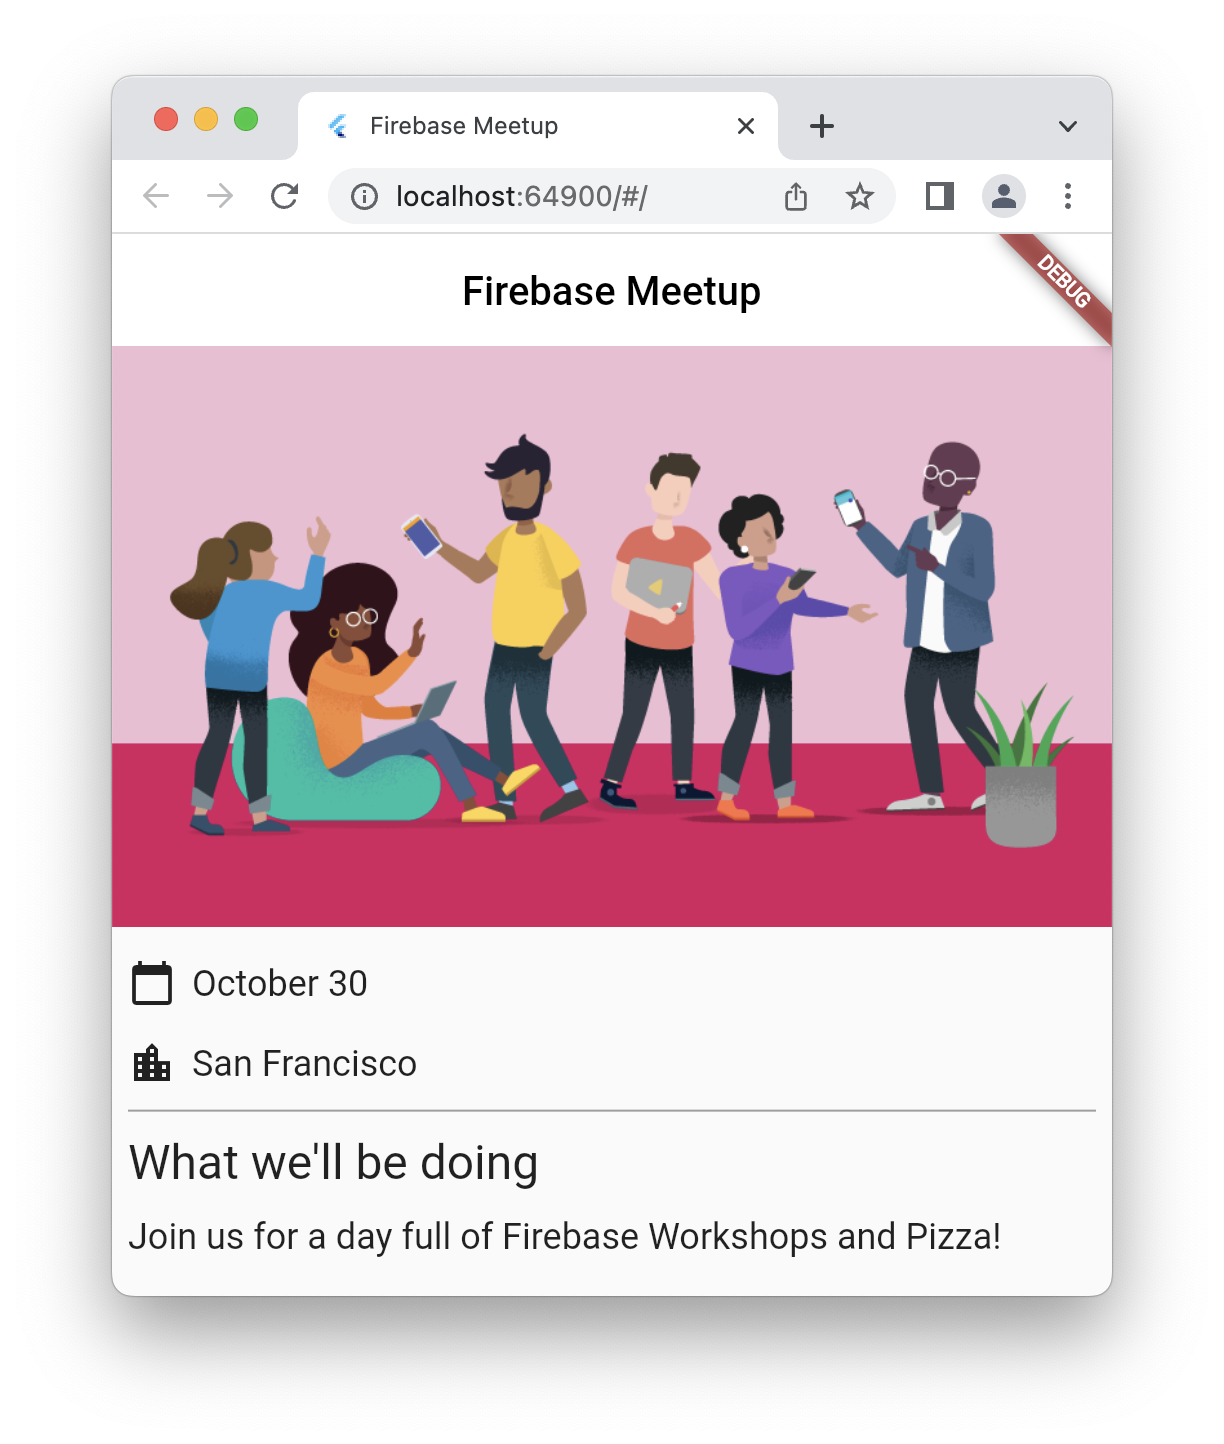
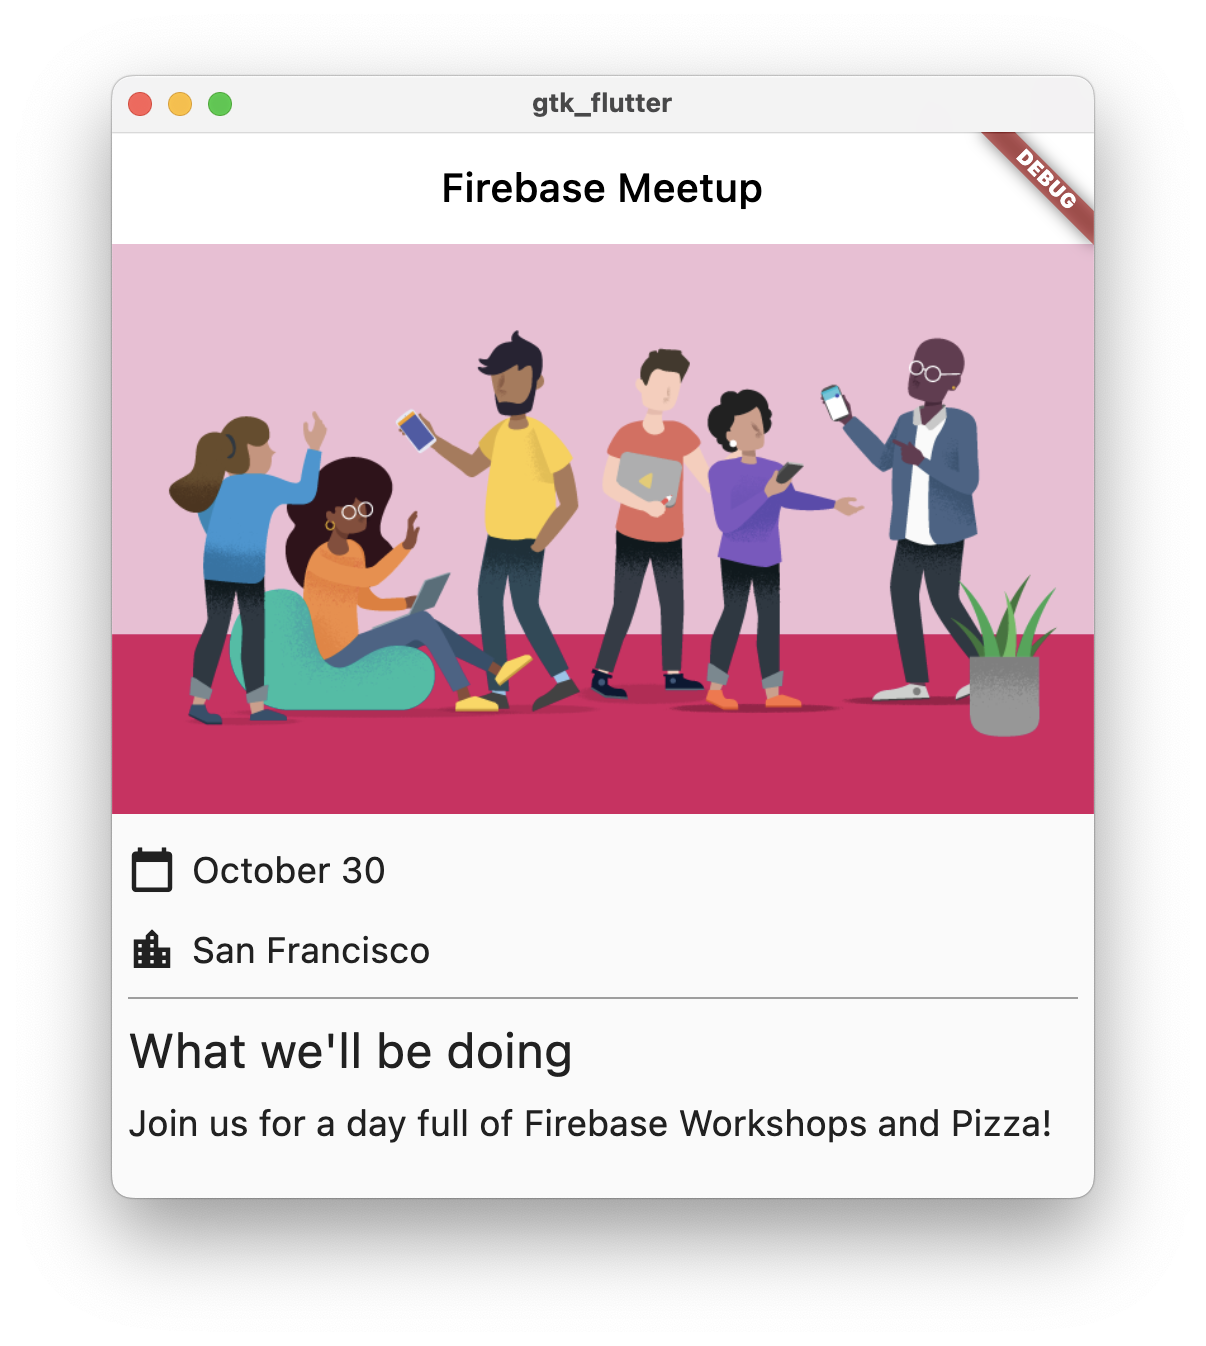
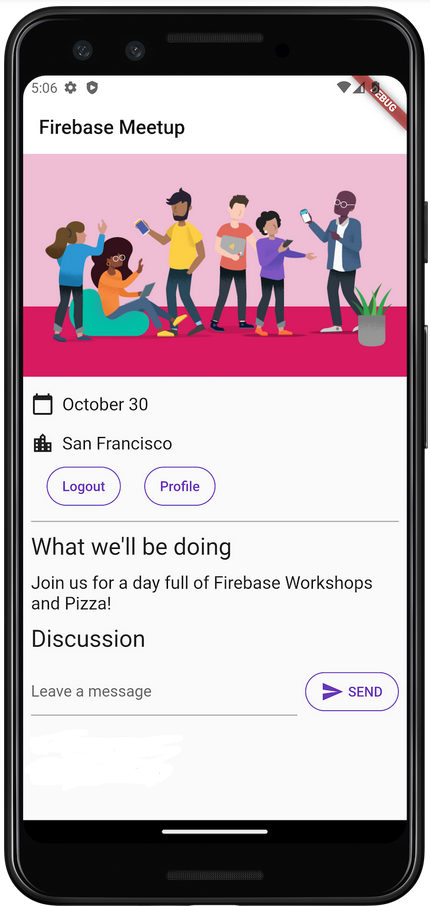
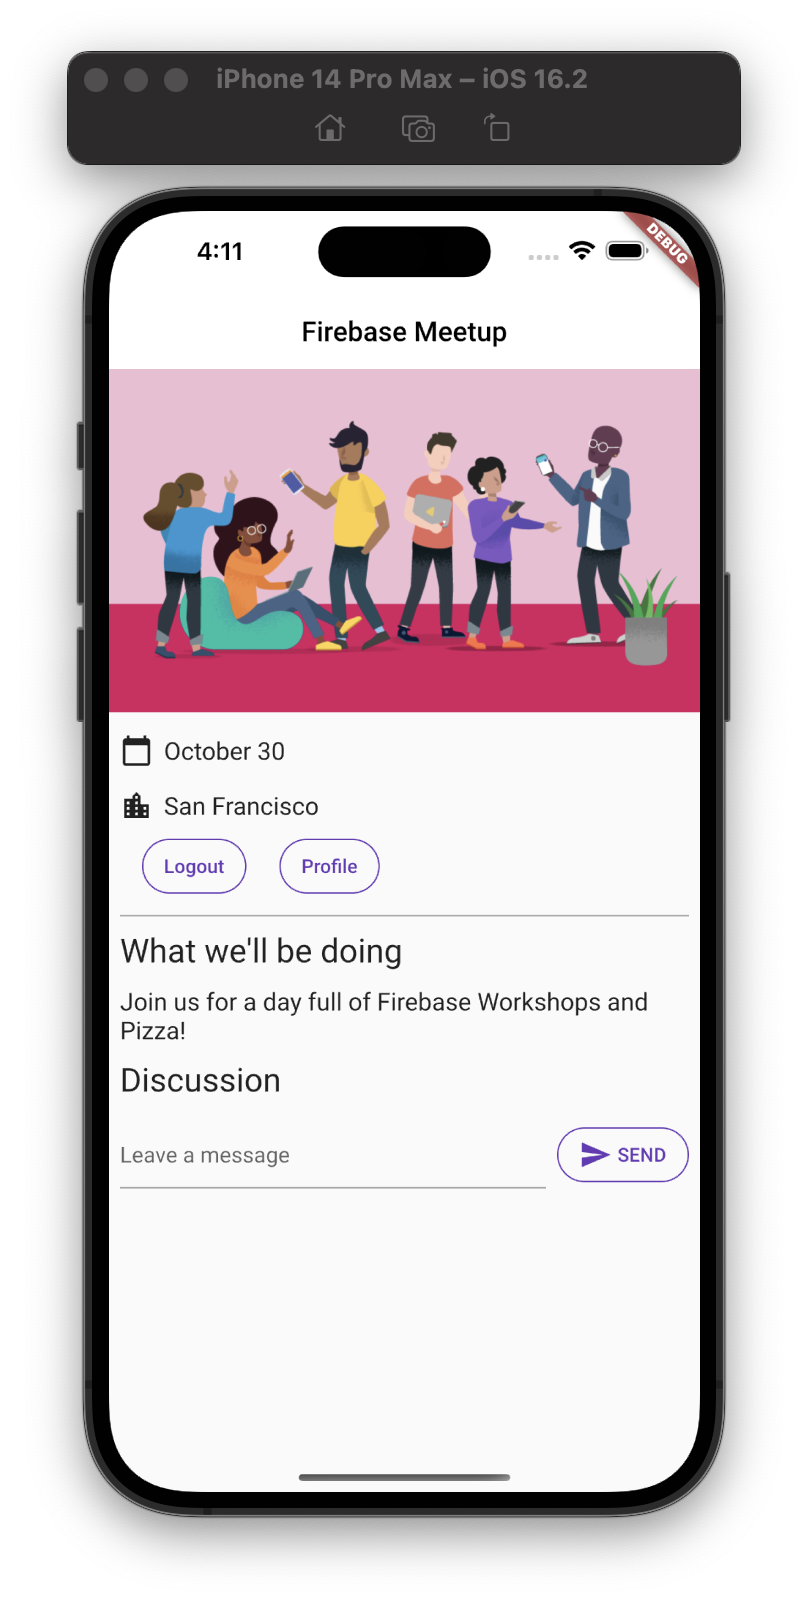
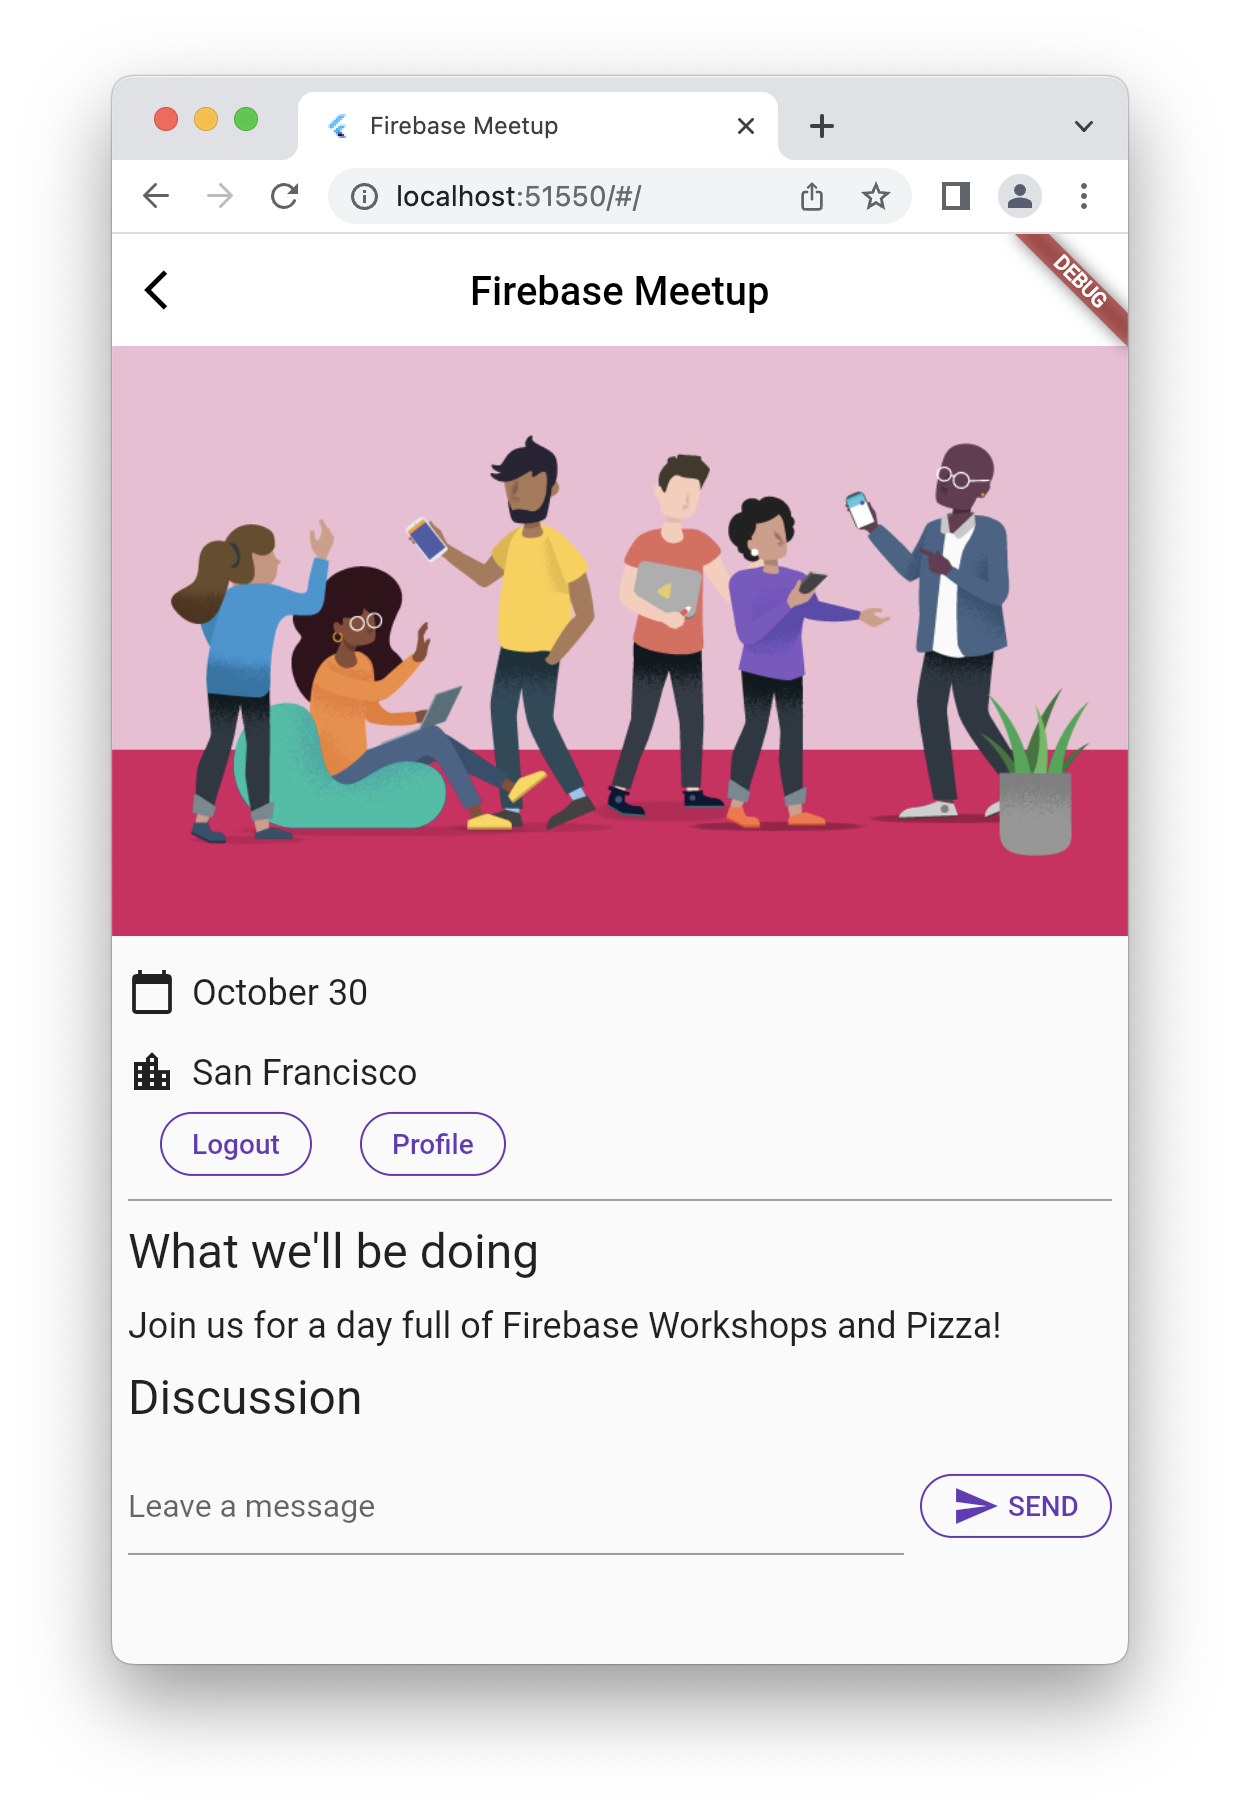
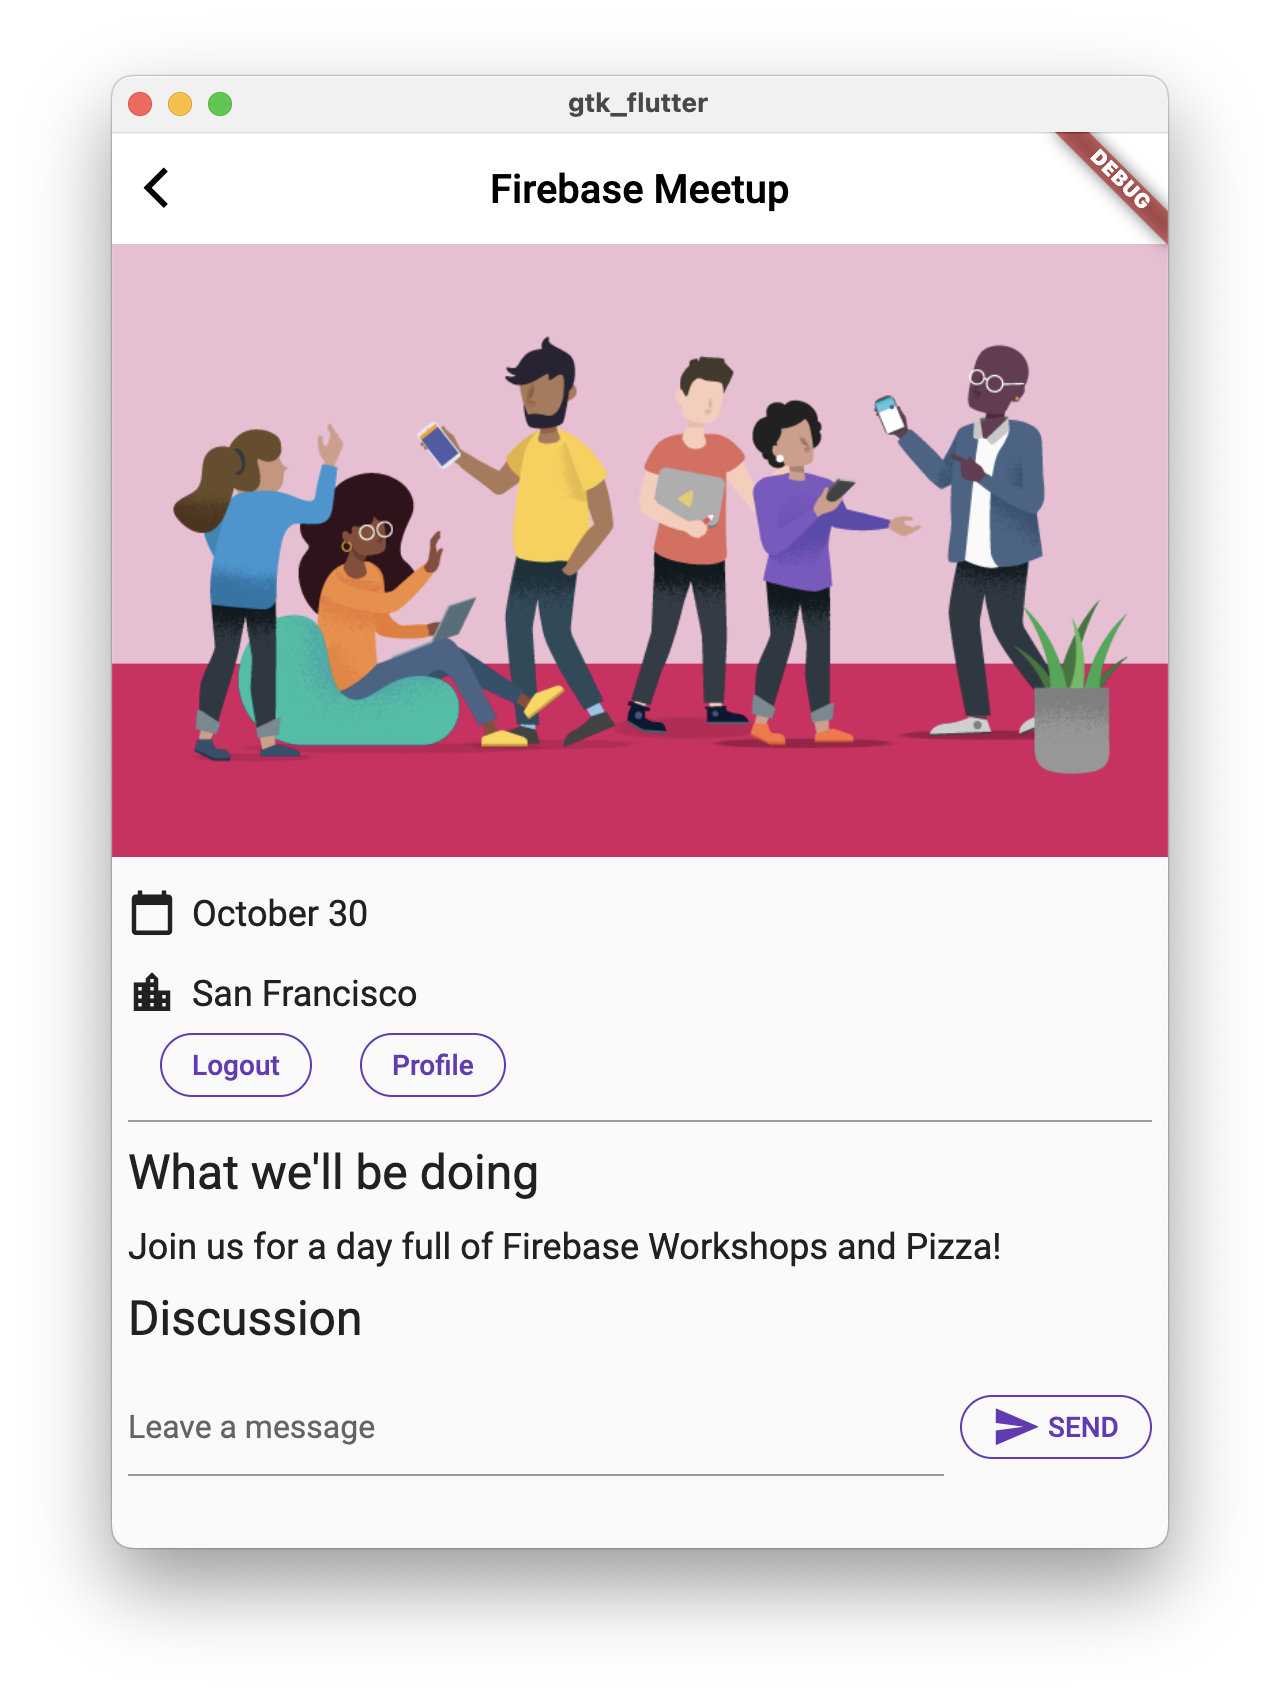
這個應用程式會利用 google_fonts 套件,將 Roboto 設為應用程式的預設字型。您可以瀏覽 fonts.google.com,並在應用程式的不同部分使用您找到的字型。
您可以使用 lib/src/widgets.dart 檔案中的輔助小工具,形式為 Header、Paragraph 和 IconAndDetail。這些小工具可消除重複的程式碼,減少 HomePage 中所述網頁版面配置的雜亂程度。這也有助於維持一致的外觀與風格。
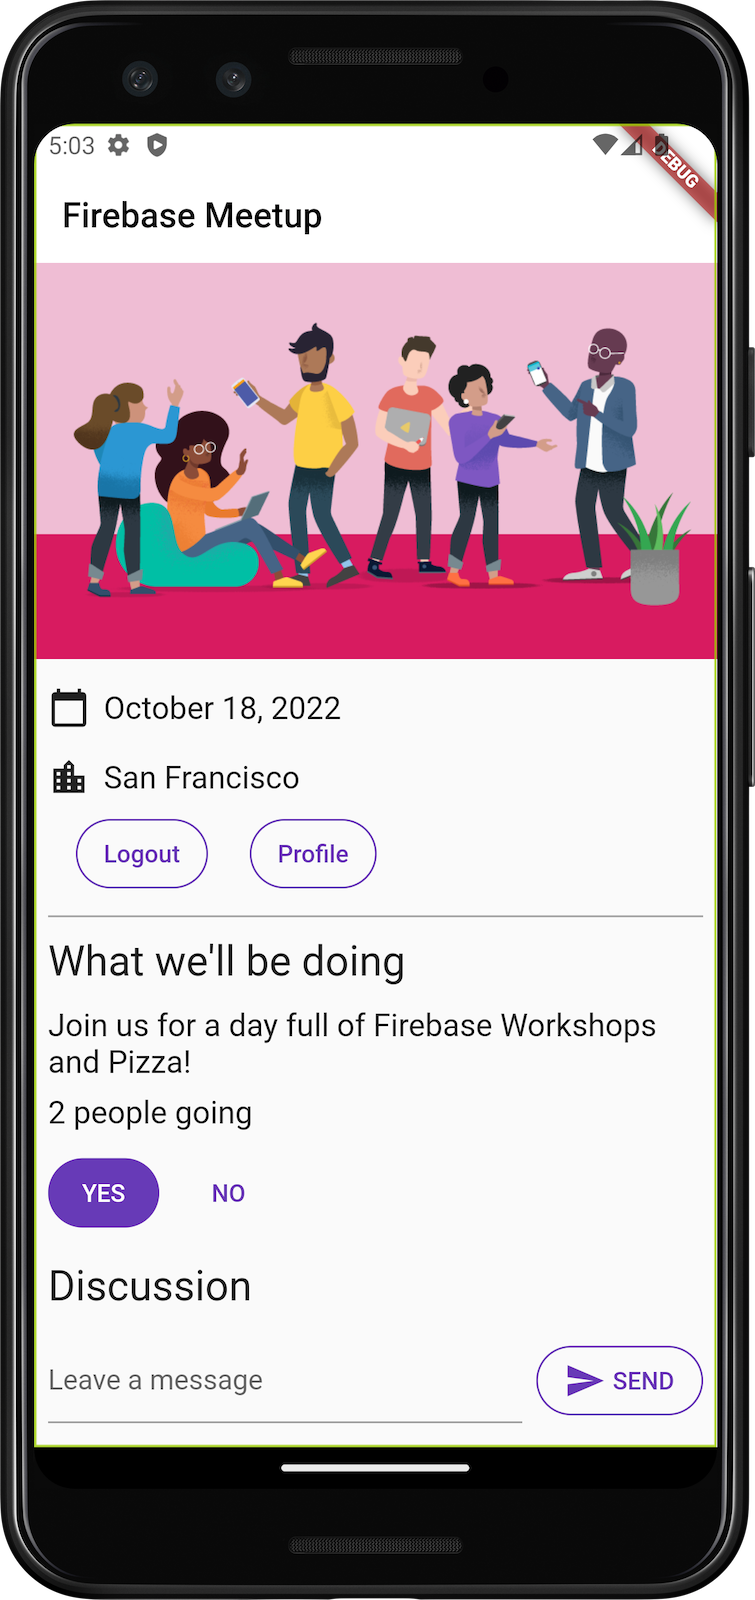
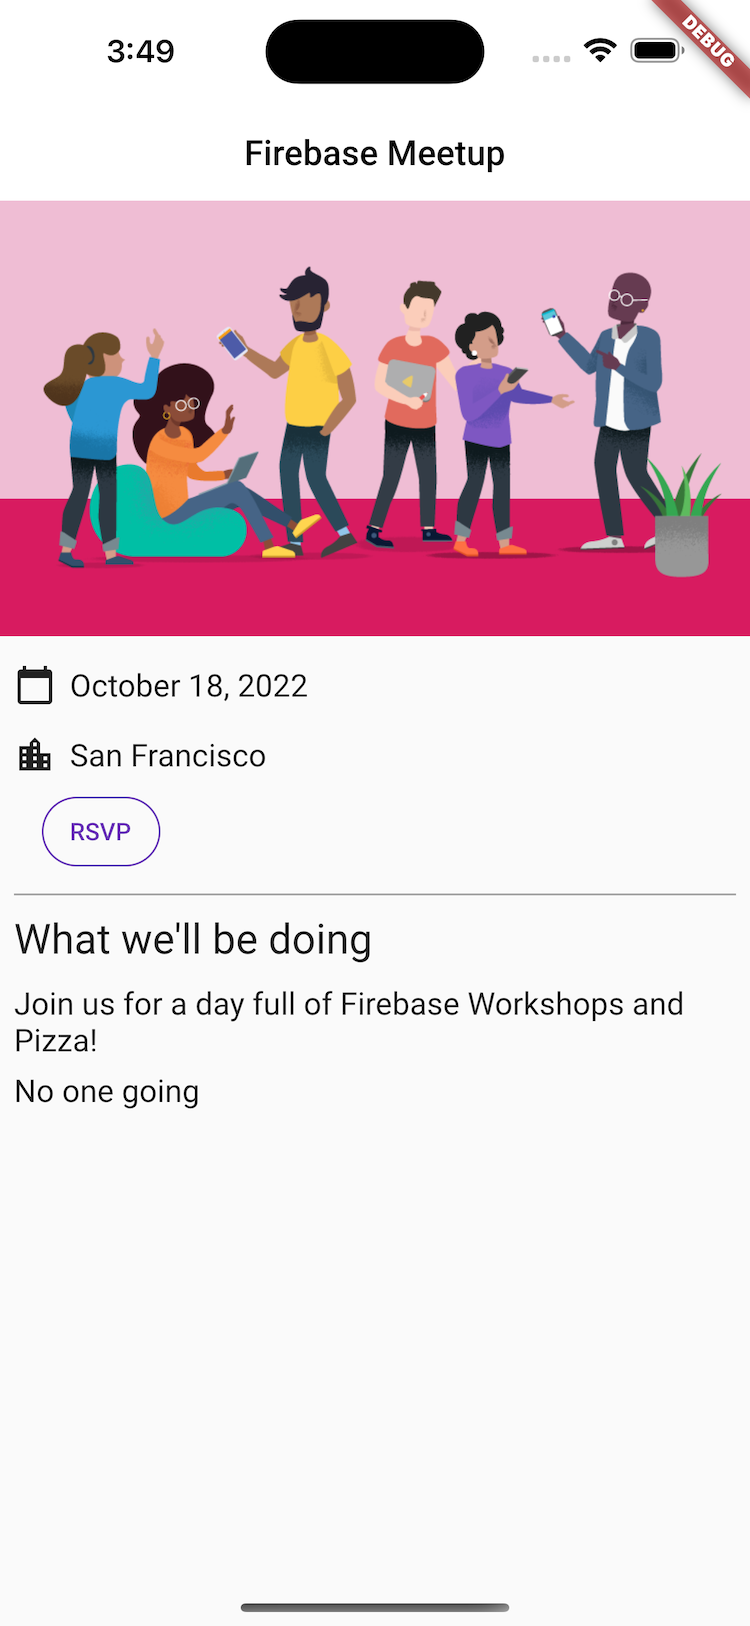
以下是應用程式在 Android、iOS、網頁和 macOS 上的外觀:
|
|
|
|
3. 建立及設定 Firebase 專案
顯示活動資訊對賓客來說很方便,但對其他人來說就沒什麼用處。您需要在應用程式中加入一些動態功能。如要這麼做,請將 Firebase 連結至應用程式。如要開始使用 Firebase,請建立及設定 Firebase 專案。
建立 Firebase 專案
- 使用 Google 帳戶登入 Firebase 控制台。
- 按一下按鈕建立新專案,然後輸入專案名稱 (例如
Firebase-Flutter-Codelab)。
- 按一下「繼續」。
- 如果系統提示,請詳閱並接受 Firebase 條款,然後按一下「繼續」。
- (選用) 在 Firebase 控制台中啟用 AI 輔助功能 (稱為「Gemini in Firebase」)。
- 本程式碼研究室不需要 Google Analytics,因此請關閉 Google Analytics 選項。
- 按一下「建立專案」,等待專案佈建完成,然後按一下「繼續」。
如要進一步瞭解 Firebase 專案,請參閱「瞭解 Firebase 專案」一文。
設定 Firebase 產品
這個應用程式會使用下列 Firebase 產品,這些產品都可用於網頁應用程式:
- 驗證:讓使用者登入應用程式。
- Firestore:在雲端儲存結構化資料,並在資料變更時立即收到通知。
- Firebase 安全性規則:保護資料庫安全。
部分產品需要特殊設定或透過 Firebase 控制台啟用。
啟用電子郵件地址登入驗證
- 在 Firebase 控制台的「專案總覽」窗格中,展開「建構」選單。
- 依序點選「Authentication」>「Get Started」>「Sign-in method」>「Email/Password」>「Enable」>「Save」。

設定 Firestore
這個網頁應用程式會使用 Firestore 儲存及接收新的即時通訊訊息。
在 Firebase 專案中設定 Firestore 的方法如下:
4. 設定 Firebase
如要在 Flutter 中使用 Firebase,您必須完成下列工作,才能設定 Flutter 專案,正確使用 FlutterFire 程式庫:
- 將
FlutterFire依附元件新增至專案。 - 在 Firebase 專案中註冊所選平台。
- 下載平台專屬的設定檔,然後新增至程式碼。
在 Flutter 應用程式的最上層目錄中,有 android、ios、macos 和 web 子目錄,分別存放 iOS 和 Android 的平台專屬設定檔。
設定依附元件
您需要為這個應用程式中使用的兩項 Firebase 產品 (驗證和 Firestore) 新增 FlutterFire 程式庫。
- 在指令列中,從應用程式的根目錄 (
.../firebase-get-to-know-flutter/step_02) 新增下列依附元件:
$ flutter pub add firebase_core firebase_auth cloud_firestore provider firebase_ui_auth
如要在 Flutter 應用程式中使用 Firebase,您需要結合幾個專用套件:
firebase_corepackage:這是重要的起點。您必須擁有這個套件,因為所有其他適用於 Flutter 的 Firebase 工具都依附於此。firebase_auth套件:這個套件用於處理使用者帳戶。可讓您新增註冊、登入和登出等功能。cloud_firestore套件:用來將應用程式連線至 Firestore 資料庫,以便儲存及存取應用程式資料。firebase_ui_auth套件:這個套件可大幅加快驗證設定速度。這項服務提供現成的 UI 小工具 (例如預先建構的登入畫面),因此您不必從頭開始建構所有項目。provider套件:這是狀態管理的熱門選擇。這有助於應用程式追蹤資訊 (例如登入者),並在需要時,讓所有不同畫面都能存取該資料。
您已新增必要套件,但還需要設定 iOS、Android、macOS 和網頁執行器專案,才能適當使用 Firebase。您也會使用 provider 套件,將商業邏輯與顯示邏輯分開。
安裝 FlutterFire CLI
FlutterFire CLI 依附於基礎 Firebase CLI。
- 如果尚未安裝,請在電腦上安裝 Firebase CLI。
- 安裝 FlutterFire CLI:
$ dart pub global activate flutterfire_cli
安裝完成後,flutterfire 指令即可在全域使用。
設定應用程式
CLI 會從 Firebase 專案和所選專案應用程式中擷取資訊,為特定平台產生所有設定。
在應用程式的根目錄 (flutter-codelabs/firebase-get-to-know-flutter/step_02 ) 中,執行 configure 指令:
$ flutterfire configure
設定指令會執行下列程序:
- 根據
.firebaserc檔案或 Firebase 控制台選取 Firebase 專案。 - 決定要設定的平台,例如 Android、iOS、macOS 和網頁。
- 找出要擷取設定的 Firebase 應用程式。根據預設,CLI 會嘗試根據目前的專案設定,自動比對 Firebase 應用程式。
- 在專案中產生
firebase_options.dart檔案。
設定 macOS
macOS 上的 Flutter 會建構完全經過沙箱處理的應用程式。由於這個應用程式會與網路整合,以便與 Firebase 伺服器通訊,因此您需要為應用程式設定網路用戶端權限。
macos/Runner/DebugProfile.entitlements
<?xml version="1.0" encoding="UTF-8"?>
<!DOCTYPE plist PUBLIC "-//Apple//DTD PLIST 1.0//EN" "http://www.apple.com/DTDs/PropertyList-1.0.dtd">
<plist version="1.0">
<dict>
	<key>com.apple.security.app-sandbox</key>
	<true/>
	<key>com.apple.security.cs.allow-jit</key>
	<true/>
	<key>com.apple.security.network.server</key>
	<true/>
  <!-- Add the following two lines -->
	<key>com.apple.security.network.client</key>
	<true/>
</dict>
</plist>
macos/Runner/Release.entitlements
<?xml version="1.0" encoding="UTF-8"?>
<!DOCTYPE plist PUBLIC "-//Apple//DTD PLIST 1.0//EN" "http://www.apple.com/DTDs/PropertyList-1.0.dtd">
<plist version="1.0">
<dict>
	<key>com.apple.security.app-sandbox</key>
	<true/>
  <!-- Add the following two lines -->
	<key>com.apple.security.network.client</key>
	<true/>
</dict>
</plist>
詳情請參閱「Flutter 的桌面支援」。
5. 新增回覆功能
現在您已將 Firebase 新增至應用程式,可以建立「RSVP」按鈕,透過驗證功能註冊使用者。Android 原生、iOS 原生和網頁都有預先建構的 FirebaseUI Auth 套件,但您需要為 Flutter 建構這項功能。
您先前擷取的專案包含一組小工具,可實作大部分驗證流程的使用者介面。您會實作商業邏輯,將驗證功能與應用程式整合。
使用 Provider 套件新增業務邏輯
使用 provider 套件,在整個應用程式的 Flutter 小工具樹狀結構中提供集中式應用程式狀態物件:
- 建立名為
app_state.dart的新檔案,並在其中加入下列內容:
lib/app_state.dart
import 'package:firebase_auth/firebase_auth.dart'
    hide EmailAuthProvider, PhoneAuthProvider;
import 'package:firebase_core/firebase_core.dart';
import 'package:firebase_ui_auth/firebase_ui_auth.dart';
import 'package:flutter/material.dart';

import 'firebase_options.dart';

class ApplicationState extends ChangeNotifier {
  ApplicationState() {
    init();
  }

  bool _loggedIn = false;
  bool get loggedIn => _loggedIn;

  Future<void> init() async {
    await Firebase.initializeApp(
        options: DefaultFirebaseOptions.currentPlatform);

    FirebaseUIAuth.configureProviders([
      EmailAuthProvider(),
    ]);

    FirebaseAuth.instance.userChanges().listen((user) {
      if (user != null) {
        _loggedIn = true;
      } else {
        _loggedIn = false;
      }
      notifyListeners();
    });
  }
}
import 陳述式會導入 Firebase Core 和 Auth、提取 provider 套件 (可讓應用程式狀態物件在整個小工具樹狀結構中可用),並納入 firebase_ui_auth 套件中的驗證小工具。
這個 ApplicationState 應用程式狀態類別在本步驟中有一項主要責任,就是提醒小工具樹狀結構驗證狀態已更新。
您只會使用供應器將使用者的登入狀態傳達給應用程式。如要讓使用者登入,請使用 firebase_ui_auth 套件提供的 UI,這是在應用程式中快速啟動登入畫面的絕佳方式。
整合驗證流程
- 修改
lib/main.dart檔案頂端的匯入項目:
lib/main.dart
import 'package:firebase_ui_auth/firebase_ui_auth.dart'; // new
import 'package:flutter/material.dart';
import 'package:go_router/go_router.dart';               // new
import 'package:google_fonts/google_fonts.dart';
import 'package:provider/provider.dart';                 // new

import 'app_state.dart';                                 // new
import 'home_page.dart';
- 將應用程式狀態與應用程式初始化作業連結,然後將驗證程序新增至
HomePage:
lib/main.dart
void main() {
  // Modify from here...
  WidgetsFlutterBinding.ensureInitialized();

  runApp(ChangeNotifierProvider(
    create: (context) => ApplicationState(),
    builder: ((context, child) => const App()),
  ));
  // ...to here.
}
修改 main() 函式後,供應商套件會負責使用 ChangeNotifierProvider 小工具例項化應用程式狀態物件。您使用這個特定 provider 類別,是因為應用程式狀態物件會擴充 ChangeNotifier 類別,讓 provider 套件知道何時要重新顯示相依的小工具。
- 更新應用程式,以處理
FirebaseUI為您提供的不同畫面導覽,方法是建立GoRouter設定:
lib/main.dart
// Add GoRouter configuration outside the App class
final _router = GoRouter(
  routes: [
    GoRoute(
      path: '/',
      builder: (context, state) => const HomePage(),
      routes: [
        GoRoute(
          path: 'sign-in',
          builder: (context, state) {
            return SignInScreen(
              actions: [
                ForgotPasswordAction(((context, email) {
                  final uri = Uri(
                    path: '/sign-in/forgot-password',
                    queryParameters: <String, String?>{
                      'email': email,
                    },
                  );
                  context.push(uri.toString());
                })),
                AuthStateChangeAction(((context, state) {
                  final user = switch (state) {
                    SignedIn state => state.user,
                    UserCreated state => state.credential.user,
                    _ => null
                  };
                  if (user == null) {
                    return;
                  }
                  if (state is UserCreated) {
                    user.updateDisplayName(user.email!.split('@')[0]);
                  }
                  if (!user.emailVerified) {
                    user.sendEmailVerification();
                    const snackBar = SnackBar(
                        content: Text(
                            'Please check your email to verify your email address'));
                    ScaffoldMessenger.of(context).showSnackBar(snackBar);
                  }
                  context.pushReplacement('/');
                })),
              ],
            );
          },
          routes: [
            GoRoute(
              path: 'forgot-password',
              builder: (context, state) {
                final arguments = state.uri.queryParameters;
                return ForgotPasswordScreen(
                  email: arguments['email'],
                  headerMaxExtent: 200,
                );
              },
            ),
          ],
        ),
        GoRoute(
          path: 'profile',
          builder: (context, state) {
            return ProfileScreen(
              providers: const [],
              actions: [
                SignedOutAction((context) {
                  context.pushReplacement('/');
                }),
              ],
            );
          },
        ),
      ],
    ),
  ],
);
// end of GoRouter configuration

// Change MaterialApp to MaterialApp.router and add the routerConfig
class App extends StatelessWidget {
  const App({super.key});

  @override
  Widget build(BuildContext context) {
    return MaterialApp.router(
      title: 'Firebase Meetup',
      theme: ThemeData(
        buttonTheme: Theme.of(context).buttonTheme.copyWith(
              highlightColor: Colors.deepPurple,
            ),
        colorScheme: ColorScheme.fromSeed(seedColor: Colors.deepPurple),
        textTheme: GoogleFonts.robotoTextTheme(
          Theme.of(context).textTheme,
        ),
        visualDensity: VisualDensity.adaptivePlatformDensity
      ),
      routerConfig: _router, // new
    );
  }
}
每個畫面都有不同類型的相關動作,具體取決於驗證流程的新狀態。在驗證程序中,大部分的狀態變更完成後,您都可以重新導向至偏好的畫面,例如主畫面或個人資料等其他畫面。
- 在
HomePage類別的建構方法中,將應用程式狀態與AuthFunc小工具整合:
lib/home_page.dart
import 'package:firebase_auth/firebase_auth.dart' // new
    hide EmailAuthProvider, PhoneAuthProvider;    // new
import 'package:flutter/material.dart';           // new
import 'package:provider/provider.dart';          // new

import 'app_state.dart';                          // new
import 'src/authentication.dart';                 // new
import 'src/widgets.dart';

class HomePage extends StatelessWidget {
  const HomePage({super.key});

  @override
  Widget build(BuildContext context) {
    return Scaffold(
      appBar: AppBar(
        title: const Text('Firebase Meetup'),
      ),
      body: ListView(
        children: <Widget>[
          Image.asset('assets/codelab.png'),
          const SizedBox(height: 8),
          const IconAndDetail(Icons.calendar_today, 'October 30'),
          const IconAndDetail(Icons.location_city, 'San Francisco'),
          // Add from here
          Consumer<ApplicationState>(
            builder: (context, appState, _) => AuthFunc(
                loggedIn: appState.loggedIn,
                signOut: () {
                  FirebaseAuth.instance.signOut();
                }),
          ),
          // to here
          const Divider(
            height: 8,
            thickness: 1,
            indent: 8,
            endIndent: 8,
            color: Colors.grey,
          ),
          const Header("What we'll be doing"),
          const Paragraph(
            'Join us for a day full of Firebase Workshops and Pizza!',
          ),
        ],
      ),
    );
  }
}
您會將 AuthFunc 小工具例項化,並將其包裝在 Consumer 小工具中。當應用程式狀態變更時,通常會使用 Consumer 小工具重建部分樹狀結構,這也是 provider 套件的常見用途。AuthFunc 小工具是您測試的補充小工具。
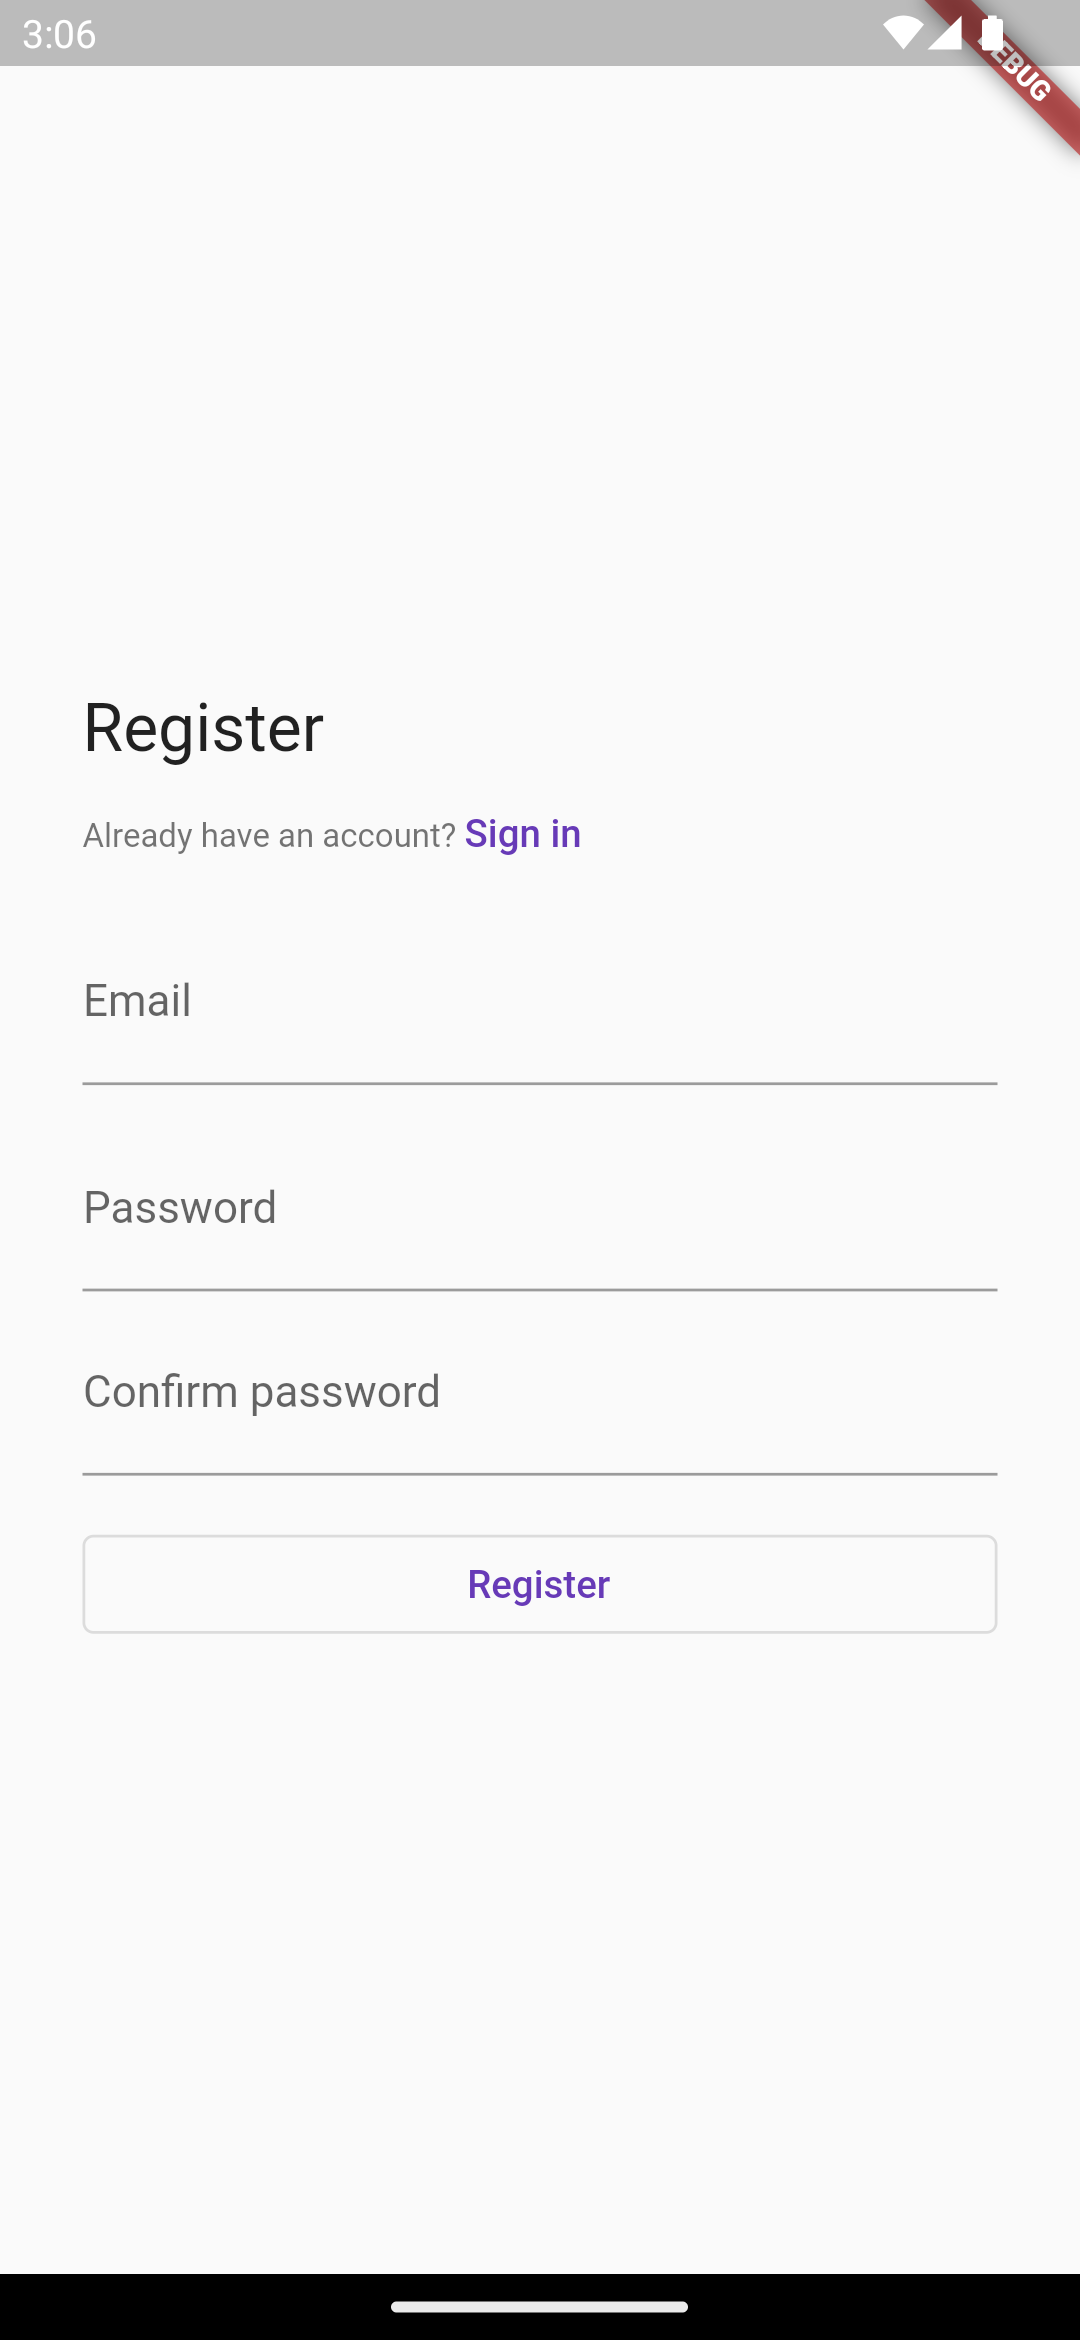
執行應用程式,測試驗證流程
- 在應用程式中輕觸「回覆」按鈕,即可啟動
SignInScreen。
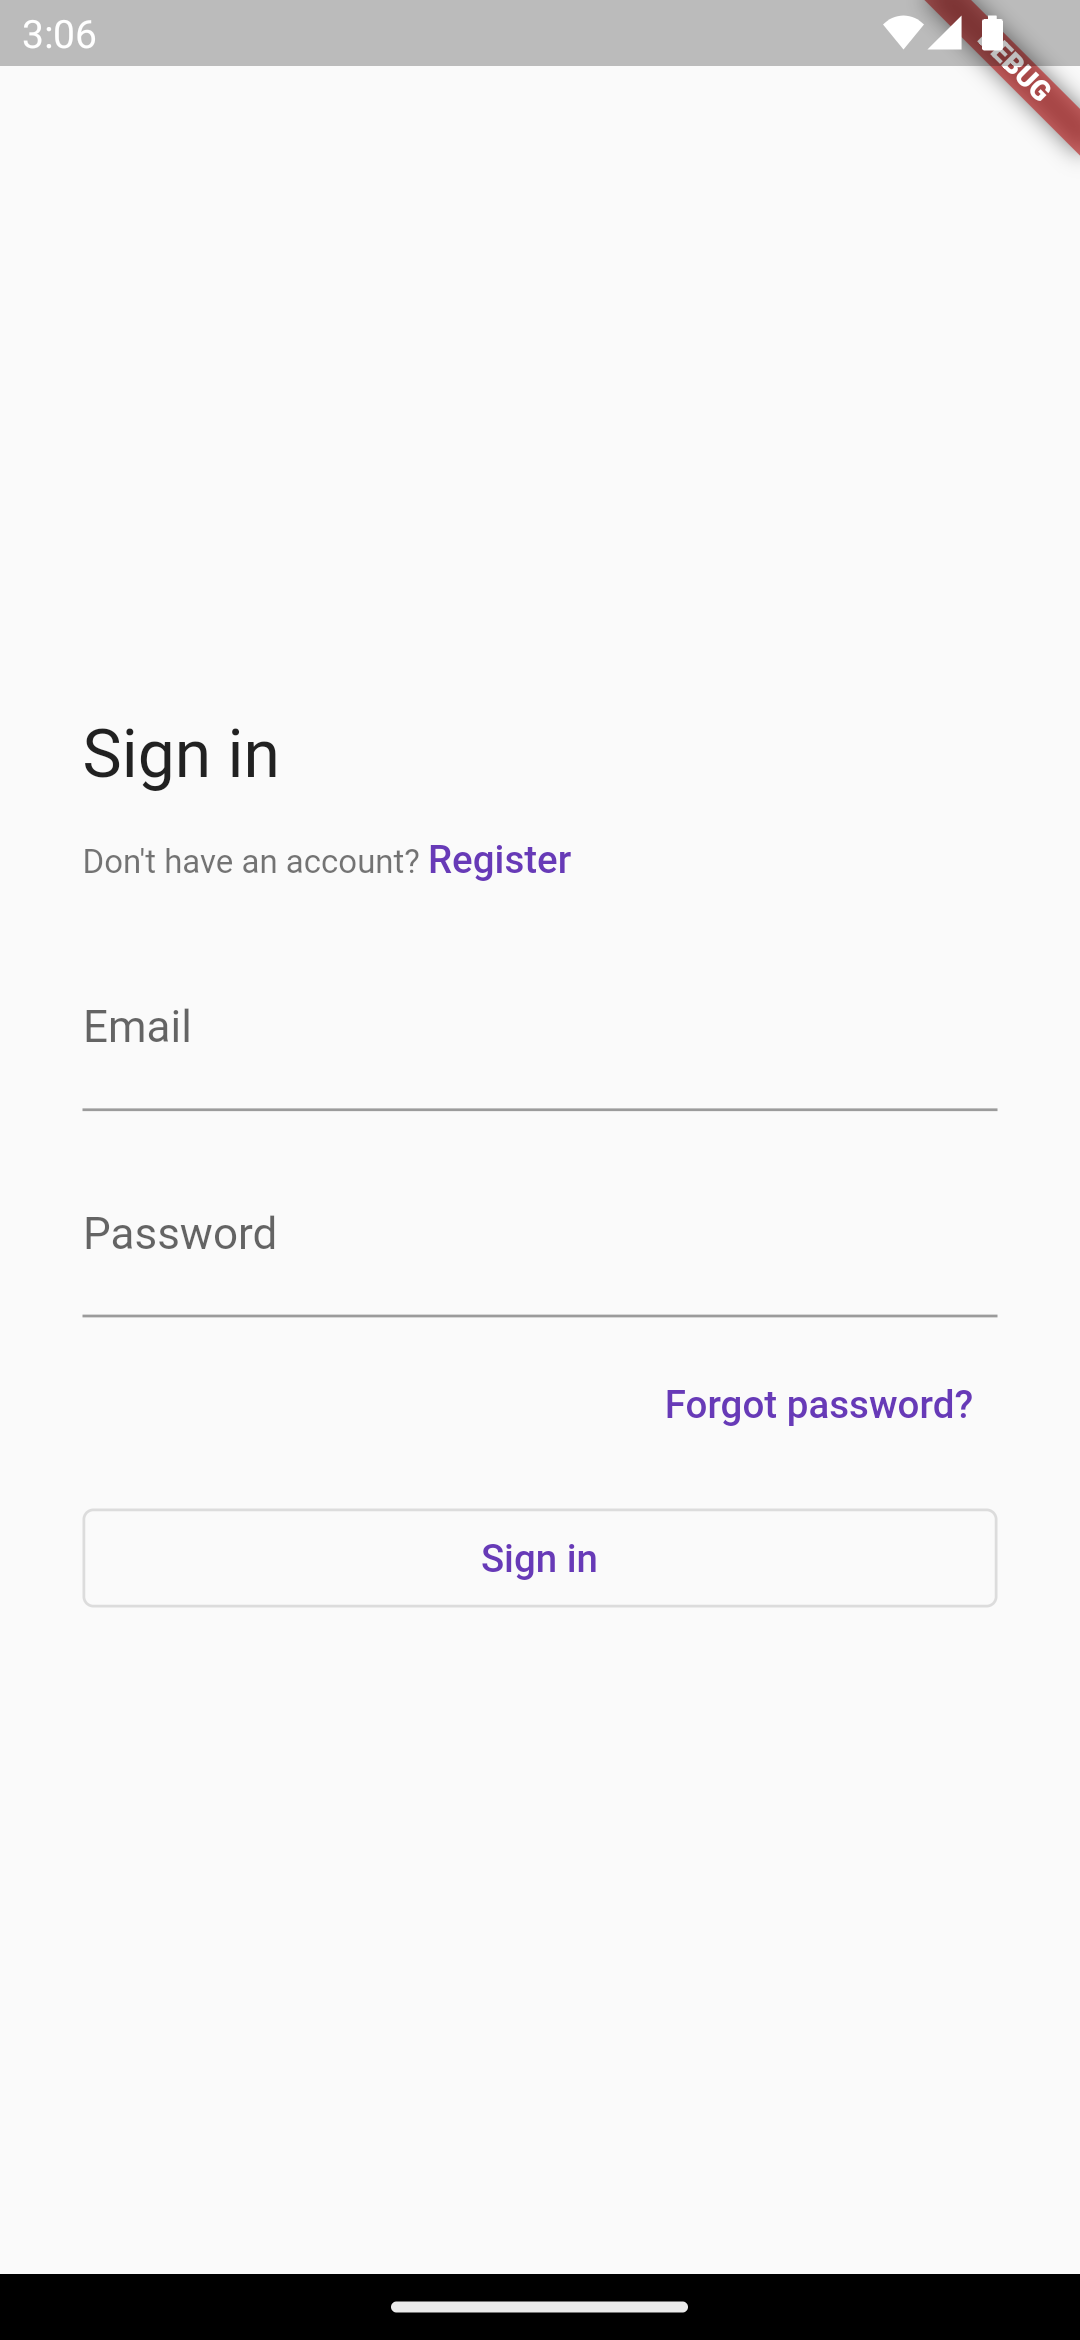
- 輸入電子郵件地址。如果已註冊,系統會提示您輸入密碼。否則系統會提示您填寫註冊表單。
- 輸入少於六個字元的密碼,檢查錯誤處理流程。如果已註冊,系統會改為顯示密碼表單。
- 輸入錯誤密碼,檢查錯誤處理流程。
- 請輸入正確的密碼。您會看到登入後的體驗,使用者可以登出。

6. 將訊息寫入 Firestore
很高興有使用者來訪,但您必須讓訪客在應用程式中做其他事。如果他們可以在留言簿中留言呢?他們可以分享自己期待出席的原因,或是希望與誰見面。
如要儲存使用者在應用程式中撰寫的即時通訊訊息,請使用 Firestore。
資料模型
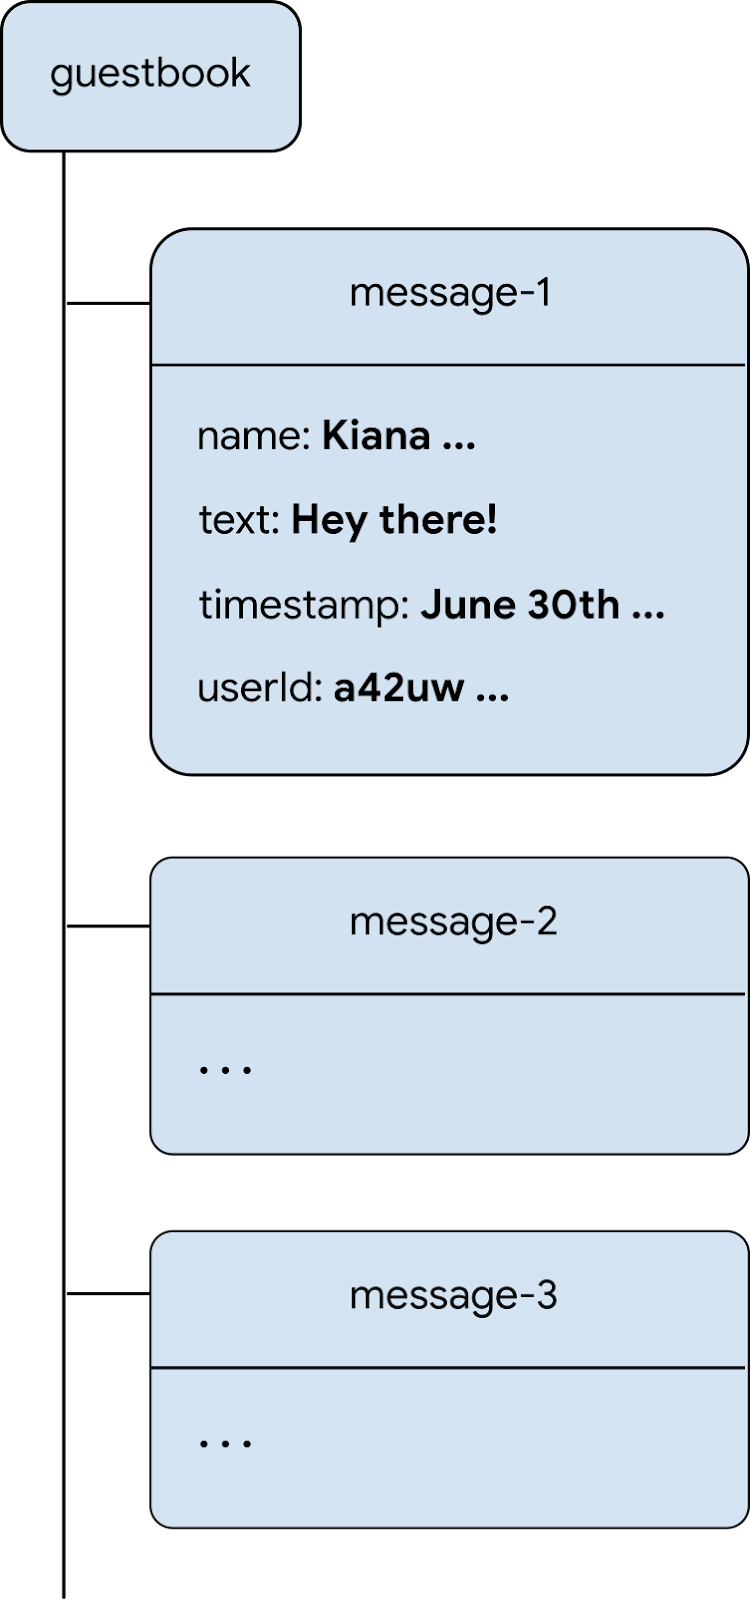
Firestore 是 NoSQL 資料庫,儲存在資料庫中的資料會分成集合、文件、欄位和子集合。您會將對話中的每則訊息儲存為 guestbook 集合中的文件,這個集合是頂層集合。
將訊息新增至 Firestore
在本節中,您要新增功能,讓使用者將訊息寫入資料庫。首先,您要新增表單欄位和傳送按鈕,然後新增程式碼,將這些元素與資料庫連結。
- 建立名為
guest_book.dart的新檔案,然後新增GuestBook具狀態小工具,建構訊息欄位和傳送按鈕的 UI 元素:
lib/guest_book.dart
import 'dart:async';

import 'package:flutter/material.dart';

import 'src/widgets.dart';

class GuestBook extends StatefulWidget {
  const GuestBook({required this.addMessage, super.key});

  final FutureOr<void> Function(String message) addMessage;

  @override
  State<GuestBook> createState() => _GuestBookState();
}

class _GuestBookState extends State<GuestBook> {
  final _formKey = GlobalKey<FormState>(debugLabel: '_GuestBookState');
  final _controller = TextEditingController();

  @override
  Widget build(BuildContext context) {
    return Padding(
      padding: const EdgeInsets.all(8.0),
      child: Form(
        key: _formKey,
        child: Row(
          children: [
            Expanded(
              child: TextFormField(
                controller: _controller,
                decoration: const InputDecoration(
                  hintText: 'Leave a message',
                ),
                validator: (value) {
                  if (value == null || value.isEmpty) {
                    return 'Enter your message to continue';
                  }
                  return null;
                },
              ),
            ),
            const SizedBox(width: 8),
            StyledButton(
              onPressed: () async {
                if (_formKey.currentState!.validate()) {
                  await widget.addMessage(_controller.text);
                  _controller.clear();
                }
              },
              child: Row(
                children: const [
                  Icon(Icons.send),
                  SizedBox(width: 4),
                  Text('SEND'),
                ],
              ),
            ),
          ],
        ),
      ),
    );
  }
}
這裡有幾個值得注意的地方。首先,您要例項化表單,以便驗證訊息是否確實含有內容,如果沒有,則向使用者顯示錯誤訊息。如要驗證表單,請使用 GlobalKey 存取表單背後的表單狀態。如要進一步瞭解金鑰和使用方式,請參閱「金鑰的使用時機」。
此外,請注意小工具的版面配置方式,您有一個 Row,其中包含 TextFormField 和 StyledButton,而 StyledButton 則包含 Row。另請注意,TextFormField 包裝在 Expanded 小工具中,這會強制 TextFormField 填入列中的任何額外空間。如要進一步瞭解為何需要這麼做,請參閱「瞭解限制」。
現在您已建立小工具,可讓使用者輸入文字並新增至留言簿,接下來請將小工具顯示在畫面上。
- 編輯
HomePage的主體,在ListView的子項結尾處新增下列兩行:
const Header("What we'll be doing"),
const Paragraph(
  'Join us for a day full of Firebase Workshops and Pizza!',
),
// Add the following two lines.
const Header('Discussion'),
GuestBook(addMessage: (message) => print(message)),
雖然這樣就足以顯示小工具,但還無法執行任何實用動作。您很快就會更新這段程式碼,讓它正常運作。
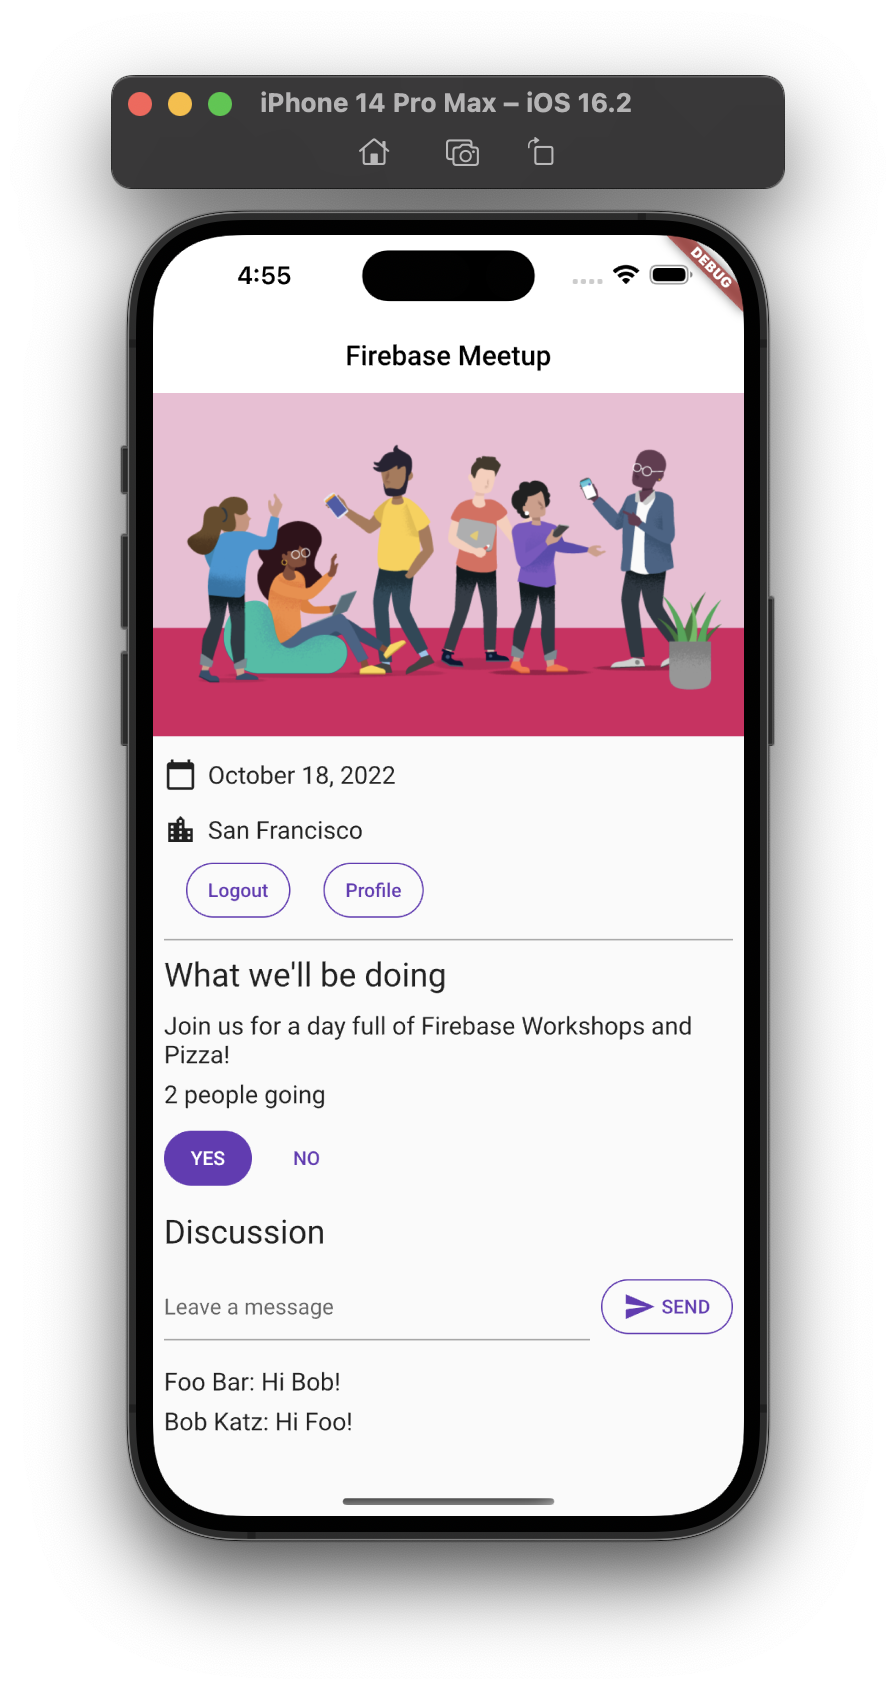
應用程式預覽
|
|
|
|
使用者點選「傳送」時,系統會觸發下列程式碼片段。這會將訊息輸入欄位的內容新增至資料庫的 guestbook 集合。具體來說,addMessageToGuestBook 方法會將訊息內容新增至 guestbook 集合中,並自動產生 ID。
請注意,FirebaseAuth.instance.currentUser.uid 是指驗證服務為所有登入使用者自動產生的專屬 ID。
- 在
lib/app_state.dart檔案中,新增addMessageToGuestBook方法。您會在下一個步驟中,將這項功能與使用者介面連結。
lib/app_state.dart
import 'package:cloud_firestore/cloud_firestore.dart'; // new
import 'package:firebase_auth/firebase_auth.dart'
    hide EmailAuthProvider, PhoneAuthProvider;
import 'package:firebase_core/firebase_core.dart';
import 'package:firebase_ui_auth/firebase_ui_auth.dart';
import 'package:flutter/material.dart';

import 'firebase_options.dart';

class ApplicationState extends ChangeNotifier {

  // Current content of ApplicationState elided ...

  // Add from here...
  Future<DocumentReference> addMessageToGuestBook(String message) {
    if (!_loggedIn) {
      throw Exception('Must be logged in');
    }

    return FirebaseFirestore.instance
        .collection('guestbook')
        .add(<String, dynamic>{
      'text': message,
      'timestamp': DateTime.now().millisecondsSinceEpoch,
      'name': FirebaseAuth.instance.currentUser!.displayName,
      'userId': FirebaseAuth.instance.currentUser!.uid,
    });
  }
  // ...to here.
}
連結 UI 和資料庫
您有一個 UI,使用者可以在其中輸入要新增至留言簿的文字,而且您有將項目新增至 Firestore 的程式碼。現在只要將兩者連結即可。
- 在
lib/home_page.dart檔案中,對HomePage小工具進行下列變更:
lib/home_page.dart
import 'package:firebase_auth/firebase_auth.dart'
    hide EmailAuthProvider, PhoneAuthProvider;
import 'package:flutter/material.dart';
import 'package:provider/provider.dart';

import 'app_state.dart';
import 'guest_book.dart';                         // new
import 'src/authentication.dart';
import 'src/widgets.dart';

class HomePage extends StatelessWidget {
  const HomePage({super.key});

  @override
  Widget build(BuildContext context) {
    return Scaffold(
      appBar: AppBar(
        title: const Text('Firebase Meetup'),
      ),
      body: ListView(
        children: <Widget>[
          Image.asset('assets/codelab.png'),
          const SizedBox(height: 8),
          const IconAndDetail(Icons.calendar_today, 'October 30'),
          const IconAndDetail(Icons.location_city, 'San Francisco'),
          Consumer<ApplicationState>(
            builder: (context, appState, _) => AuthFunc(
                loggedIn: appState.loggedIn,
                signOut: () {
                  FirebaseAuth.instance.signOut();
                }),
          ),
          const Divider(
            height: 8,
            thickness: 1,
            indent: 8,
            endIndent: 8,
            color: Colors.grey,
          ),
          const Header("What we'll be doing"),
          const Paragraph(
            'Join us for a day full of Firebase Workshops and Pizza!',
          ),
          // Modify from here...
          Consumer<ApplicationState>(
            builder: (context, appState, _) => Column(
              crossAxisAlignment: CrossAxisAlignment.start,
              children: [
                if (appState.loggedIn) ...[
                  const Header('Discussion'),
                  GuestBook(
                    addMessage: (message) =>
                        appState.addMessageToGuestBook(message),
                  ),
                ],
              ],
            ),
          ),
          // ...to here.
        ],
      ),
    );
  }
}
您已將這個步驟開頭新增的兩行程式碼,替換為完整的實作內容。您再次使用 Consumer<ApplicationState>,讓應用程式狀態可供您算繪的樹狀結構部分使用。這樣一來,您就能對在 UI 中輸入訊息並發布至資料庫的使用者做出回應。在下一節中,您將測試新增的訊息是否發布至資料庫。
測試傳送訊息
- 如有必要,請登入應用程式。
- 輸入訊息 (例如
Hey there!),然後按一下「傳送」。
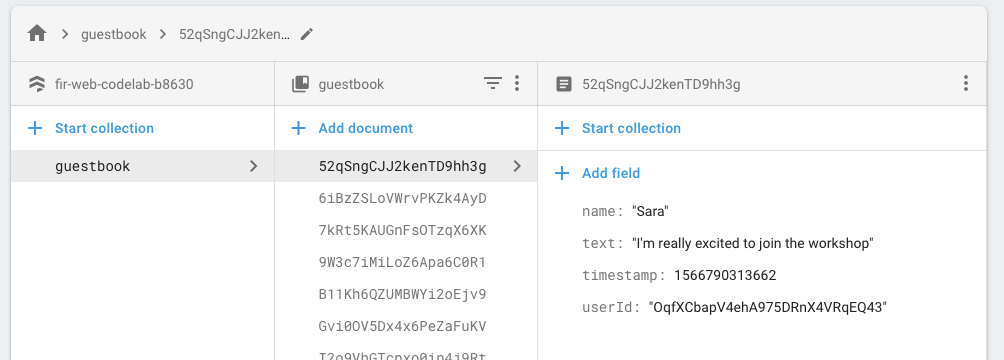
這項動作會將訊息寫入 Firestore 資料庫。不過,您還需要實作資料擷取作業,因此實際的 Flutter 應用程式不會顯示訊息。請繼續下一個步驟。不過,在 Firebase 主控台的「資料庫」資訊主頁中,您可以在 guestbook 集合中看到新增的訊息。傳送越多訊息,guestbook收藏內容就會越豐富。舉例來說,請參閱下列程式碼片段:
7. 朗讀訊息
很高興訪客可以將訊息寫入資料庫,但他們目前還無法在應用程式中查看這些訊息。現在就來修正這個問題!
同步處理訊息
如要顯示訊息,您需要新增在資料變更時觸發的監聽器,然後建立顯示新訊息的 UI 元素。您可以在應用程式狀態中新增程式碼,監聽應用程式中新加入的訊息。
- 建立新檔案
guest_book_message.dart,並新增下列類別,公開您儲存在 Firestore 中的資料結構化檢視畫面。
lib/guest_book_message.dart
class GuestBookMessage {
  GuestBookMessage({required this.name, required this.message});

  final String name;
  final String message;
}
- 在
lib/app_state.dart檔案中,新增下列匯入項目:
lib/app_state.dart
import 'dart:async';                                     // new

import 'package:cloud_firestore/cloud_firestore.dart';
import 'package:firebase_auth/firebase_auth.dart'
    hide EmailAuthProvider, PhoneAuthProvider;
import 'package:firebase_core/firebase_core.dart';
import 'package:firebase_ui_auth/firebase_ui_auth.dart';
import 'package:flutter/material.dart';

import 'firebase_options.dart';
import 'guest_book_message.dart';                        // new
- 在定義狀態和 getter 的
ApplicationState區段中,新增下列程式碼行:
lib/app_state.dart
  bool _loggedIn = false;
  bool get loggedIn => _loggedIn;

  // Add from here...
  StreamSubscription<QuerySnapshot>? _guestBookSubscription;
  List<GuestBookMessage> _guestBookMessages = [];
  List<GuestBookMessage> get guestBookMessages => _guestBookMessages;
  // ...to here.
- 在
ApplicationState的初始化部分中,新增下列幾行程式碼,以便在使用者登入時訂閱文件集合的查詢,並在登出時取消訂閱:
lib/app_state.dart
  Future<void> init() async {
    await Firebase.initializeApp(
        options: DefaultFirebaseOptions.currentPlatform);

    FirebaseUIAuth.configureProviders([
      EmailAuthProvider(),
    ]);

    FirebaseAuth.instance.userChanges().listen((user) {
      if (user != null) {
        _loggedIn = true;
        // Add from here...
        _guestBookSubscription = FirebaseFirestore.instance
            .collection('guestbook')
            .orderBy('timestamp', descending: true)
            .snapshots()
            .listen((snapshot) {
          _guestBookMessages = [];
          for (final document in snapshot.docs) {
            _guestBookMessages.add(
              GuestBookMessage(
                name: document.data()['name'] as String,
                message: document.data()['text'] as String,
              ),
            );
          }
          notifyListeners();
        });
        // ...to here.
      } else {
        _loggedIn = false;
        // Add from here...
        _guestBookMessages = [];
        _guestBookSubscription?.cancel();
        // to here.
      }
      notifyListeners();
    });
  }
這個部分非常重要,因為您會在這裡建構 guestbook 集合的查詢,並處理訂閱及取消訂閱這個集合的作業。您會監聽串流,在 guestbook 集合中重建訊息的本機快取,並儲存這個訂閱項目的參照,以便稍後取消訂閱。這裡有很多內容,因此您應該在偵錯工具中探索,檢查發生了什麼事,以便更清楚瞭解心智模型。詳情請參閱「使用 Firestore 取得即時更新」。
- 在
lib/guest_book.dart檔案中,新增下列匯入項目:
import 'guest_book_message.dart';
- 在
GuestBook小工具中,將訊息清單新增為設定的一部分,將這個變更狀態連結至使用者介面:
lib/guest_book.dart
class GuestBook extends StatefulWidget {
  // Modify the following line:
  const GuestBook({
    super.key,
    required this.addMessage,
    required this.messages,
  });

  final FutureOr<void> Function(String message) addMessage;
  final List<GuestBookMessage> messages; // new

  @override
  State<GuestBook> createState() => _GuestBookState();
}
- 在
_GuestBookState中,按照下列方式修改build方法,公開這項設定:
lib/guest_book.dart
class _GuestBookState extends State<GuestBook> {
  final _formKey = GlobalKey<FormState>(debugLabel: '_GuestBookState');
  final _controller = TextEditingController();

  @override
  Widget build(BuildContext context) {
    // Modify from here...
    return Column(
      crossAxisAlignment: CrossAxisAlignment.start,
      children: [
        // ...to here.
        Padding(
          padding: const EdgeInsets.all(8.0),
          child: Form(
            key: _formKey,
            child: Row(
              children: [
                Expanded(
                  child: TextFormField(
                    controller: _controller,
                    decoration: const InputDecoration(
                      hintText: 'Leave a message',
                    ),
                    validator: (value) {
                      if (value == null || value.isEmpty) {
                        return 'Enter your message to continue';
                      }
                      return null;
                    },
                  ),
                ),
                const SizedBox(width: 8),
                StyledButton(
                  onPressed: () async {
                    if (_formKey.currentState!.validate()) {
                      await widget.addMessage(_controller.text);
                      _controller.clear();
                    }
                  },
                  child: Row(
                    children: [
                      Icon(Icons.send),
                      SizedBox(width: 4),
                      Text('SEND'),
                    ],
                  ),
                ),
              ],
            ),
          ),
        ),
        // Modify from here...
        const SizedBox(height: 8),
        for (var message in widget.messages)
          Paragraph('${message.name}: ${message.message}'),
        const SizedBox(height: 8),
      ],
      // ...to here.
    );
  }
}
您可以使用 Column 小工具包裝 build() 方法的先前內容,然後在 Column 的子項尾端新增 collection for,為訊息清單中的每則訊息產生新的 Paragraph。
- 更新
HomePage的主體,使用新的messages參數正確建構GuestBook:
lib/home_page.dart
Consumer<ApplicationState>(
  builder: (context, appState, _) => Column(
    crossAxisAlignment: CrossAxisAlignment.start,
    children: [
      if (appState.loggedIn) ...[
        const Header('Discussion'),
        GuestBook(
          addMessage: (message) =>
              appState.addMessageToGuestBook(message),
          messages: appState.guestBookMessages, // new
        ),
      ],
    ],
  ),
),
測試訊息同步
Firestore 會自動且即時地將資料與訂閱資料庫的用戶端同步處理。
測試訊息同步處理:
- 在應用程式中,找出您先前在資料庫中建立的訊息。
- 撰寫新訊息。這些更新會立即反映。
- 在多個視窗或分頁中開啟工作區。訊息會在視窗和分頁間即時同步。
- 選用:在 Firebase 主控台的「資料庫」選單中,手動刪除、修改或新增訊息。所有變更都會顯示在 UI 中。
恭喜!您已在應用程式中讀取 Firestore 文件!
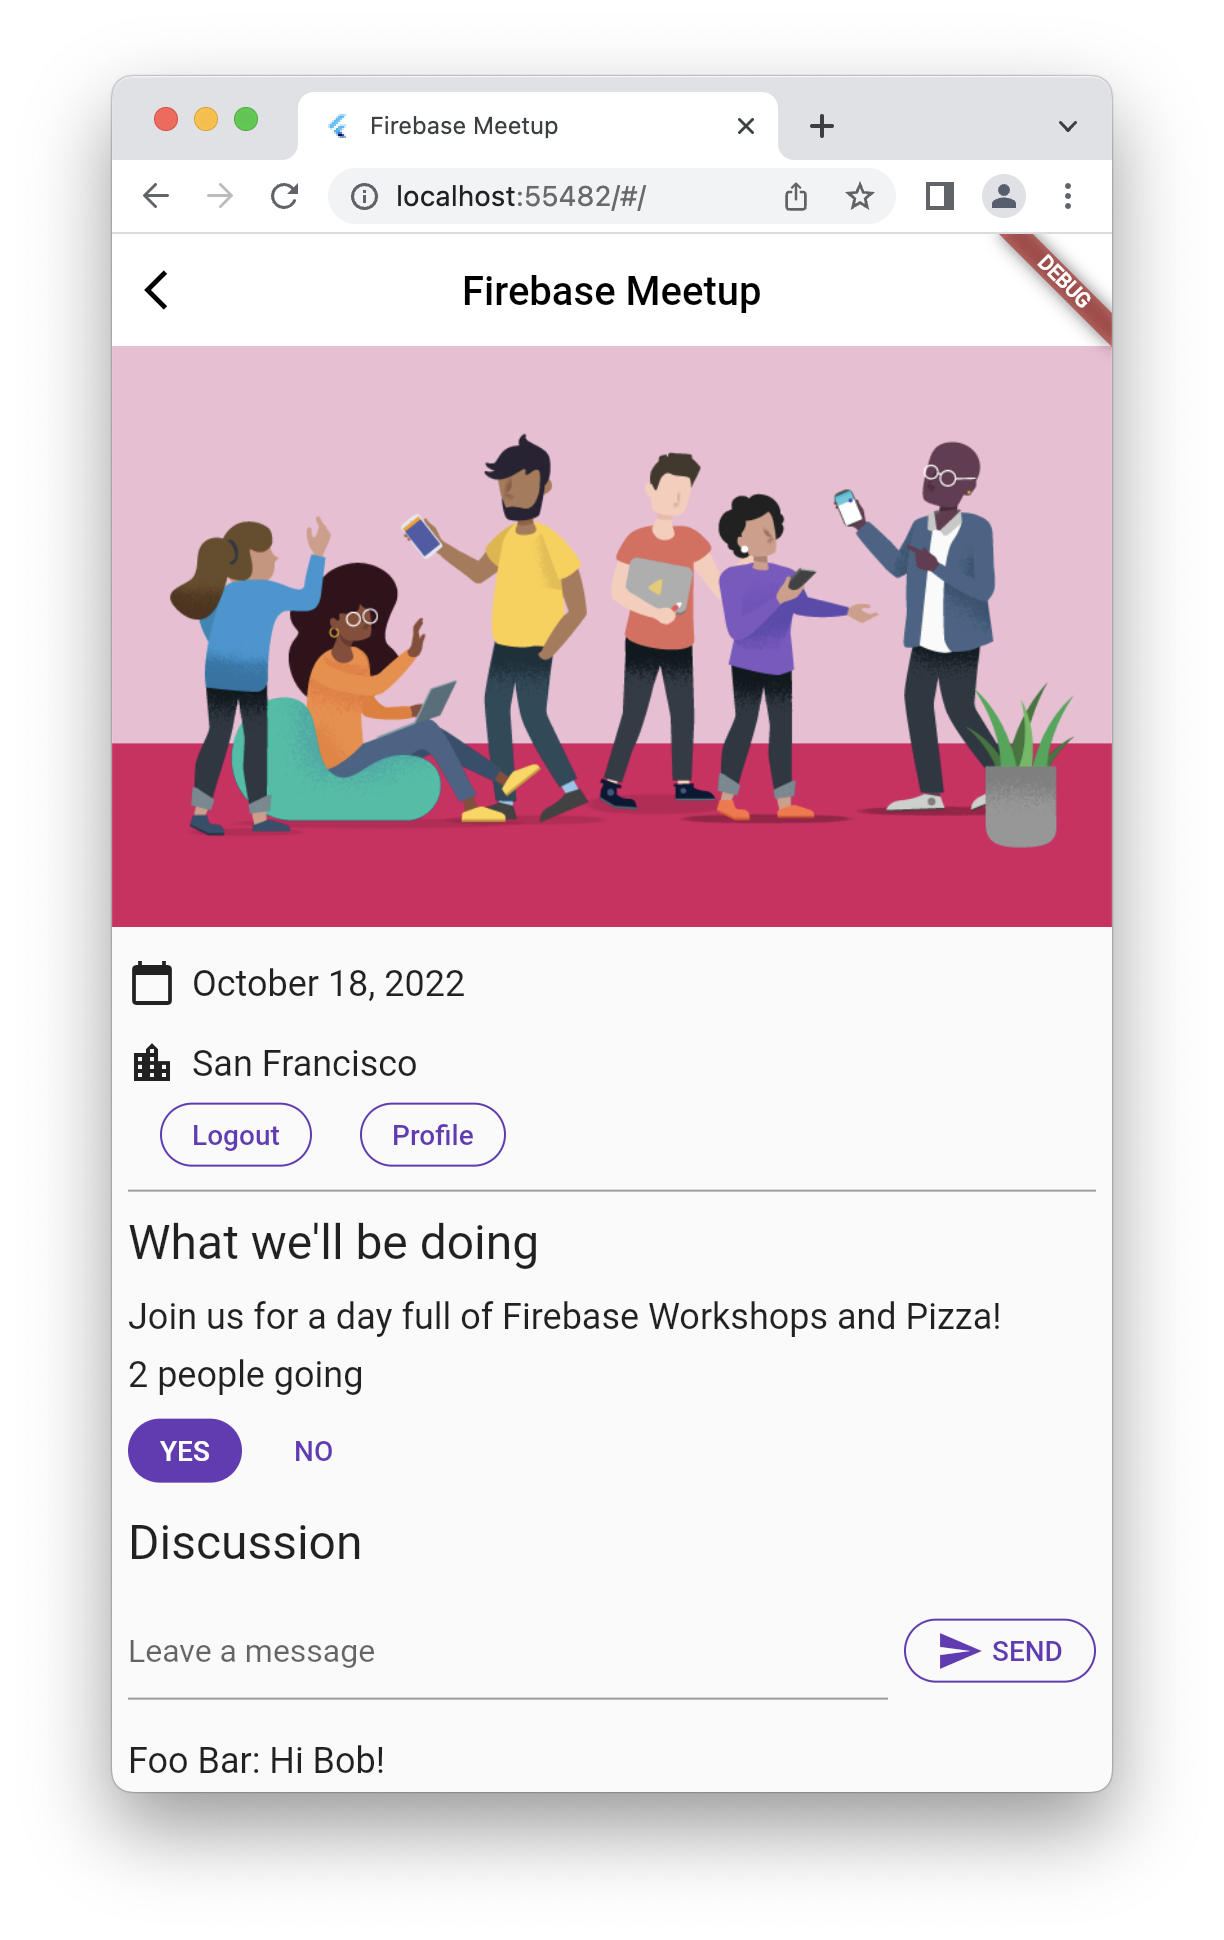
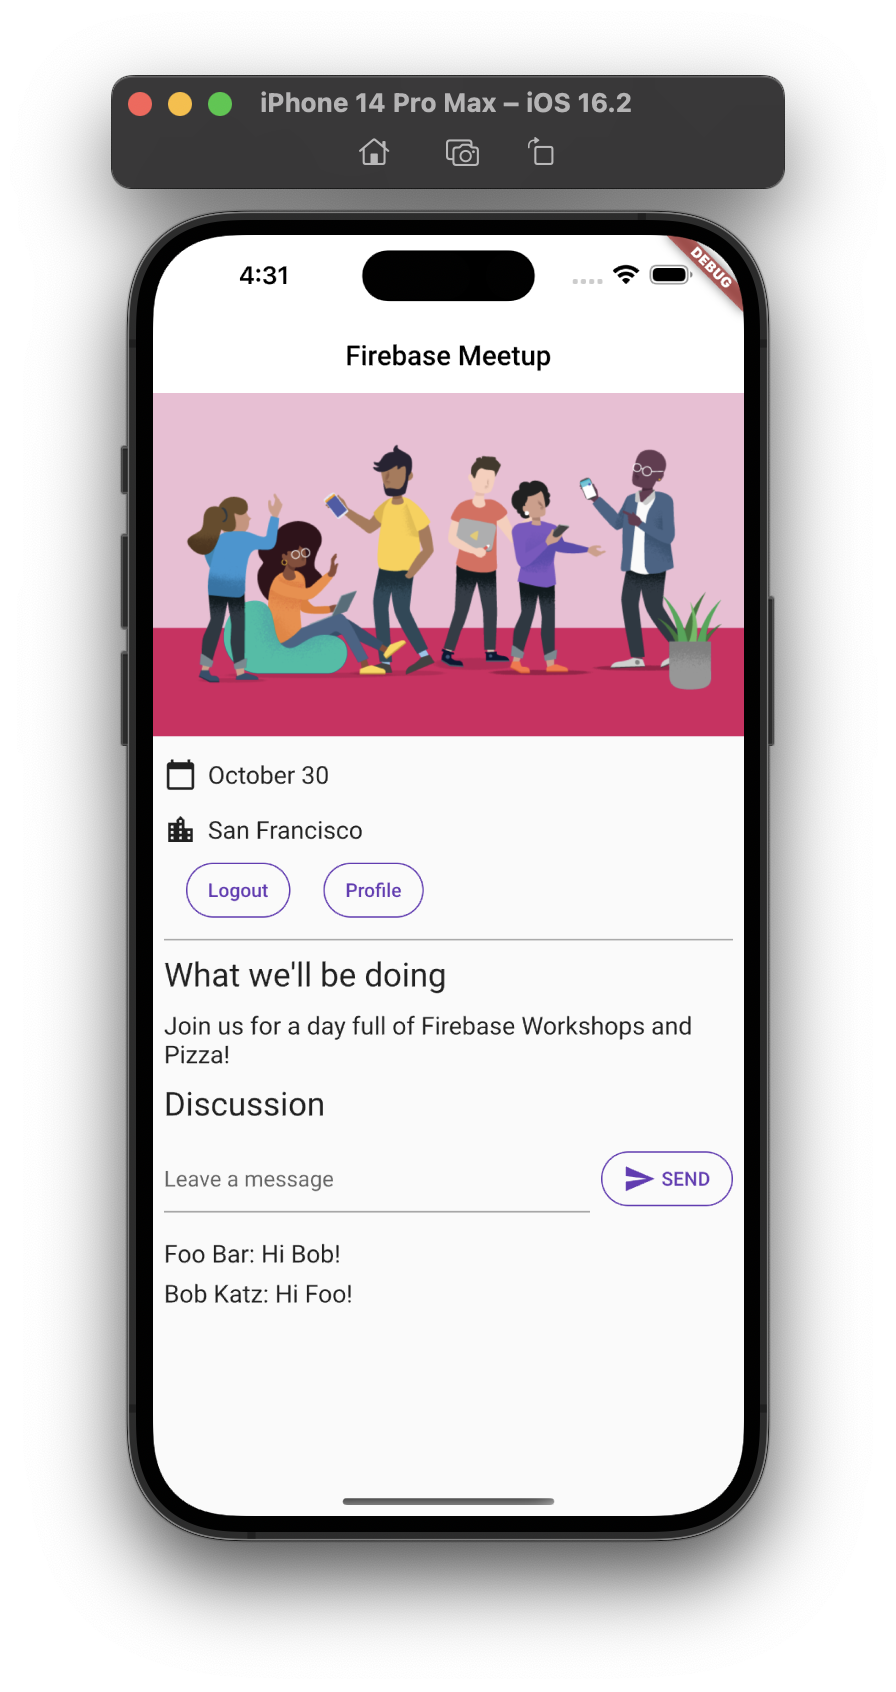
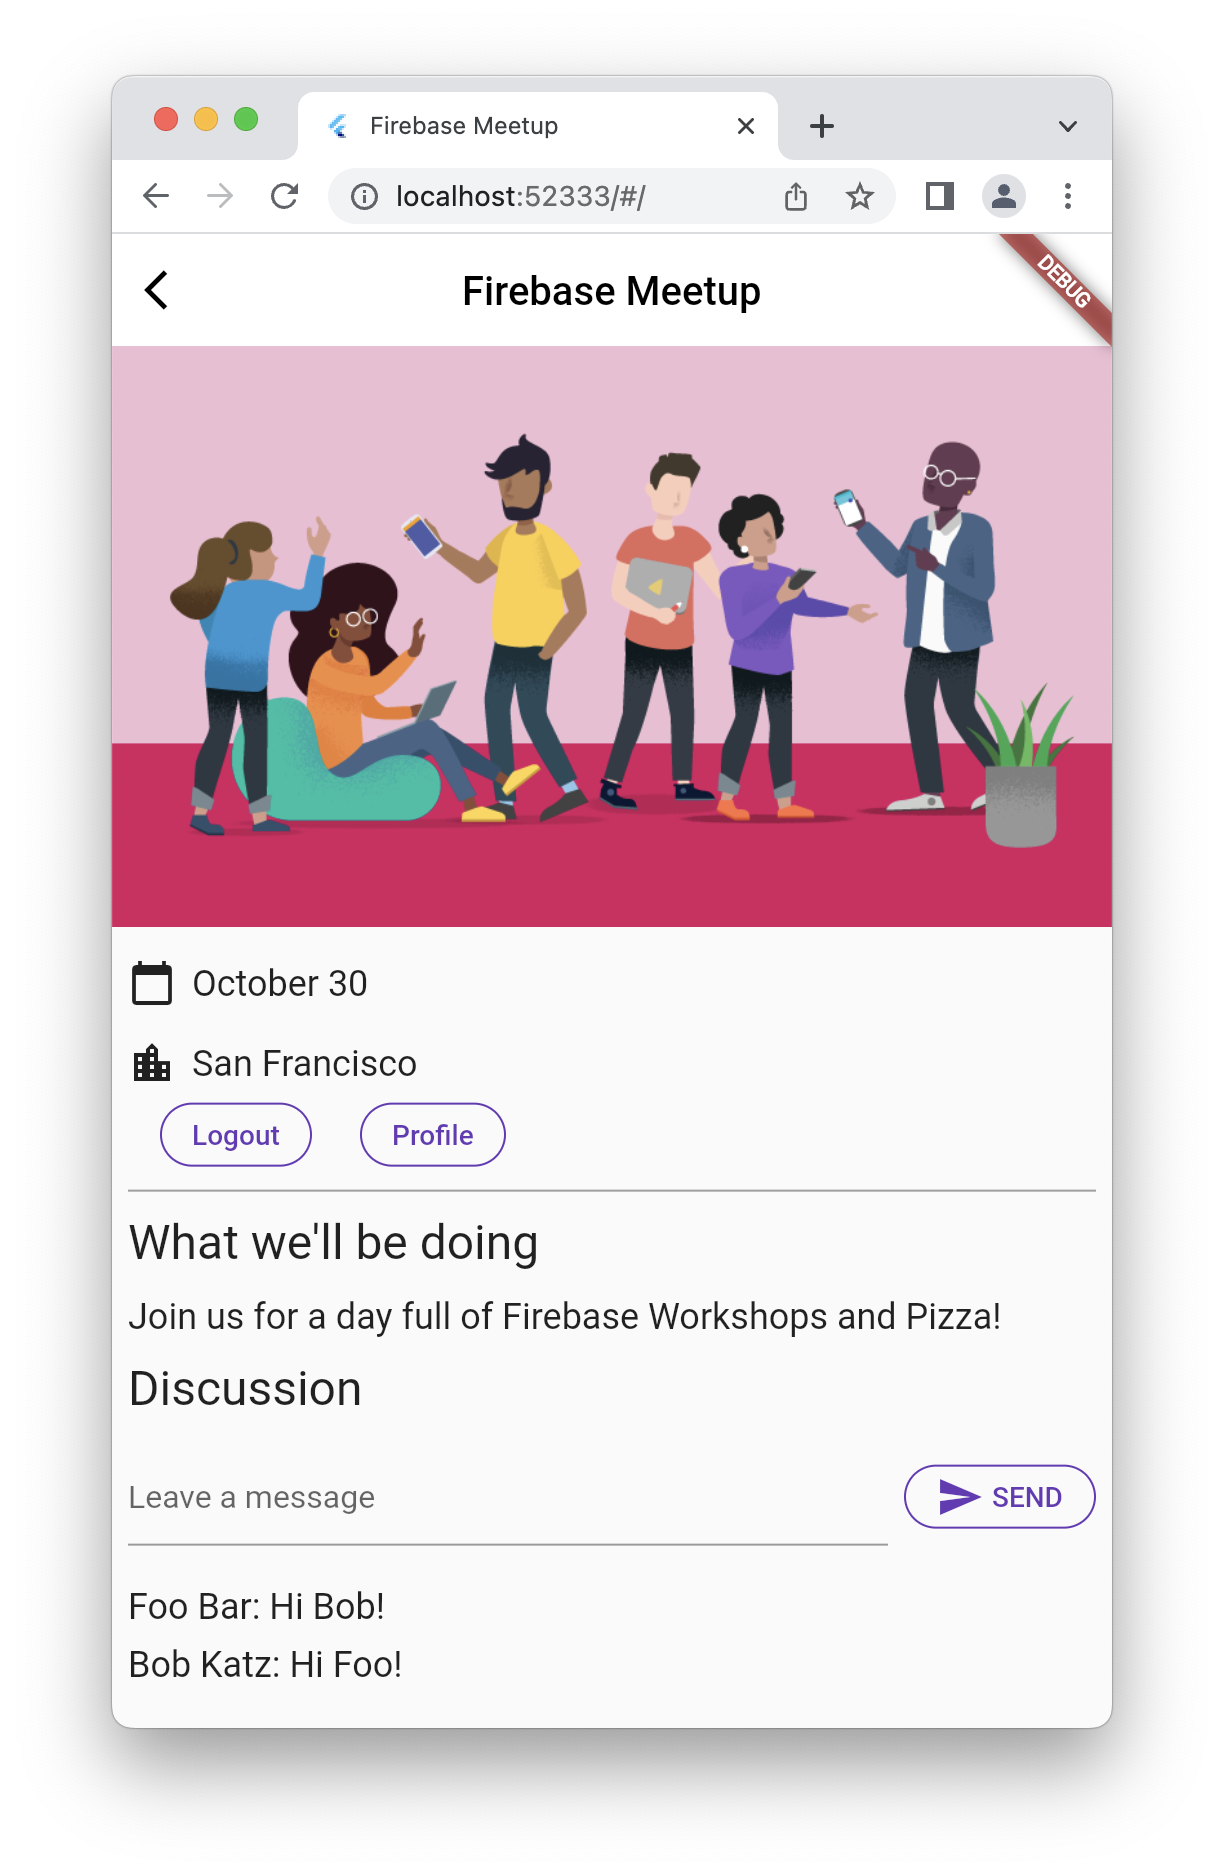
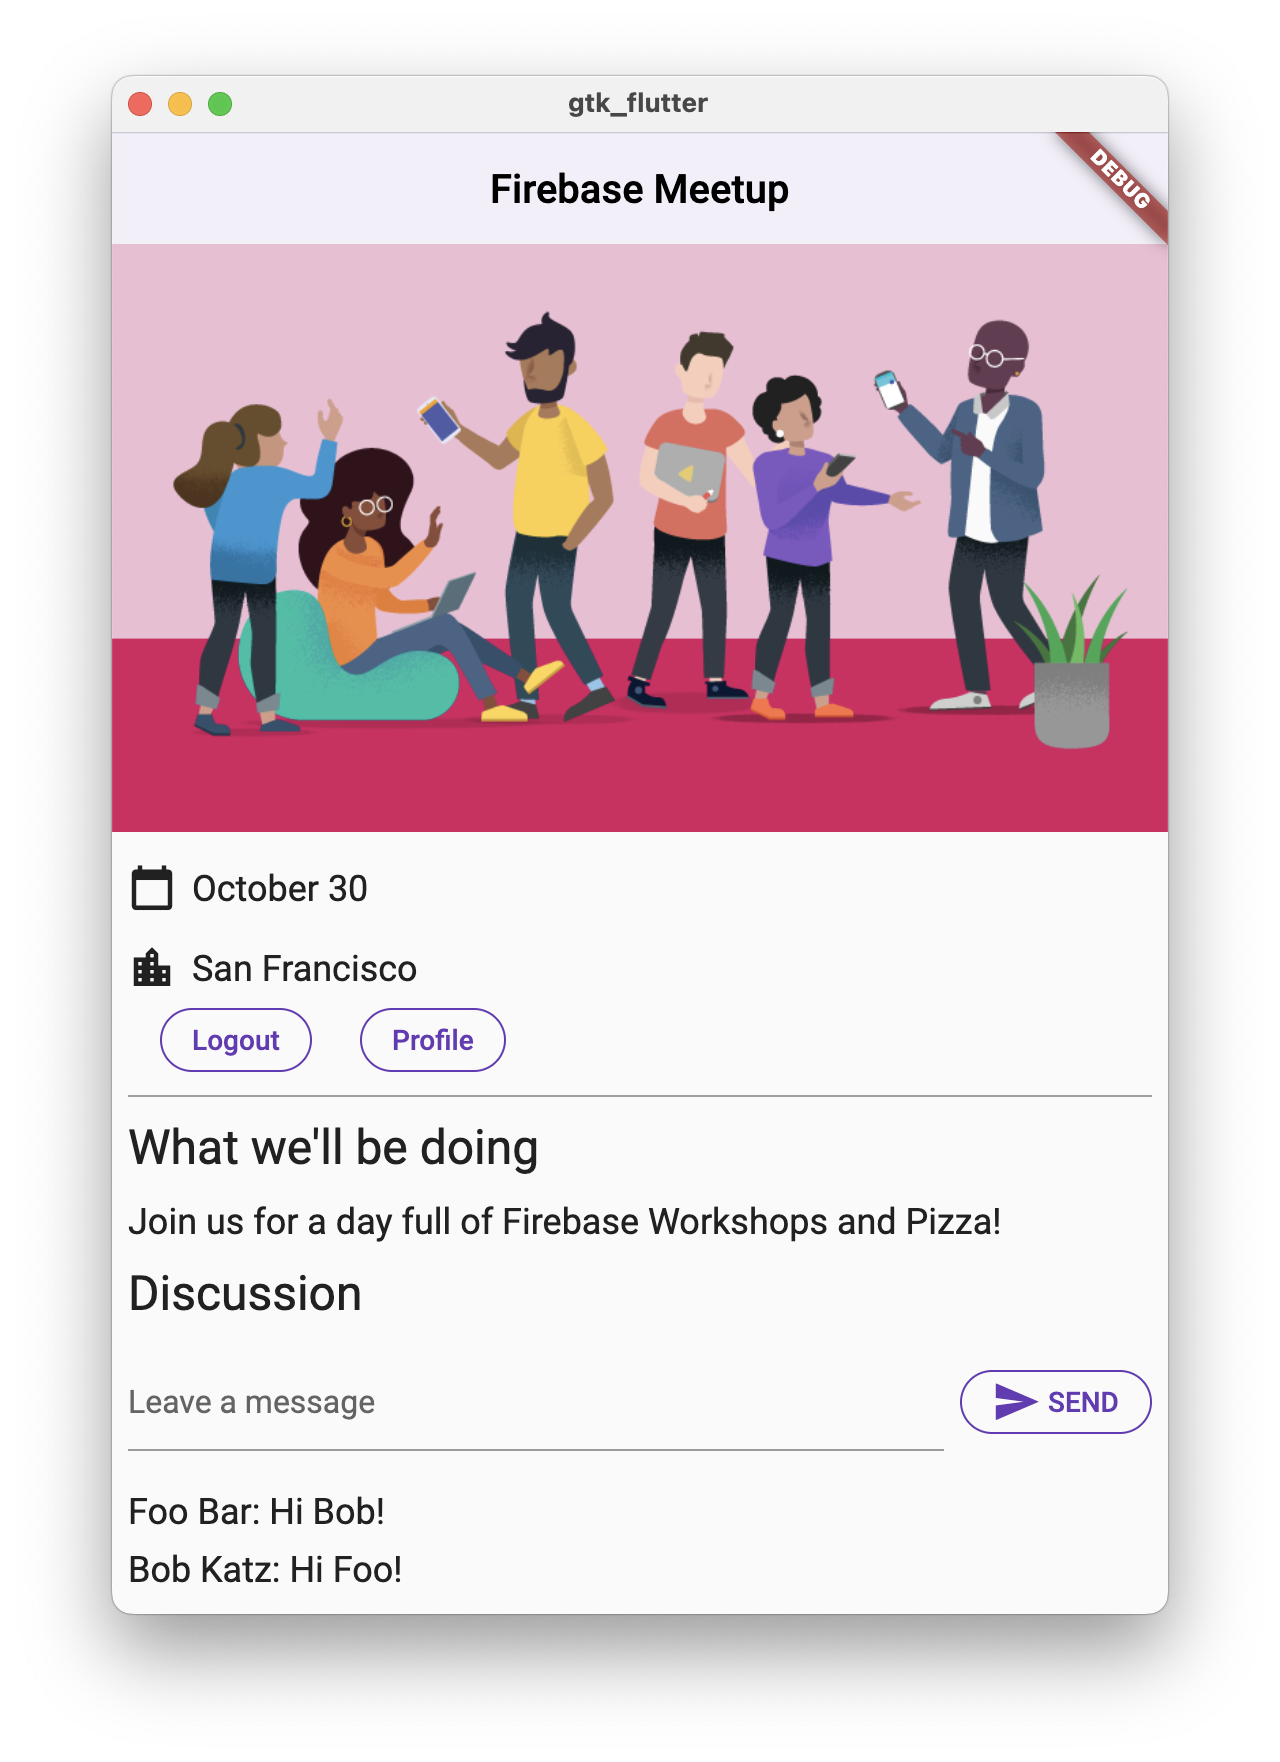
應用程式預覽
|
|
|
|

8. 設定基本安全性規則
您一開始設定 Firestore 時使用測試模式,這表示資料庫可供讀取和寫入。不過,建議您只在開發初期使用測試模式。最佳做法是在開發應用程式時,為資料庫設定安全性規則。安全性是應用程式結構和行為不可或缺的一環。
Firebase 安全性規則可讓您控管資料庫中文件和集合的存取權。彈性規則語法可讓您建立規則,比對所有寫入作業、整個資料庫,以及特定文件的作業。
設定基本安全性規則:
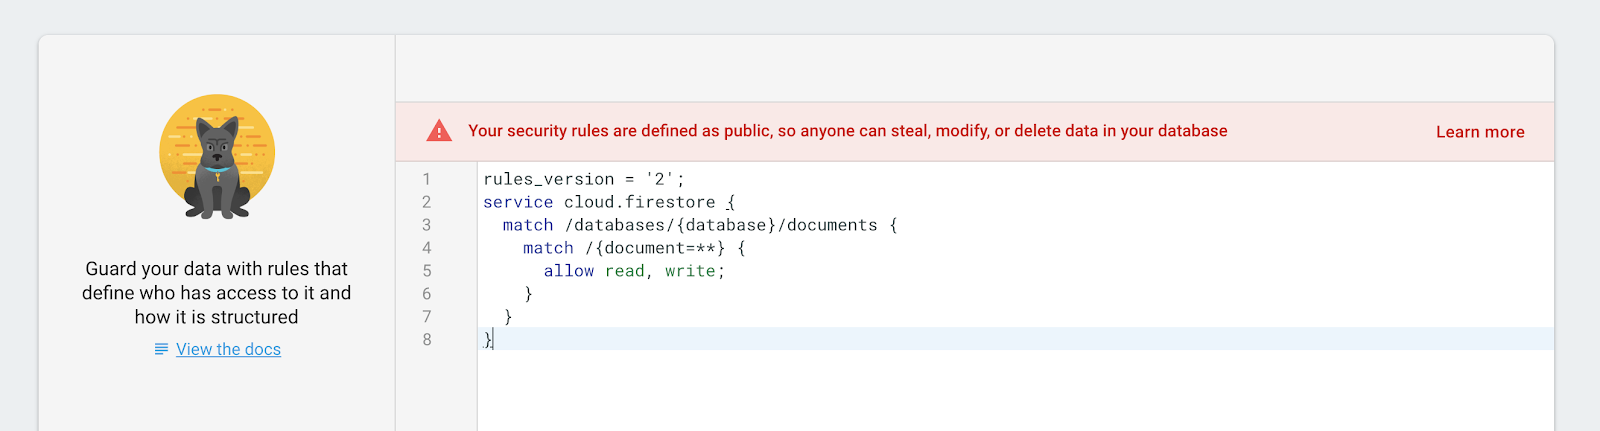
- 在 Firebase 控制台的「Develop」選單中,依序點選「Database」>「Rules」。您應該會看到下列預設安全性規則,以及規則處於公開狀態的警告訊息:
- 找出應用程式寫入資料的集合:
在 match /databases/{database}/documents 中,找出要保護的集合:
rules_version = '2';
service cloud.firestore {
  match /databases/{database}/documents {
    match /guestbook/{entry} {
     // You'll add rules here in the next step.
  }
}
由於您在每個留言簿文件中都使用驗證 UID 做為欄位,因此可以取得驗證 UID,並確認嘗試寫入文件的使用者是否具有相符的驗證 UID。
- 在規則集中新增讀取和寫入規則:
rules_version = '2';
service cloud.firestore {
  match /databases/{database}/documents {
    match /guestbook/{entry} {
      allow read: if request.auth.uid != null;
      allow write:
        if request.auth.uid == request.resource.data.userId;
    }
  }
}
現在只有登入的使用者可以閱讀留言簿中的訊息,但只有訊息作者可以編輯訊息。
- 新增資料驗證,確保文件中包含所有預期欄位:
rules_version = '2';
service cloud.firestore {
  match /databases/{database}/documents {
    match /guestbook/{entry} {
      allow read: if request.auth.uid != null;
      allow write:
      if request.auth.uid == request.resource.data.userId
          && "name" in request.resource.data
          && "text" in request.resource.data
          && "timestamp" in request.resource.data;
    }
  }
}
9. 加分步驟:練習所學內容
記錄出席者的回覆狀態
目前,只有對活動感興趣的使用者才能在應用程式中聊天。此外,你只能透過對話得知對方是否會到場。
在這個步驟中,請整理好一切,並讓大家知道有多少人會出席。您在應用程式狀態中新增了幾項功能。首先,登入的使用者可以表明是否會出席。第二個是出席人數計數器。
- 在
lib/app_state.dart檔案中,將下列程式行新增至ApplicationState的存取子區段,讓 UI 程式碼可以與這個狀態互動:
lib/app_state.dart
int _attendees = 0;
int get attendees => _attendees;

Attending _attending = Attending.unknown;
StreamSubscription<DocumentSnapshot>? _attendingSubscription;
Attending get attending => _attending;
set attending(Attending attending) {
  final userDoc = FirebaseFirestore.instance
      .collection('attendees')
      .doc(FirebaseAuth.instance.currentUser!.uid);
  if (attending == Attending.yes) {
    userDoc.set(<String, dynamic>{'attending': true});
  } else {
    userDoc.set(<String, dynamic>{'attending': false});
  }
}
- 將
ApplicationState的init()方法更新如下:
lib/app_state.dart
  Future<void> init() async {
    await Firebase.initializeApp(
        options: DefaultFirebaseOptions.currentPlatform);

    FirebaseUIAuth.configureProviders([
      EmailAuthProvider(),
    ]);

    // Add from here...
    FirebaseFirestore.instance
        .collection('attendees')
        .where('attending', isEqualTo: true)
        .snapshots()
        .listen((snapshot) {
      _attendees = snapshot.docs.length;
      notifyListeners();
    });
    // ...to here.

    FirebaseAuth.instance.userChanges().listen((user) {
      if (user != null) {
        _loggedIn = true;
        _emailVerified = user.emailVerified;
        _guestBookSubscription = FirebaseFirestore.instance
            .collection('guestbook')
            .orderBy('timestamp', descending: true)
            .snapshots()
            .listen((snapshot) {
          _guestBookMessages = [];
          for (final document in snapshot.docs) {
            _guestBookMessages.add(
              GuestBookMessage(
                name: document.data()['name'] as String,
                message: document.data()['text'] as String,
              ),
            );
          }
          notifyListeners();
        });
        // Add from here...
        _attendingSubscription = FirebaseFirestore.instance
            .collection('attendees')
            .doc(user.uid)
            .snapshots()
            .listen((snapshot) {
          if (snapshot.data() != null) {
            if (snapshot.data()!['attending'] as bool) {
              _attending = Attending.yes;
            } else {
              _attending = Attending.no;
            }
          } else {
            _attending = Attending.unknown;
          }
          notifyListeners();
        });
        // ...to here.
      } else {
        _loggedIn = false;
        _emailVerified = false;
        _guestBookMessages = [];
        _guestBookSubscription?.cancel();
        _attendingSubscription?.cancel(); // new
      }
      notifyListeners();
    });
  }
這段程式碼會新增一律訂閱的查詢,以判斷出席者人數,以及只有在使用者登入時才會啟用的第二個查詢,以判斷使用者是否出席。
- 在
lib/app_state.dart檔案頂端新增下列列舉。
lib/app_state.dart
enum Attending { yes, no, unknown }
- 建立新檔案
yes_no_selection.dart,定義類似單選按鈕的新小工具:
lib/yes_no_selection.dart
import 'package:flutter/material.dart';

import 'app_state.dart';
import 'src/widgets.dart';

class YesNoSelection extends StatelessWidget {
  const YesNoSelection(
      {super.key, required this.state, required this.onSelection});
  final Attending state;
  final void Function(Attending selection) onSelection;

  @override
  Widget build(BuildContext context) {
    switch (state) {
      case Attending.yes:
        return Padding(
          padding: const EdgeInsets.all(8.0),
          child: Row(
            children: [
              FilledButton(
                onPressed: () => onSelection(Attending.yes),
                child: const Text('YES'),
              ),
              const SizedBox(width: 8),
              TextButton(
                onPressed: () => onSelection(Attending.no),
                child: const Text('NO'),
              ),
            ],
          ),
        );
      case Attending.no:
        return Padding(
          padding: const EdgeInsets.all(8.0),
          child: Row(
            children: [
              TextButton(
                onPressed: () => onSelection(Attending.yes),
                child: const Text('YES'),
              ),
              const SizedBox(width: 8),
              FilledButton(
                onPressed: () => onSelection(Attending.no),
                child: const Text('NO'),
              ),
            ],
          ),
        );
      default:
        return Padding(
          padding: const EdgeInsets.all(8.0),
          child: Row(
            children: [
              StyledButton(
                onPressed: () => onSelection(Attending.yes),
                child: const Text('YES'),
              ),
              const SizedBox(width: 8),
              StyledButton(
                onPressed: () => onSelection(Attending.no),
                child: const Text('NO'),
              ),
            ],
          ),
        );
    }
  }
}
一開始會處於不確定狀態,既未選取「是」,也未選取「否」。使用者選取是否出席後,您會以填滿的按鈕醒目顯示該選項,並以平面呈現其他選項。
- 更新
HomePage的build()方法,以便利用YesNoSelection,讓登入的使用者提名自己是否會出席活動,並顯示活動的出席人數:
lib/home_page.dart
import 'yes_no_selection.dart';             // new

Consumer<ApplicationState>(
  builder: (context, appState, _) => Column(
    crossAxisAlignment: CrossAxisAlignment.start,
    children: [
      // Add from here...
      switch (appState.attendees) {
        1 => const Paragraph('1 person going'),
        >= 2 => Paragraph('${appState.attendees} people going'),
        _ => const Paragraph('No one going'),
      },
      // ...to here.
      if (appState.loggedIn) ...[
        // Add from here...
        YesNoSelection(
          state: appState.attending,
          onSelection: (attending) => appState.attending = attending,
        ),
        // ...to here.
        const Header('Discussion'),
        GuestBook(
          addMessage: (message) =>
              appState.addMessageToGuestBook(message),
          messages: appState.guestBookMessages,
        ),
      ],
    ],
  ),
),
新增規則
您已設定部分規則,因此使用按鈕新增的資料會遭到拒絕。您需要更新規則,允許將項目新增至「attendees」集合。
- 在
attendees集合中,抓取您用做文件名稱的驗證 UID,並確認提交者的uid與他們撰寫的文件相同:
rules_version = '2';
service cloud.firestore {
  match /databases/{database}/documents {
    // ... //
    match /attendees/{userId} {
      allow read: if true;
      allow write: if request.auth.uid == userId;
    }
  }
}
這樣一來,所有人都能查看出席者名單 (因為名單中沒有私人資料),但只有建立者可以更新名單。
- 新增資料驗證,確保文件中包含所有預期欄位:
rules_version = '2';
service cloud.firestore {
  match /databases/{database}/documents {
    // ... //
    match /attendees/{userId} {
      allow read: if true;
      allow write: if request.auth.uid == userId
          && "attending" in request.resource.data;

    }
  }
}
- 選用:在應用程式中按一下按鈕,即可在 Firebase 主控台的 Firestore 資訊主頁中查看結果。
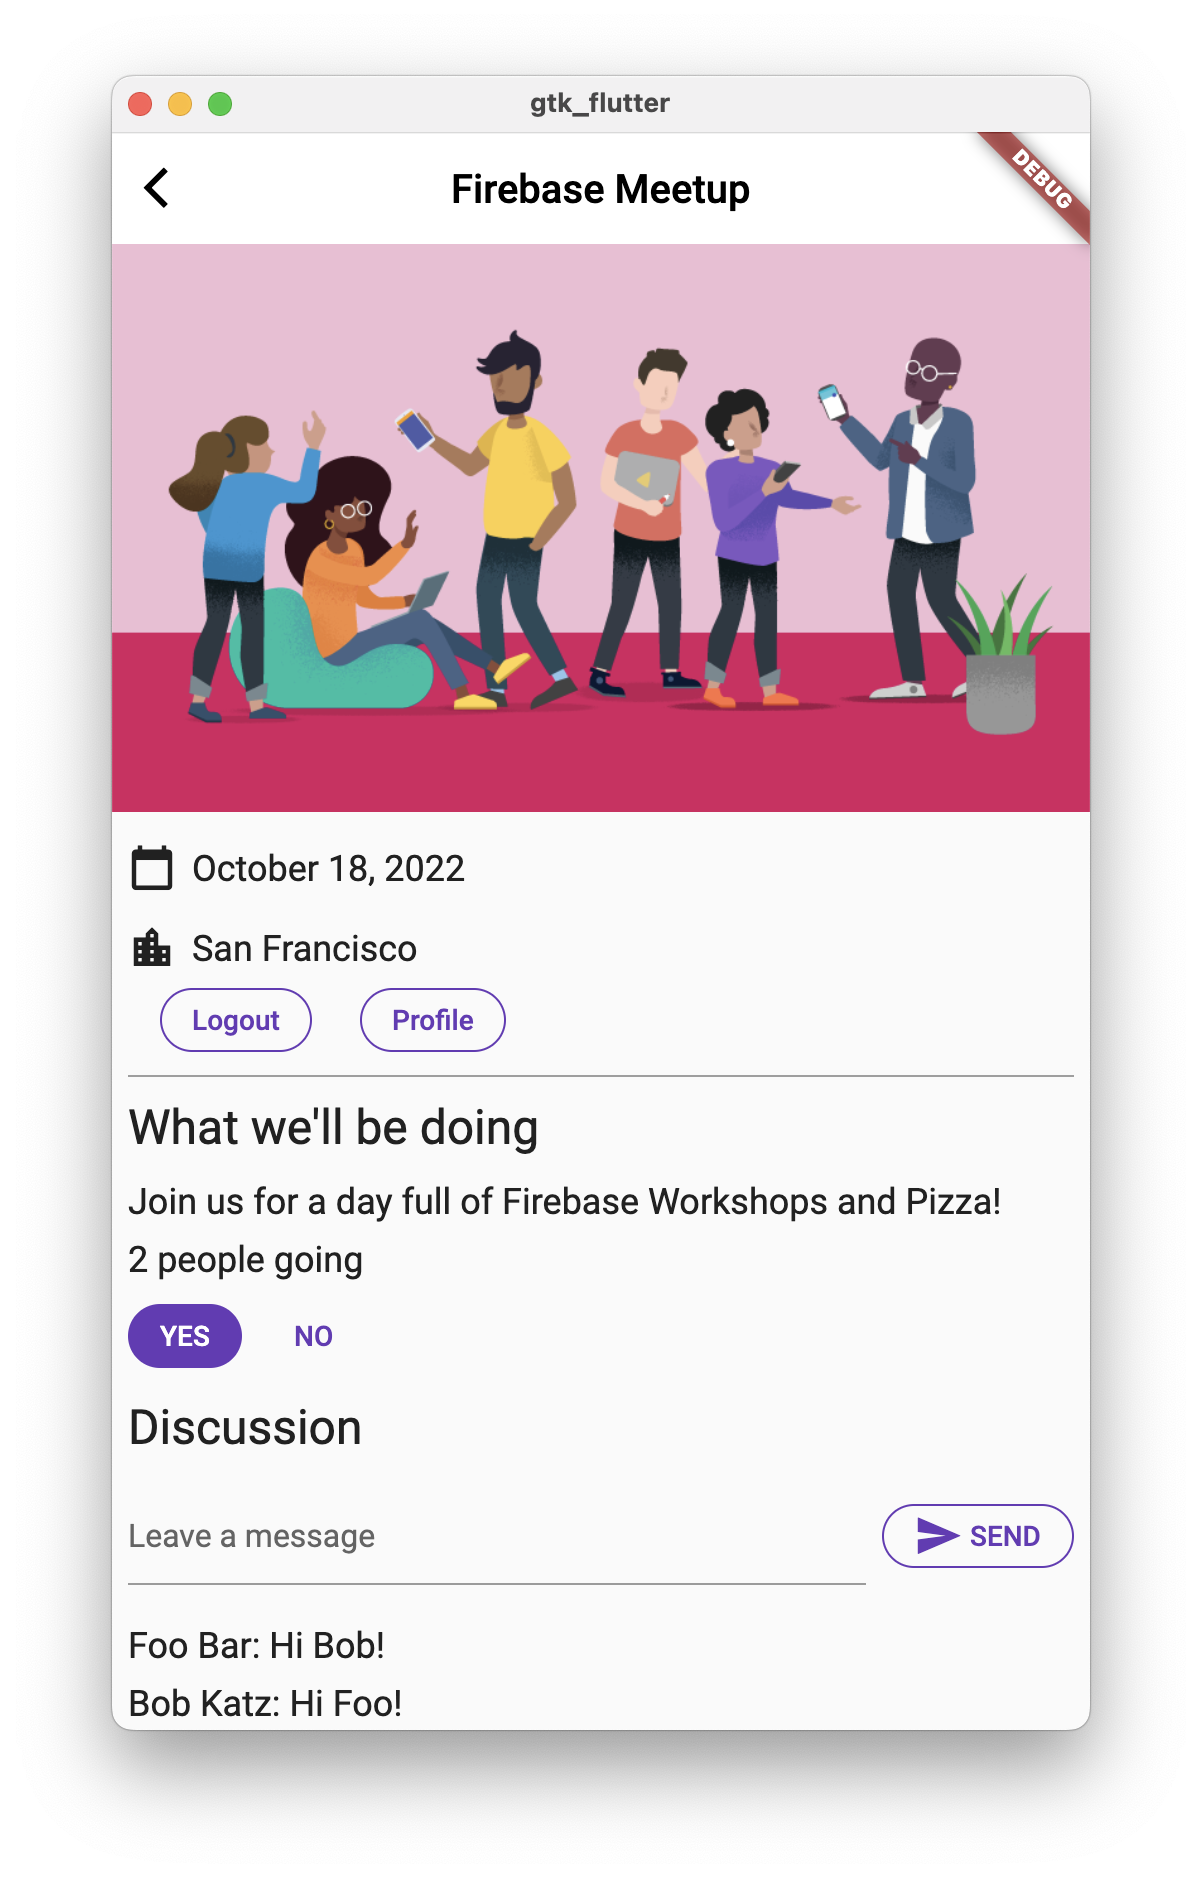
應用程式預覽
|
|
|
|
10. 恭喜!
您已使用 Firebase 建構互動式即時網頁應用程式!