
1. 總覽
目標
在本程式碼研究室中,您將在 Android 上建構餐廳推薦應用程式,並以 Cloud Firestore 做為後端。您將學習下列內容:
- 從 Android 應用程式讀取及寫入 Firestore 資料
- 即時監聽 Firestore 資料的變更
- 使用 Firebase 驗證和安全性規則保護 Firestore 資料
- 撰寫複雜的 Firestore 查詢
事前準備
開始本程式碼研究室前,請確認您已具備下列條件:
- Android Studio Flamingo 以上版本
- 搭載 API 19 以上版本的 Android 模擬器
- Node.js 16 以上版本
- Java 17 以上版本
2. 建立 Firebase 專案
- 使用 Google 帳戶登入 Firebase 控制台。
- 按一下按鈕建立新專案,然後輸入專案名稱 (例如
FriendlyEats)。
- 按一下「繼續」。
- 如果系統提示,請詳閱並接受 Firebase 條款,然後按一下「繼續」。
- (選用) 在 Firebase 控制台中啟用 AI 輔助功能 (稱為「Gemini in Firebase」)。
- 本程式碼研究室不需要 Google Analytics,因此請關閉 Google Analytics 選項。
- 按一下「建立專案」,等待專案佈建完成,然後按一下「繼續」。
3. 設定範例專案
下載程式碼
執行下列指令,複製本程式碼研究室的範例程式碼。這會在電腦上建立名為 friendlyeats-android 的資料夾:
$ git clone https://github.com/firebase/friendlyeats-android
如果電腦上沒有 Git,也可以直接從 GitHub 下載程式碼。
新增 Firebase 設定
- 在 Firebase 控制台中,選取左側導覽列的「專案總覽」。按一下「Android」按鈕選取平台。系統提示您輸入套件名稱時,請輸入
com.google.firebase.example.fireeats

- 按一下「註冊應用程式」,然後按照操作說明下載
google-services.json檔案,並將其移至剛下載程式碼的app/資料夾。然後點按「下一步」。
匯入專案
開啟 Android Studio,依序點選「File」 >「New」 >「Import Project」,然後選取「friendlyeats-android」資料夾。
4. 設定 Firebase 模擬器
在本程式碼研究室中,您將使用 Firebase 模擬器套件,在本機模擬 Cloud Firestore 和其他 Firebase 服務。這項工具提供安全、快速且免費的本機開發環境,方便您建構應用程式。
安裝 Firebase CLI
首先,您需要安裝 Firebase CLI。如果您使用 macOS 或 Linux,可以執行下列 cURL 指令:
curl -sL https://firebase.tools | bash
如果是 Windows,請參閱安裝說明,取得獨立二進位檔或透過 npm 安裝。
安裝 CLI 後,執行 firebase --version 應會回報 9.0.0 以上版本:
$ firebase --version
9.0.0
登入
執行 firebase login,將 CLI 連結至 Google 帳戶。系統會開啟新的瀏覽器視窗,讓你完成登入程序。請務必選擇先前建立 Firebase 專案時使用的帳戶。
連結專案
在 friendlyeats-android 資料夾中執行 firebase use --add,將本機專案連結至 Firebase 專案。按照提示選取先前建立的專案,並在系統要求選擇別名時輸入 default。
5. 執行應用程式
現在要首次執行 Firebase 模擬器套件和 FriendlyEats Android 應用程式。
執行模擬器
在終端機中,從 friendlyeats-android 目錄內執行 firebase emulators:start,啟動 Firebase 模擬器。您應該會看到類似下方的記錄:
$ firebase emulators:start
i  emulators: Starting emulators: auth, firestore
i  firestore: Firestore Emulator logging to firestore-debug.log
i  ui: Emulator UI logging to ui-debug.log

┌─────────────────────────────────────────────────────────────┐
│ ✔  All emulators ready! It is now safe to connect your app. │
│ i  View Emulator UI at http://localhost:4000                │
└─────────────────────────────────────────────────────────────┘

┌────────────────┬────────────────┬─────────────────────────────────┐
│ Emulator       │ Host:Port      │ View in Emulator UI             │
├────────────────┼────────────────┼─────────────────────────────────┤
│ Authentication │ localhost:9099 │ http://localhost:4000/auth      │
├────────────────┼────────────────┼─────────────────────────────────┤
│ Firestore      │ localhost:8080 │ http://localhost:4000/firestore │
└────────────────┴────────────────┴─────────────────────────────────┘
  Emulator Hub running at localhost:4400
  Other reserved ports: 4500

Issues? Report them at https://github.com/firebase/firebase-tools/issues and attach the *-debug.log files.
現在您已在本機電腦上執行完整的本機開發環境!請務必讓這項指令在程式碼研究室的其餘部分保持執行狀態,因為 Android 應用程式需要連線至模擬器。
將應用程式連結至模擬器
在 Android Studio 中開啟 util/FirestoreInitializer.kt 和 util/AuthInitializer.kt 檔案。這些檔案包含的邏輯,會在應用程式啟動時,將 Firebase SDK 連接至電腦上執行的本機模擬器。
在 FirestoreInitializer 類別的 create() 方法中,檢查這段程式碼:
    // Use emulators only in debug builds
    if (BuildConfig.DEBUG) {
        firestore.useEmulator(FIRESTORE_EMULATOR_HOST, FIRESTORE_EMULATOR_PORT)
    }
我們使用 BuildConfig 確保只有在應用程式以 debug 模式執行時,才會連線至模擬器。以 release 模式編譯應用程式時,這個條件會為 false。
我們可以看到,這個方法會使用 useEmulator(host, port) 將 Firebase SDK 連線至本機 Firestore 模擬器。在整個應用程式中,我們會使用 FirebaseUtil.getFirestore() 存取這個 FirebaseFirestore 執行個體,確保在 debug 模式下執行時,一律連線至 Firestore 模擬器。
執行應用程式
如果已正確加入 google-services.json 檔案,專案現在應該會編譯。在 Android Studio 中,依序點選「Build」 >「Rebuild Project」,確認沒有任何錯誤。
在 Android Studio 中,在 Android 模擬器上執行應用程式。一開始會顯示「登入」畫面。您可以使用任何電子郵件地址和密碼登入應用程式。這個登入程序會連線至 Firebase 驗證模擬器,因此不會傳輸任何實際憑證。
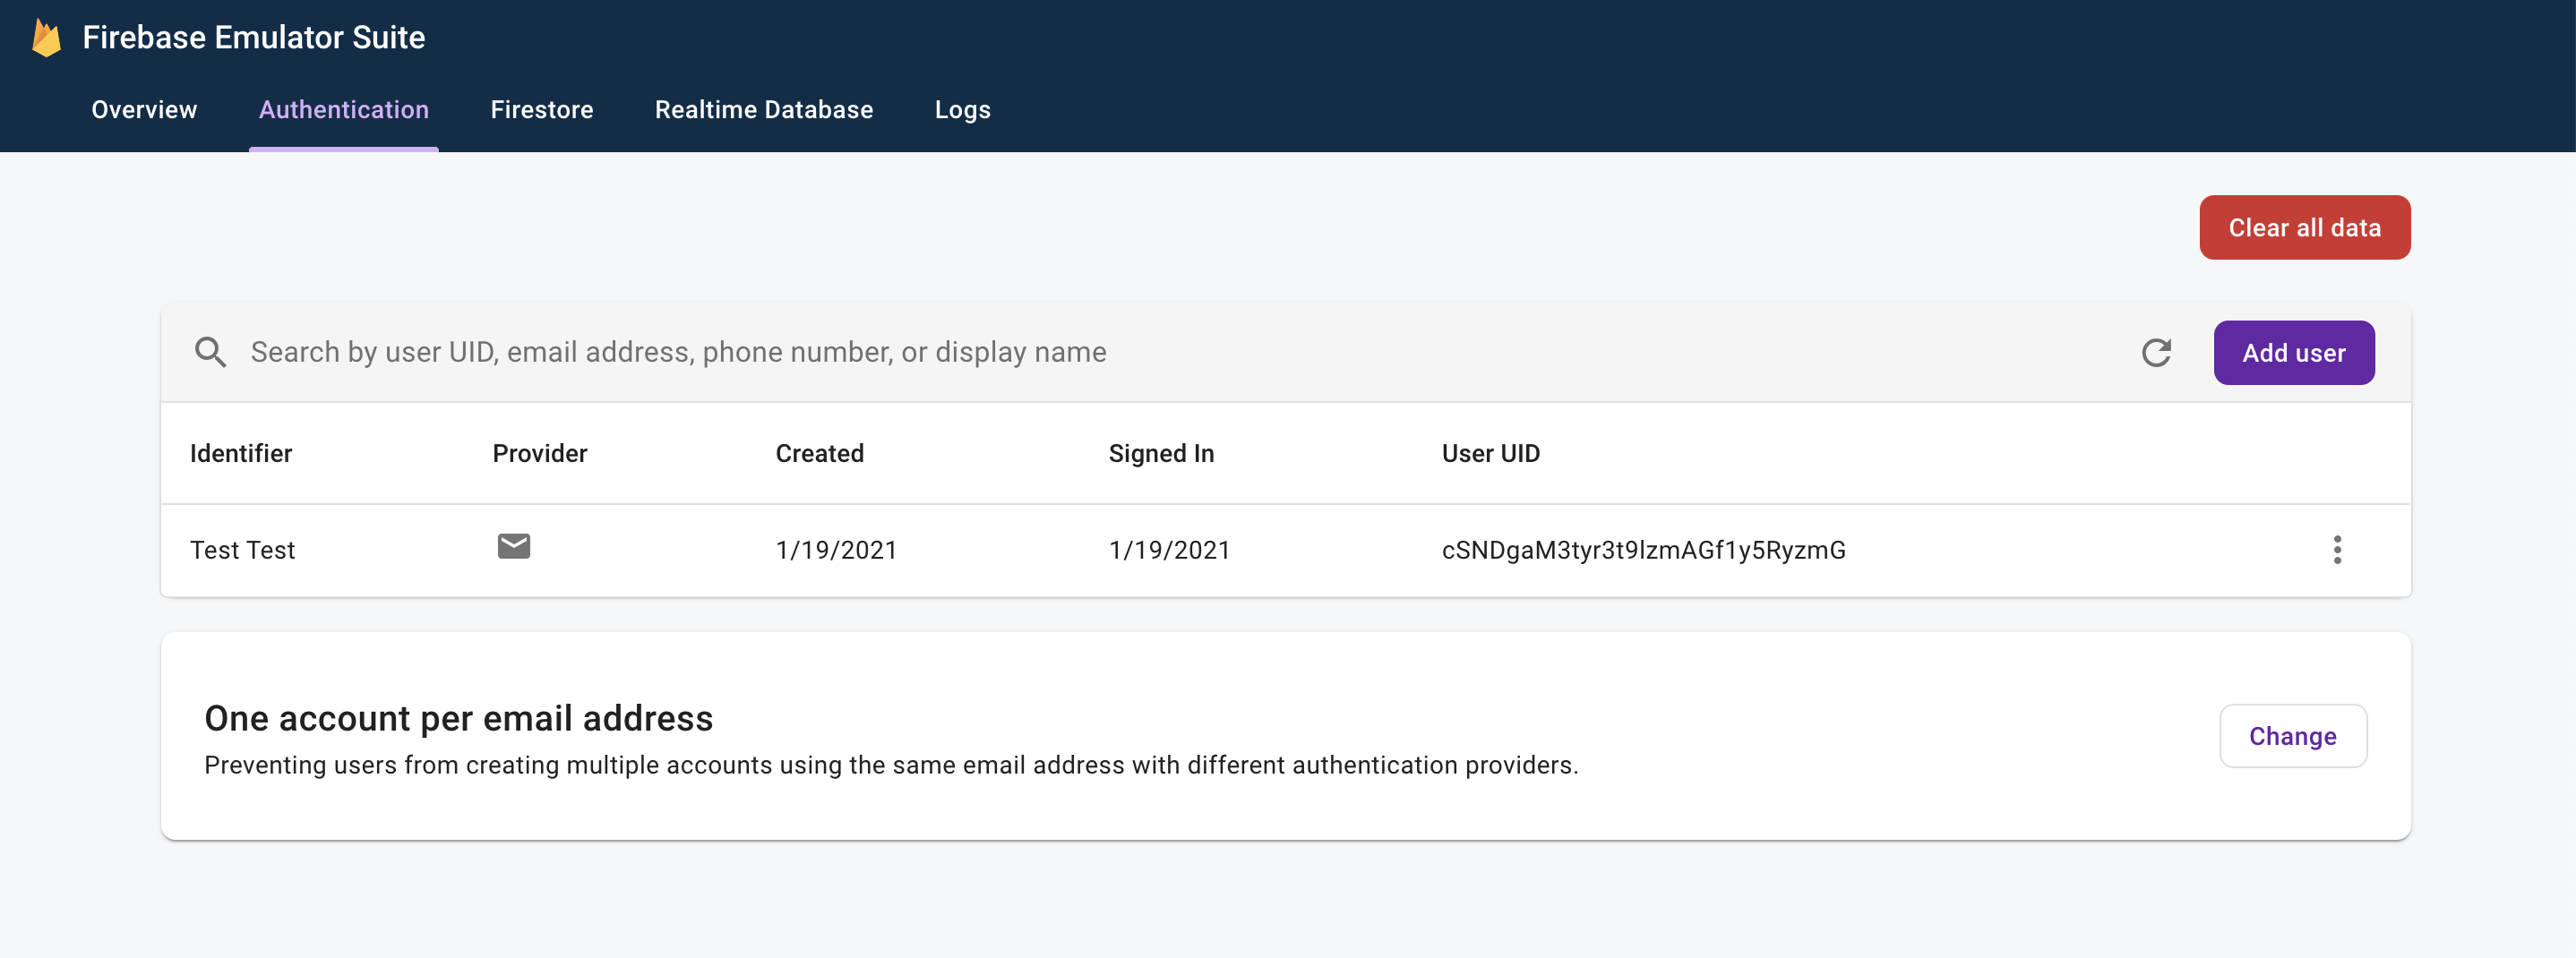
現在,請在網路瀏覽器中前往 http://localhost:4000,開啟模擬器 UI。然後按一下「Authentication」分頁標籤,您應該會看到剛建立的帳戶:
完成登入程序後,您應該會看到應用程式主畫面:
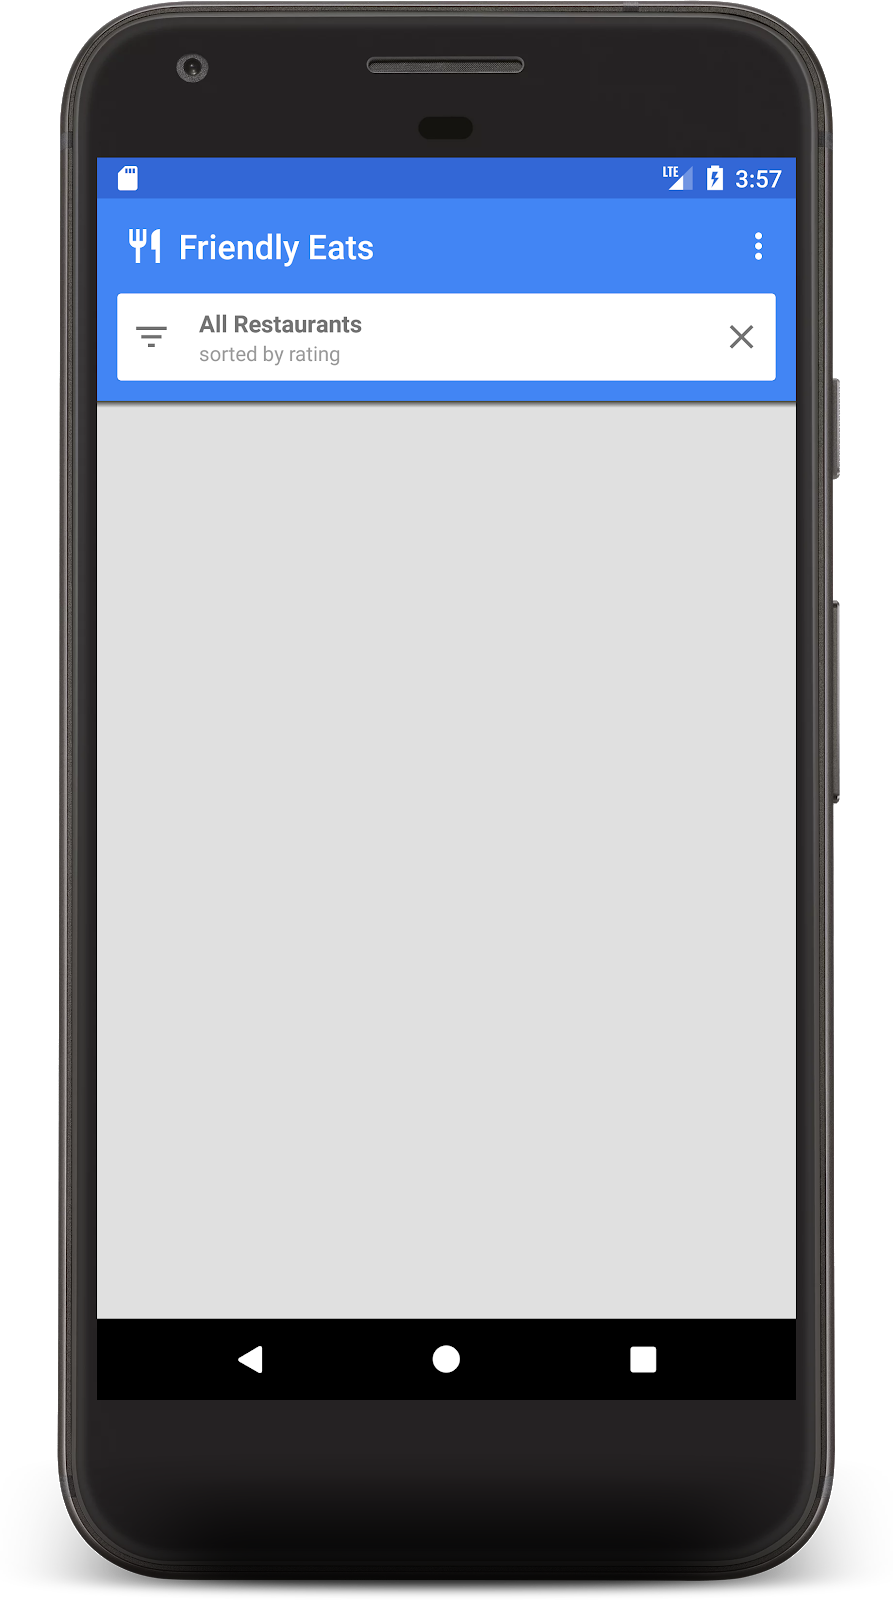
我們很快就會新增一些資料,填入主畫面。
6. 將資料寫入 Firestore
在本節中,我們會將一些資料寫入 Firestore,以便填入目前空白的主畫面。
應用程式中的主要模型物件是餐廳 (請參閱 model/Restaurant.kt)。Firestore 資料會分割成文件、集合和子集合。我們會將每間餐廳儲存為頂層集合 (名為 "restaurants") 中的文件。如要進一步瞭解 Firestore 資料模型,請參閱說明文件中的文件和集合。
為了示範,我們會在應用程式中新增功能,在溢位選單中點選「Add Random Items」按鈕時,建立十間隨機餐廳。開啟 MainFragment.kt 檔案,並將 onAddItemsClicked() 方法中的內容替換為:
    private fun onAddItemsClicked() {
        val restaurantsRef = firestore.collection("restaurants")
        for (i in 0..9) {
            // Create random restaurant / ratings
            val randomRestaurant = RestaurantUtil.getRandom(requireContext())

            // Add restaurant
            restaurantsRef.add(randomRestaurant)
        }
    }
請注意上述程式碼的幾個重點:
- 首先,我們會取得
"restaurants"集合的參照。新增文件時,系統會隱含建立集合,因此不需要在寫入資料前建立集合。 - 您可以使用 Kotlin 資料類別建立文件,我們就是使用這項功能建立每個 Restaurant 文件。
add()方法會將文件新增至集合,並自動產生 ID,因此我們不需要為每個餐廳指定專屬 ID。
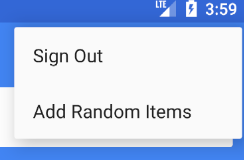
現在請再次執行應用程式,然後點選溢位選單 (右上角) 中的「Add Random Items」按鈕,叫用您剛才編寫的程式碼:
現在,請在網路瀏覽器中前往 http://localhost:4000,開啟模擬器 UI。然後點選「Firestore」分頁標籤,您應該會看到剛新增的資料:
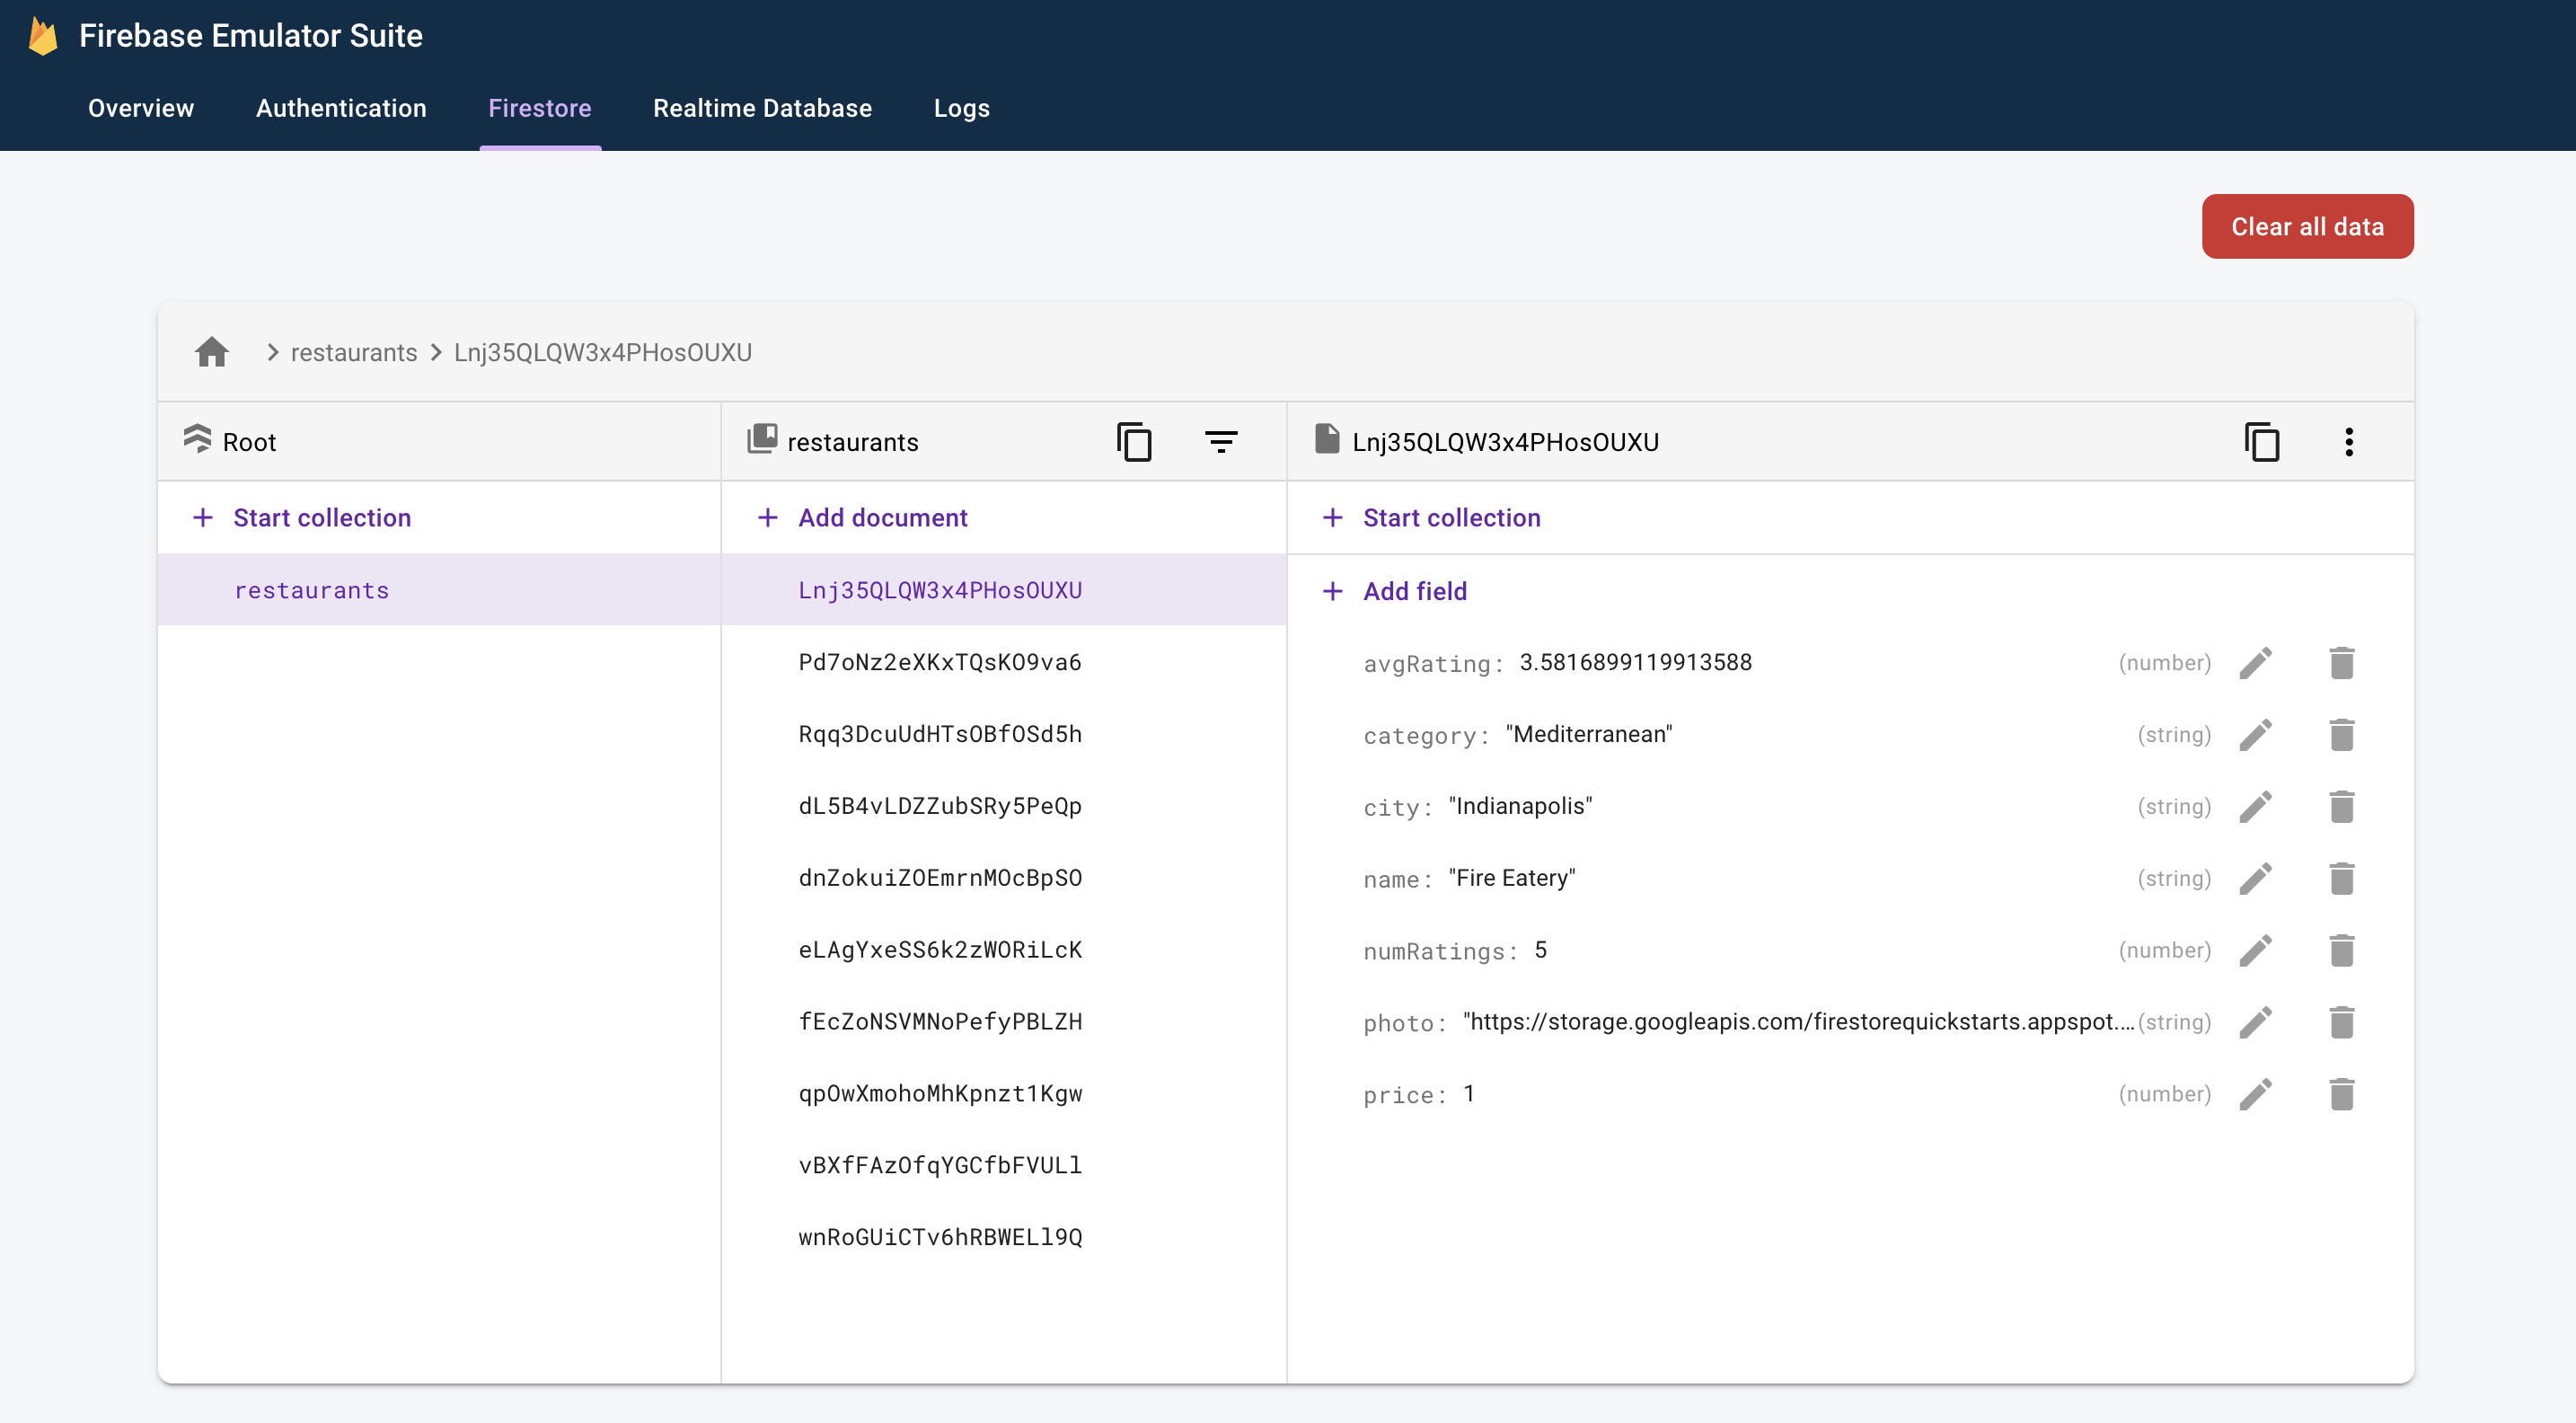
這項資料完全儲存在本機電腦上,事實上,您的實際專案甚至還沒有 Firestore 資料庫!也就是說,您可以放心修改及刪除這類資料,不會造成任何影響。
恭喜,您剛才將資料寫入 Firestore!在下一個步驟中,我們將瞭解如何在應用程式中顯示這項資料。
7. 顯示 Firestore 中的資料
在本步驟中,我們將瞭解如何從 Firestore 擷取資料,並在應用程式中顯示。從 Firestore 讀取資料的第一步是建立 Query。開啟 MainFragment.kt 檔案,然後在 onViewCreated() 方法開頭新增下列程式碼:
        // Firestore
        firestore = Firebase.firestore

        // Get the 50 highest rated restaurants
        query = firestore.collection("restaurants")
            .orderBy("avgRating", Query.Direction.DESCENDING)
            .limit(LIMIT.toLong())
現在我們要監聽查詢,以便取得所有相符的文件,並即時收到日後的更新通知。由於我們的最終目標是將這項資料繫結至 RecyclerView,因此需要建立 RecyclerView.Adapter 類別來監聽資料。
開啟 FirestoreAdapter 類別,這個類別已部分實作。首先,請讓轉接器實作 EventListener 並定義 onEvent 函式,以便接收 Firestore 查詢的更新:
abstract class FirestoreAdapter<VH : RecyclerView.ViewHolder>(private var query: Query?) :
        RecyclerView.Adapter<VH>(),
        EventListener<QuerySnapshot> { // Add this implements

    // ...

    // Add this method
    override fun onEvent(documentSnapshots: QuerySnapshot?, e: FirebaseFirestoreException?) {

        // Handle errors
        if (e != null) {
            Log.w(TAG, "onEvent:error", e)
            return
        }

        // Dispatch the event
        if (documentSnapshots != null) {
            for (change in documentSnapshots.documentChanges) {
                // snapshot of the changed document
                when (change.type) {
                    DocumentChange.Type.ADDED -> {
                        // TODO: handle document added
                    }
                    DocumentChange.Type.MODIFIED -> {
                        // TODO: handle document changed
                    }
                    DocumentChange.Type.REMOVED -> {
                        // TODO: handle document removed
                    }
                }
            }
        }

        onDataChanged()
    }

    // ...
}
在初始載入時,監聽器會為每個新文件接收一個 ADDED 事件。隨著查詢的結果集隨時間變更,監聽器會收到更多包含變更的事件。現在,我們來完成事件監聽器的實作。首先,請新增三種新方法:onDocumentAdded、onDocumentModified 和 onDocumentRemoved:
    private fun onDocumentAdded(change: DocumentChange) {
        snapshots.add(change.newIndex, change.document)
        notifyItemInserted(change.newIndex)
    }

    private fun onDocumentModified(change: DocumentChange) {
        if (change.oldIndex == change.newIndex) {
            // Item changed but remained in same position
            snapshots[change.oldIndex] = change.document
            notifyItemChanged(change.oldIndex)
        } else {
            // Item changed and changed position
            snapshots.removeAt(change.oldIndex)
            snapshots.add(change.newIndex, change.document)
            notifyItemMoved(change.oldIndex, change.newIndex)
        }
    }

    private fun onDocumentRemoved(change: DocumentChange) {
        snapshots.removeAt(change.oldIndex)
        notifyItemRemoved(change.oldIndex)
    }
然後從 onEvent 呼叫這些新方法:
    override fun onEvent(documentSnapshots: QuerySnapshot?, e: FirebaseFirestoreException?) {

        // Handle errors
        if (e != null) {
            Log.w(TAG, "onEvent:error", e)
            return
        }

        // Dispatch the event
        if (documentSnapshots != null) {
            for (change in documentSnapshots.documentChanges) {
                // snapshot of the changed document
                when (change.type) {
                    DocumentChange.Type.ADDED -> {
                        onDocumentAdded(change) // Add this line
                    }
                    DocumentChange.Type.MODIFIED -> {
                        onDocumentModified(change) // Add this line
                    }
                    DocumentChange.Type.REMOVED -> {
                        onDocumentRemoved(change) // Add this line
                    }
                }
            }
        }

        onDataChanged()
    }
最後,實作 startListening() 方法來附加監聽器:
    fun startListening() {
        if (registration == null) {
            registration = query.addSnapshotListener(this)
        }
    }
現在應用程式已完成設定,可以從 Firestore 讀取資料。再次執行應用程式,您應該會看到在上一個步驟中新增的餐廳:
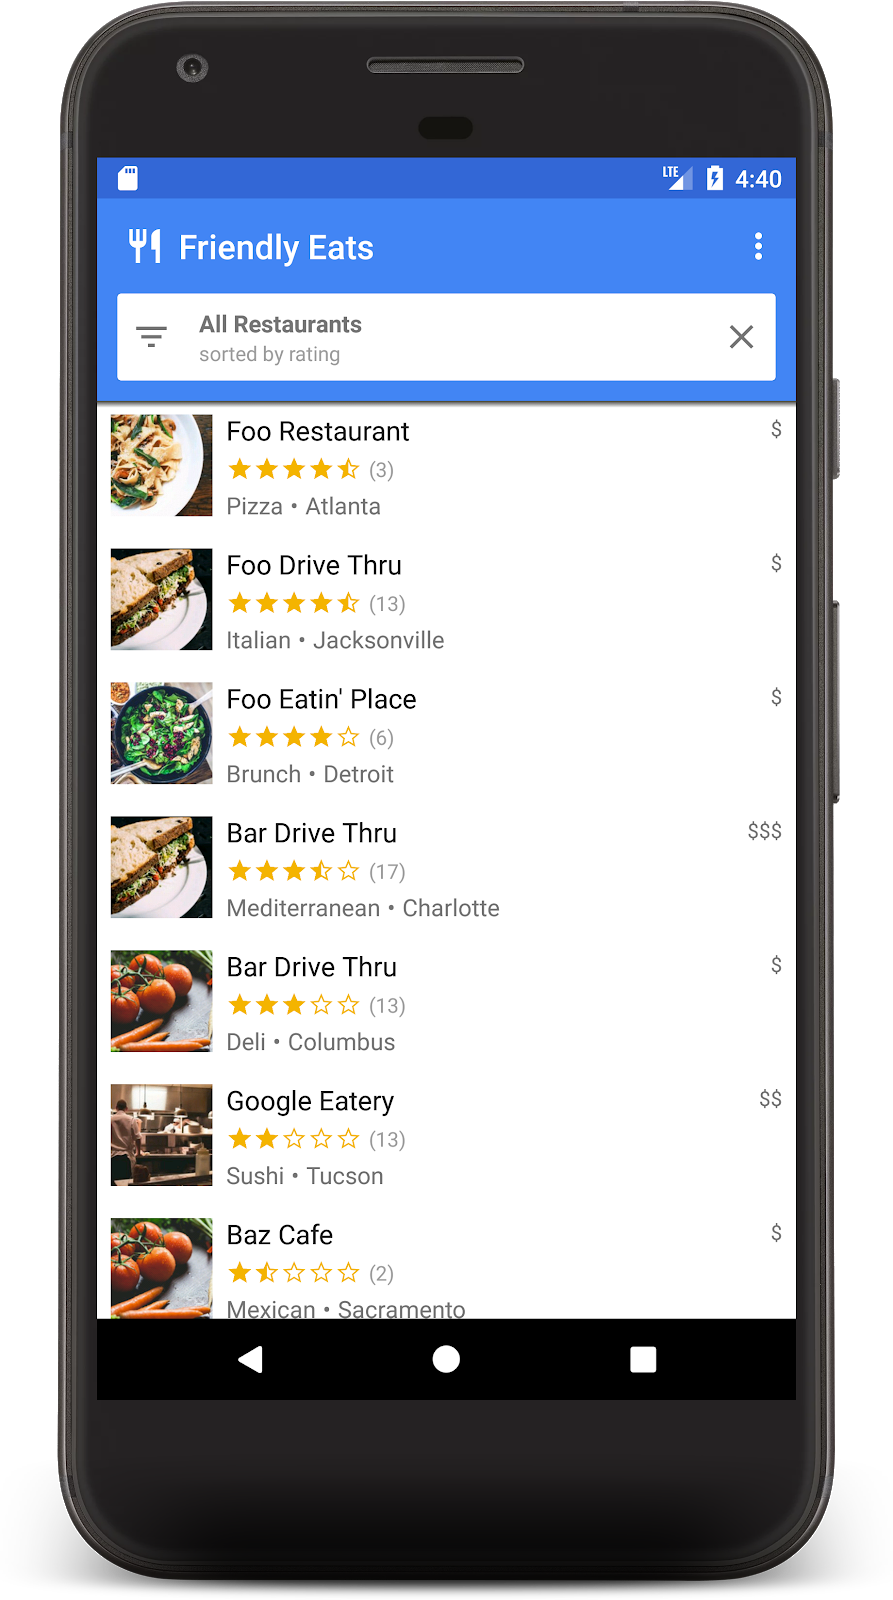
現在請返回瀏覽器中的模擬器 UI,然後編輯其中一個餐廳名稱。應用程式應該會立即反映這項變更!
8. 排序及篩選資料
應用程式目前會顯示整個集合中評分最高的餐廳,但在實際的餐廳應用程式中,使用者會想要排序及篩選資料。例如,應用程式應能顯示「費城最佳海鮮餐廳」或「最便宜的披薩」。
按一下應用程式頂端的白色橫條,即可開啟篩選器對話方塊。在本節中,我們將使用 Firestore 查詢來運作這個對話方塊:
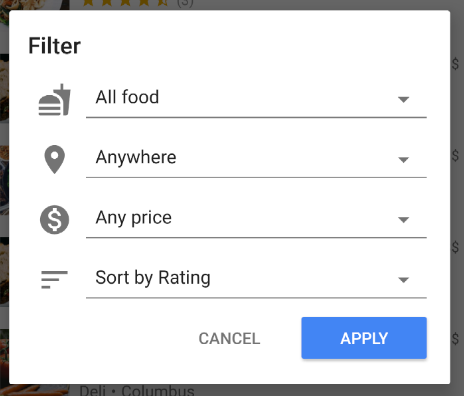
現在來編輯 MainFragment.kt 的 onFilter() 方法。這個方法會接受 Filters 物件,這是我們建立的輔助物件,用於擷取篩選器對話方塊的輸出內容。我們會變更這個方法,從篩選器建構查詢:
    override fun onFilter(filters: Filters) {
        // Construct query basic query
        var query: Query = firestore.collection("restaurants")

        // Category (equality filter)
        if (filters.hasCategory()) {
            query = query.whereEqualTo(Restaurant.FIELD_CATEGORY, filters.category)
        }

        // City (equality filter)
        if (filters.hasCity()) {
            query = query.whereEqualTo(Restaurant.FIELD_CITY, filters.city)
        }

        // Price (equality filter)
        if (filters.hasPrice()) {
            query = query.whereEqualTo(Restaurant.FIELD_PRICE, filters.price)
        }

        // Sort by (orderBy with direction)
        if (filters.hasSortBy()) {
            query = query.orderBy(filters.sortBy.toString(), filters.sortDirection)
        }

        // Limit items
        query = query.limit(LIMIT.toLong())

        // Update the query
        adapter.setQuery(query)

        // Set header
        binding.textCurrentSearch.text = HtmlCompat.fromHtml(
            filters.getSearchDescription(requireContext()),
            HtmlCompat.FROM_HTML_MODE_LEGACY
        )
        binding.textCurrentSortBy.text = filters.getOrderDescription(requireContext())

        // Save filters
        viewModel.filters = filters
    }
在上方程式碼片段中,我們附加 where 和 orderBy 子句,以符合指定篩選條件,藉此建構 Query 物件。
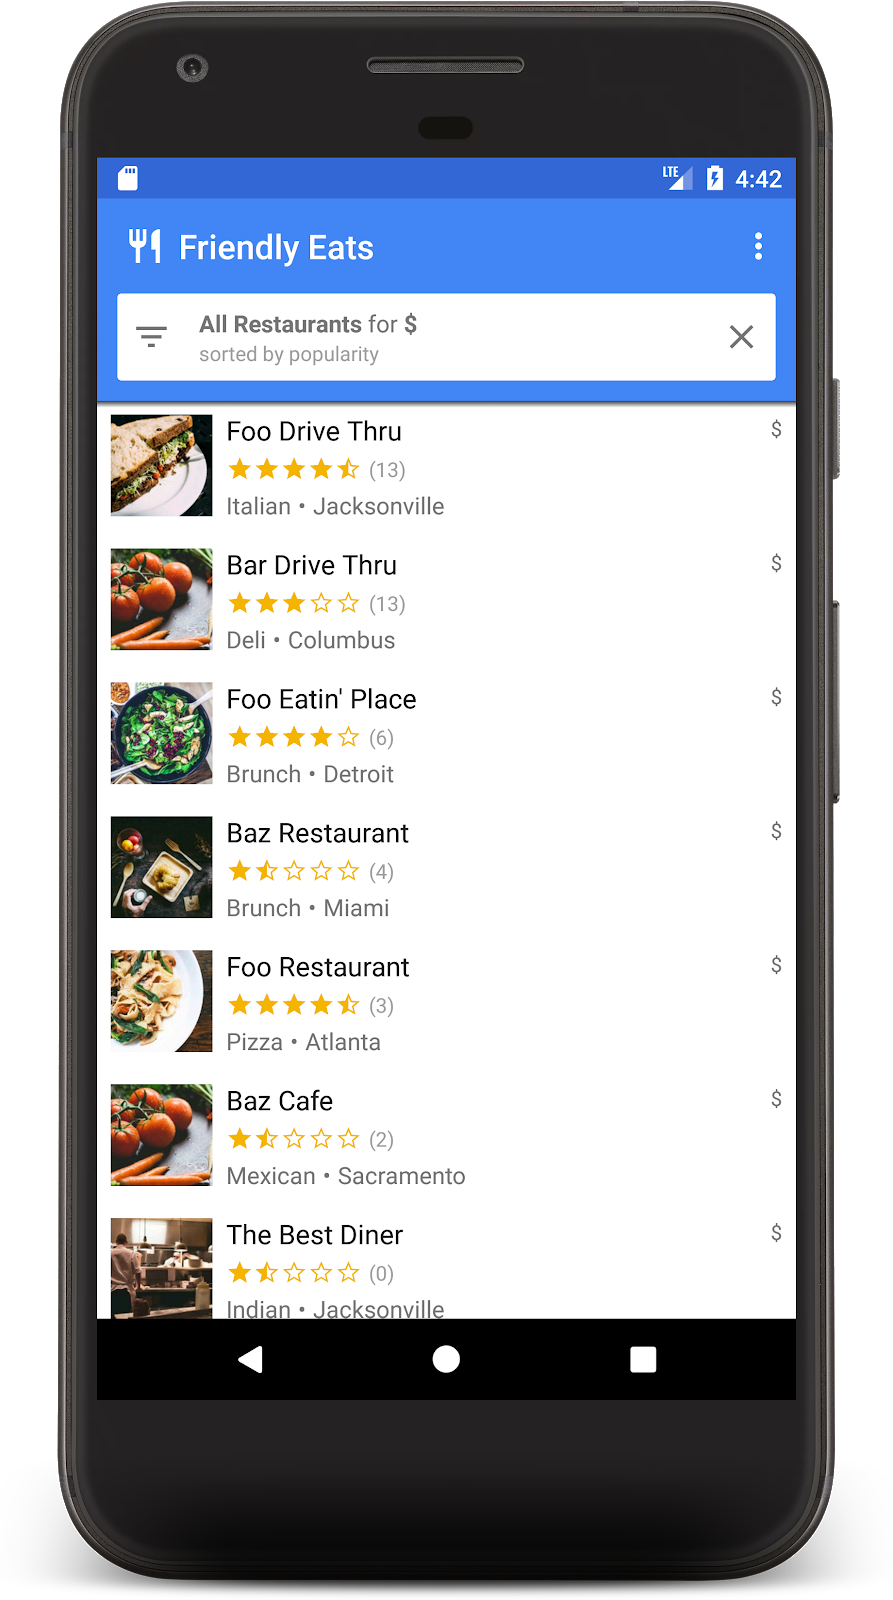
再次執行應用程式,然後選取下列篩選條件,顯示最受歡迎的低價餐廳:
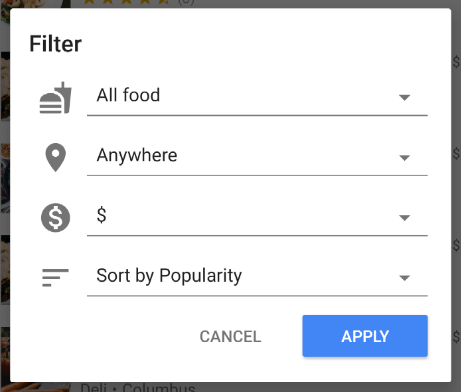
現在應該會看到篩選後的餐廳清單,只包含低價選項:
如果您已完成上述步驟,就代表您已在 Firestore 上建構出功能完備的餐廳推薦檢視應用程式!你現在可以即時排序及篩選餐廳。在接下來的幾個部分,我們會為餐廳新增評論,並為應用程式新增安全性規則。
9. 在子集合中整理資料
在本節中,我們將為應用程式新增評分功能,讓使用者可以評論自己最喜歡 (或最不喜歡) 的餐廳。
集合和子集合
目前為止,我們已將所有餐廳資料儲存在名為「restaurants」的頂層集合中。當使用者為餐廳評分時,我們想在餐廳中新增 Rating 物件。在這項工作中,我們會使用子集合。您可以將子集合視為附加至文件的集合。因此,每份餐廳文件都會有包含評分文件的評分子集合。子集合可協助整理資料,不會造成文件膨脹,也不需要複雜的查詢。
如要存取子集合,請在父項文件中呼叫 .collection():
val subRef = firestore.collection("restaurants")
        .document("abc123")
        .collection("ratings")
您可以存取及查詢子集合,就像存取及查詢頂層集合一樣,不會有大小限制或效能變化。如要進一步瞭解 Firestore 資料模型,請參閱這篇文章。
在交易中寫入資料
如要將 Rating 新增至適當的子集合,只需要呼叫 .add(),但我們也需要更新 Restaurant 物件的平均評分和評分次數,以反映新資料。如果我們使用個別作業進行這兩項變更,可能會發生多種競爭情況,導致資料過時或不正確。
為確保評分新增正確,我們會使用交易將評分新增至餐廳。這項交易會執行下列動作:
- 讀取餐廳目前的評分並計算新評分
- 將評分新增至子集合
- 更新餐廳的平均評分和評分次數
開啟 RestaurantDetailFragment.kt 並實作 addRating 函式:
    private fun addRating(restaurantRef: DocumentReference, rating: Rating): Task<Void> {
        // Create reference for new rating, for use inside the transaction
        val ratingRef = restaurantRef.collection("ratings").document()

        // In a transaction, add the new rating and update the aggregate totals
        return firestore.runTransaction { transaction ->
            val restaurant = transaction.get(restaurantRef).toObject<Restaurant>()
                ?: throw Exception("Restaurant not found at ${restaurantRef.path}")

            // Compute new number of ratings
            val newNumRatings = restaurant.numRatings + 1

            // Compute new average rating
            val oldRatingTotal = restaurant.avgRating * restaurant.numRatings
            val newAvgRating = (oldRatingTotal + rating.rating) / newNumRatings

            // Set new restaurant info
            restaurant.numRatings = newNumRatings
            restaurant.avgRating = newAvgRating

            // Commit to Firestore
            transaction.set(restaurantRef, restaurant)
            transaction.set(ratingRef, rating)

            null
        }
    }
addRating() 函式會傳回代表整個交易的 Task。在 onRating() 函式中,系統會將監聽器新增至工作,以回應交易結果。
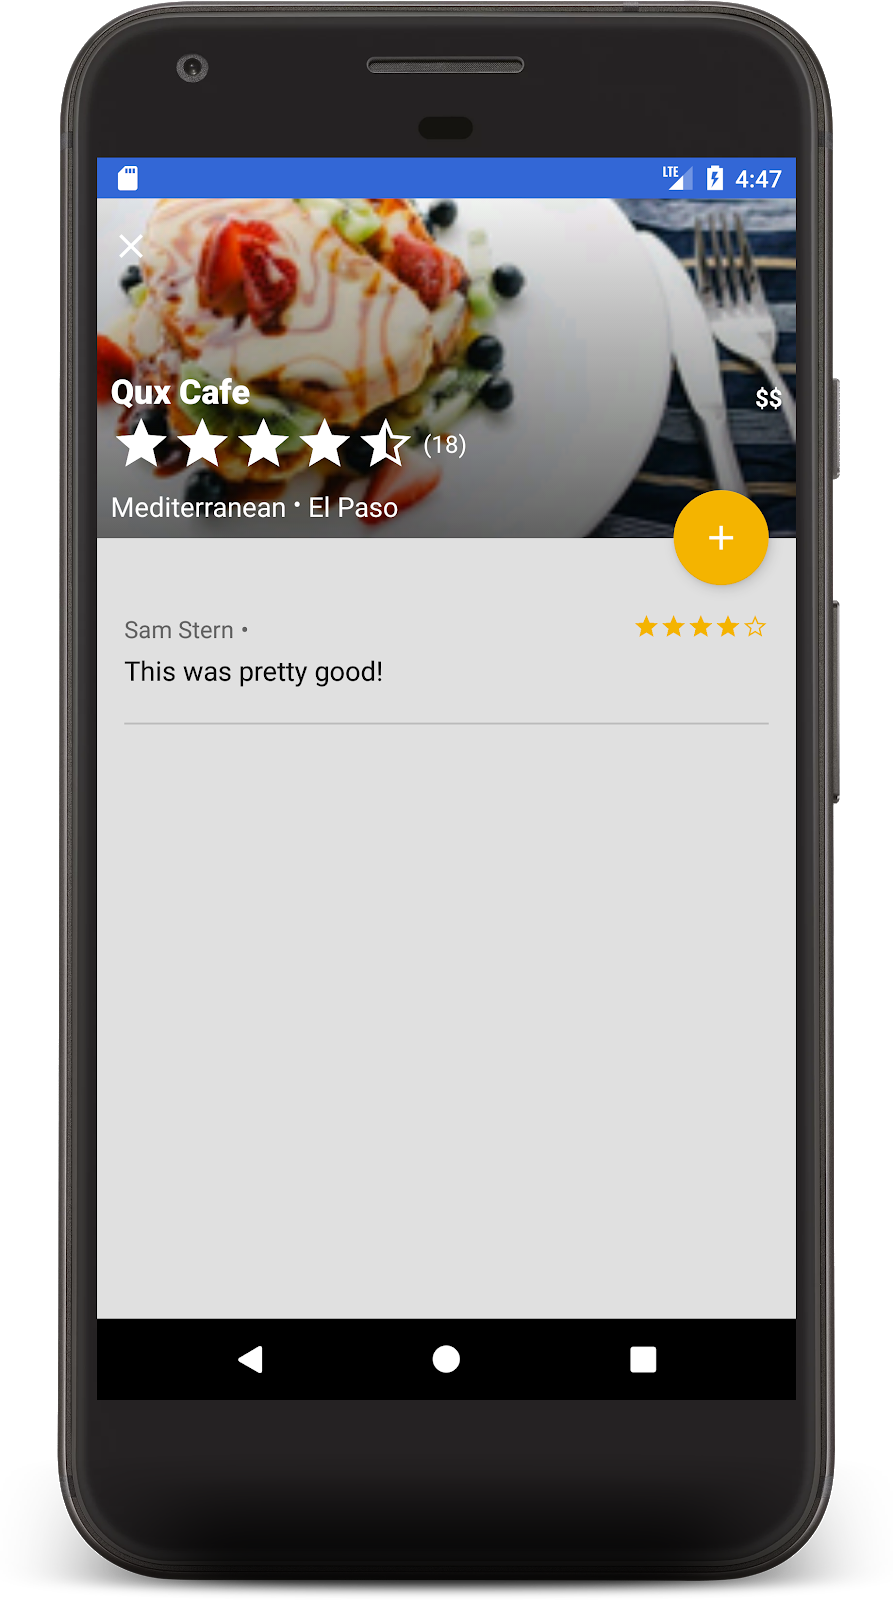
現在請再次執行應用程式,然後按一下其中一間餐廳,系統應會顯示餐廳詳細資料畫面。按一下「+」按鈕,開始新增評論。選取星級並輸入文字,即可新增評論。

按下「提交」後,系統就會啟動交易。交易完成後,你會在下方看到評論,餐廳的評論數也會更新:
恭喜!您現在已使用 Cloud Firestore 建構出社群、在地、行動餐廳評論應用程式。聽說最近很受歡迎。
10. 保護您的資料
目前為止,我們尚未考量這個應用程式的安全性。如何確保使用者只能讀取和寫入正確的自有資料?Firestore 資料庫會透過名為「安全規則」的設定檔確保安全。
開啟 firestore.rules 檔案,並將內容替換為下列程式碼:
rules_version = '2';
service cloud.firestore {
  match /databases/{database}/documents {
    // Determine if the value of the field "key" is the same
    // before and after the request.
    function isUnchanged(key) {
      return (key in resource.data)
        && (key in request.resource.data)
        && (resource.data[key] == request.resource.data[key]);
    }

    // Restaurants
    match /restaurants/{restaurantId} {
      // Any signed-in user can read
      allow read: if request.auth != null;

      // Any signed-in user can create
      // WARNING: this rule is for demo purposes only!
      allow create: if request.auth != null;

      // Updates are allowed if no fields are added and name is unchanged
      allow update: if request.auth != null
                    && (request.resource.data.keys() == resource.data.keys())
                    && isUnchanged("name");

      // Deletes are not allowed.
      // Note: this is the default, there is no need to explicitly state this.
      allow delete: if false;

      // Ratings
      match /ratings/{ratingId} {
        // Any signed-in user can read
        allow read: if request.auth != null;

        // Any signed-in user can create if their uid matches the document
        allow create: if request.auth != null
                      && request.resource.data.userId == request.auth.uid;

        // Deletes and updates are not allowed (default)
        allow update, delete: if false;
      }
    }
  }
}
這些規則會限制存取權,確保用戶端只會進行安全變更。舉例來說,更新餐廳文件只能變更評分,無法變更名稱或任何其他不可變更的資料。只有使用者 ID 與登入使用者相符時,才能建立評分,防止遭到偽造。
如要進一步瞭解安全性規則,請參閱說明文件。
11. 結論
您現在已在 Firestore 上建立功能齊全的應用程式。您已瞭解最重要的 Firestore 功能,包括:
- 文件和集合
- 讀取及寫入資料
- 使用查詢排序及篩選
- 子集合
- 交易
瞭解詳情
如要進一步瞭解 Firestore,建議從下列資源著手:
本程式碼研究室中的餐廳應用程式是以「Friendly Eats」範例應用程式為基礎。您可以在這裡瀏覽該應用程式的原始碼。
選用:部署至正式環境
到目前為止,這個應用程式只使用 Firebase 模擬器套件。如要瞭解如何將這個應用程式部署至實際的 Firebase 專案,請繼續進行下一個步驟。
12. (選用) 部署應用程式
到目前為止,這個應用程式完全在本機執行,所有資料都包含在 Firebase 模擬器套件中。在本節中,您將瞭解如何設定 Firebase 專案,讓這個應用程式在正式環境中運作。
Firebase 驗證
在 Firebase 控制台中,前往「Authentication」部分,然後按一下「Get started」。前往「登入方式」分頁,然後從「原生供應商」選取「電子郵件/密碼」選項。
啟用「電子郵件/密碼」登入方式,然後按一下「儲存」。

Firestore
建立資料庫
前往控制台的「Firestore Database」部分,然後點選「建立資料庫」:
- 系統提示您選擇安全性規則時,請選擇以「正式版模式」啟動,我們會盡快更新這些規則。
- 為應用程式選擇要使用的資料庫位置。請注意,選取資料庫位置是永久決定,如要變更,必須建立新專案。如要進一步瞭解如何選擇專案位置,請參閱說明文件。
部署規則
如要部署先前編寫的安全防護規則,請在 Codelab 目錄中執行下列指令:
$ firebase deploy --only firestore:rules
這會將 firestore.rules 的內容部署至專案,您可以在控制台的「規則」分頁中確認。
部署索引
FriendlyEats 應用程式的排序和篩選功能相當複雜,因此需要多個自訂複合式索引。您可以在 Firebase 控制台中手動建立這些函式,但更簡單的方法是在 firestore.indexes.json 檔案中撰寫定義,然後使用 Firebase CLI 部署。
開啟 firestore.indexes.json 檔案後,您會發現系統已提供必要的索引:
{
  "indexes": [
    {
      "collectionId": "restaurants",
      "queryScope": "COLLECTION",
      "fields": [
        { "fieldPath": "city", "mode": "ASCENDING" },
        { "fieldPath": "avgRating", "mode": "DESCENDING" }
      ]
    },
    {
      "collectionId": "restaurants",
      "queryScope": "COLLECTION",
      "fields": [
        { "fieldPath": "category", "mode": "ASCENDING" },
        { "fieldPath": "avgRating", "mode": "DESCENDING" }
      ]
    },
    {
      "collectionId": "restaurants",
      "queryScope": "COLLECTION",
      "fields": [
        { "fieldPath": "price", "mode": "ASCENDING" },
        { "fieldPath": "avgRating", "mode": "DESCENDING" }
      ]
    },
    {
      "collectionId": "restaurants",
      "queryScope": "COLLECTION",
      "fields": [
        { "fieldPath": "city", "mode": "ASCENDING" },
        { "fieldPath": "numRatings", "mode": "DESCENDING" }
      ]
    },
    {
      "collectionId": "restaurants",
      "queryScope": "COLLECTION",
      "fields": [
        { "fieldPath": "category", "mode": "ASCENDING" },
        { "fieldPath": "numRatings", "mode": "DESCENDING" }
      ]
    },
    {
      "collectionId": "restaurants",
      "queryScope": "COLLECTION",
      "fields": [
        { "fieldPath": "price", "mode": "ASCENDING" },
        { "fieldPath": "numRatings", "mode": "DESCENDING" }
      ]
    },
    {
      "collectionId": "restaurants",
      "queryScope": "COLLECTION",
      "fields": [
        { "fieldPath": "city", "mode": "ASCENDING" },
        { "fieldPath": "price", "mode": "ASCENDING" }
      ]
    },
    {
      "collectionId": "restaurants",
      "fields": [
        { "fieldPath": "category", "mode": "ASCENDING" },
        { "fieldPath": "price", "mode": "ASCENDING" }
      ]
    }
  ],
  "fieldOverrides": []
}
如要部署這些索引,請執行下列指令:
$ firebase deploy --only firestore:indexes
請注意,建立索引需要時間,您可以在 Firebase 控制台中監控進度。
設定應用程式
在 util/FirestoreInitializer.kt 和 util/AuthInitializer.kt 檔案中,我們已將 Firebase SDK 設為在偵錯模式下連線至模擬器:
    override fun create(context: Context): FirebaseFirestore {
        val firestore = Firebase.firestore
        // Use emulators only in debug builds
        if (BuildConfig.DEBUG) {
            firestore.useEmulator(FIRESTORE_EMULATOR_HOST, FIRESTORE_EMULATOR_PORT)
        }
        return firestore
    }
如要使用實際的 Firebase 專案測試應用程式,您可以採取下列任一做法:
- 在發布模式中建構應用程式,並在裝置上執行。
- 暫時將
BuildConfig.DEBUG替換為false,然後再次執行應用程式。
請注意,您可能需要登出應用程式並重新登入,才能正確連線至正式版。