
1. 概要
この Codelab では、Cloud Functions for Firebase を使用して、チャットアプリのユーザーに通知を送信することで、チャット ウェブアプリに機能を追加する方法を学びます。
学習内容
- Firebase SDK を使用して Google Cloud Functions を作成する。
- Auth、Cloud Storage、Cloud Firestore イベントに基づいて Cloud Functions をトリガーする。
- ウェブアプリに Firebase Cloud Messaging サポートを追加する。
必要なもの
2. サンプルコードを取得する
コマンドラインから GitHub リポジトリのクローンを作成します。
git clone https://github.com/firebase/friendlychat
スターター アプリをインポートする
IDE を使用して、サンプルコード ディレクトリから 
cloud-functions-start ディレクトリを開くか、インポートします。このディレクトリには、この Codelab の開始用コードが含まれており、完全に機能する Chat ウェブアプリで構成されています。
3. Firebase プロジェクトを作成してアプリを設定する
プロジェクトを作成する
- Google アカウントを使用して Firebase コンソールにログインします。
- ボタンをクリックして新しいプロジェクトを作成し、プロジェクト名(例:
FriendlyChat)を入力します。
- [続行] をクリックします。
- Firebase の利用規約が表示されたら、内容を読み、同意して [続行] をクリックします。
- (省略可)Firebase コンソールで AI アシスタンス(「Gemini in Firebase」)を有効にします。
- この Codelab では Google アナリティクスは必要ないため、Google アナリティクスのオプションをオフに切り替えます。
- [プロジェクトを作成] をクリックし、プロジェクトのプロビジョニングが完了するまで待ってから、[続行] をクリックします。
Blaze プランにアップグレードする
Cloud Functions for Firebase と Cloud Storage for Firebase を使用するには、Firebase プロジェクトが従量課金制(Blaze)のお支払いプランに登録されている必要があります。つまり、Cloud Billing アカウントにリンクされている必要があります。
- Cloud 請求先アカウントには、クレジット カードなどの支払い方法が必要です。
- Firebase と Google Cloud を初めて使用する場合は、$300 のクレジットと無料トライアル用 Cloud 請求先アカウントを利用できるかどうかご確認ください。
- この Codelab をイベントの一環として実施する場合は、Cloud クレジットが利用可能かどうかを主催者に確認してください。
クレジットカードをお持ちでない場合や、Blaze 料金プランの継続に不安がある場合は、Firebase Emulator Suite の使用をご検討ください。これにより、ローカルマシンで Cloud Functions を無料でエミュレートできます。
Blaze お支払いプランのプロジェクトを含むすべての Firebase プロジェクトで、Cloud Functions の無料の使用量割り当てを利用できます。この Codelab で説明する手順は、無料枠の使用量上限内に収まります。ただし、Cloud Functions のビルドイメージのホストに使用される Cloud Storage から、少額の料金(約 $0.03)が請求されます。
プロジェクトを Blaze プランにアップグレードする手順は次のとおりです。
- Firebase コンソールで、[プランをアップグレード] を選択します。
- Blaze プランを選択します。画面の指示に沿って、Cloud 請求先アカウントをプロジェクトにリンクします。
このアップグレードの一環として Cloud 請求先アカウントを作成する必要があった場合は、Firebase コンソールのアップグレード フローに戻ってアップグレードを完了する必要がある場合があります。
Google Auth を有効にする
ユーザーがアプリにログインできるようにするには、有効にする必要がある Google 認証を使用します。
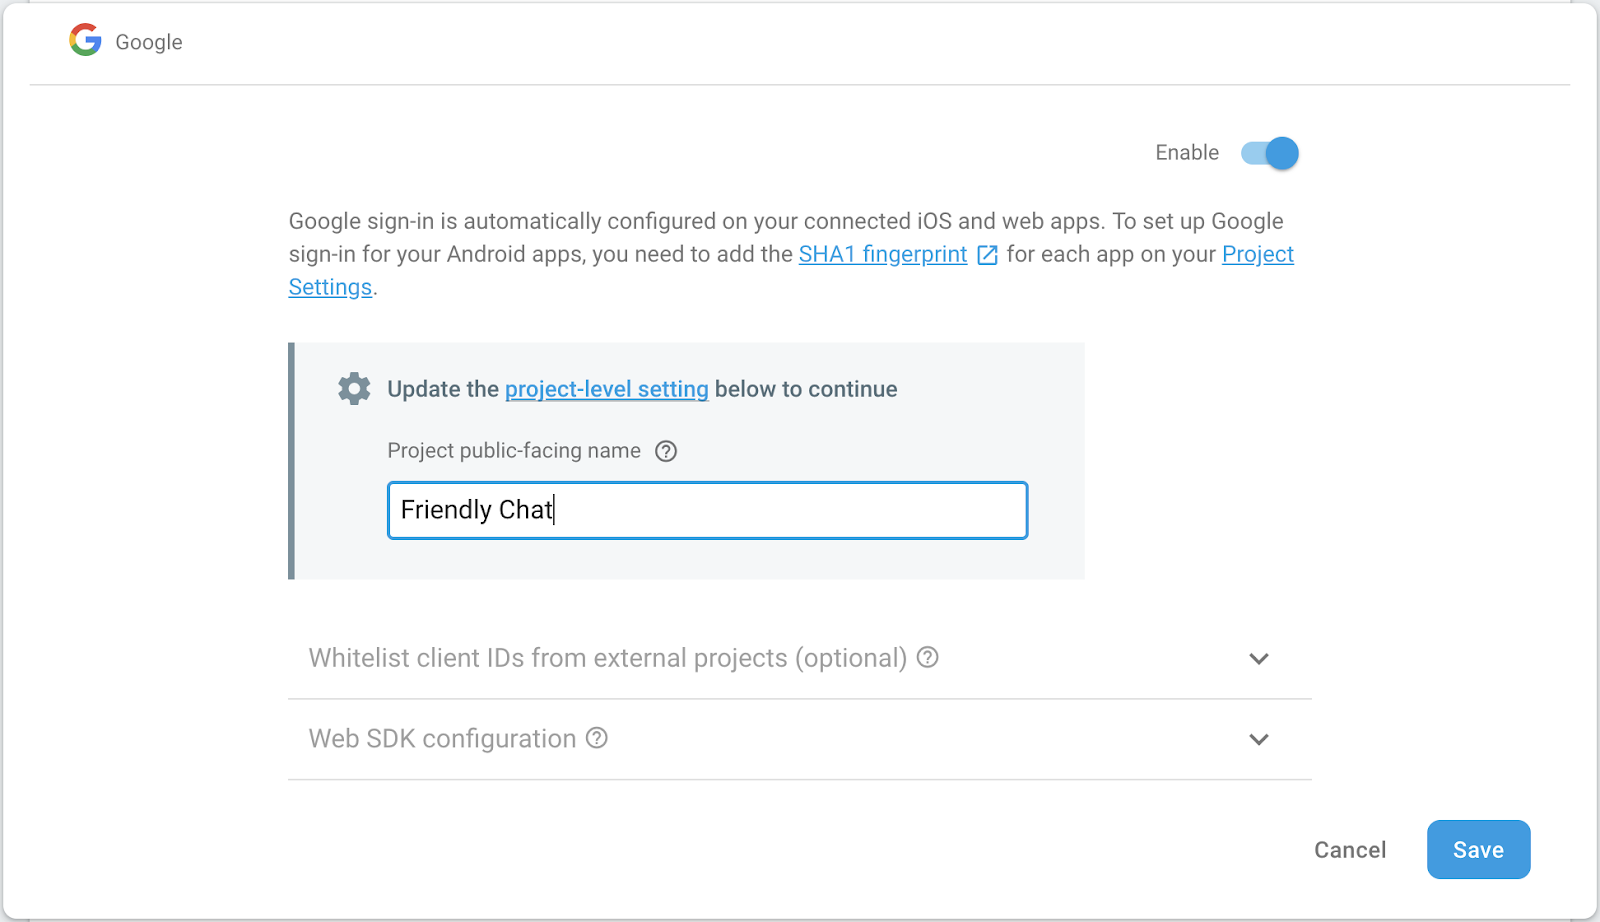
Firebase コンソールで、[Build] セクション > [Authentication] > [Sign-in method] タブを開きます(または、こちらをクリックして移動します)。次に、[Google] ログイン プロバイダを有効にして、[保存] をクリックします。これにより、ユーザーは Google アカウントでウェブアプリにログインできるようになります。
アプリの公開名を Friendly Chat に設定することもできます。
Cloud Storage for Firebase を設定する
このアプリは Cloud Storage を使用して画像をアップロードします。
Firebase プロジェクトで Cloud Storage for Firebase を設定する方法は次のとおりです。
- Firebase コンソールの左側のパネルで、[ビルド] を展開し、[Storage] を選択します。
- [開始] をクリックします。
- デフォルトの Storage バケットのロケーションを選択します。
US-WEST1、US-CENTRAL1、US-EAST1のバケットは、Google Cloud Storage の「無料枠」を利用できます。他のすべてのロケーションのバケットは、Google Cloud Storage の料金と使用量に従います。 - [テストモードで開始] をクリックします。セキュリティ ルールに関する免責条項を確認します。
Storage バケットのセキュリティ ルールを追加せずに、アプリを配布または公開しないでください。 - [作成] をクリックします。
ウェブアプリを追加する
Firebase コンソールでウェブアプリを追加します。そのためには、[プロジェクトの設定] に移動して [アプリを追加] まで下にスクロールします。プラットフォームとしてウェブを選択し、Firebase Hosting を設定するチェックボックスをオンにして、アプリを登録し、残りの手順で [次へ] をクリックし、最後に [コンソールに進む] をクリックします。
4. Firebase コマンドライン インターフェースをインストールする
Firebase コマンドライン インターフェース(CLI)を使用すると、ウェブアプリをローカルで提供し、ウェブアプリと Cloud Functions をデプロイできます。
CLI をインストールまたはアップグレードするには、次の npm コマンドを実行します。
npm -g install firebase-tools
CLI が正しくインストールされたことを確認するには、コンソールを開いて次のコマンドを実行します。
firebase --version
Firebase CLI のバージョンが 4.0.0 以降であることを確認します。これ以降のバージョンには、Cloud Functions に必要な最新の機能がすべて含まれています。バージョンがこれより低い場合は、上記のように npm install -g firebase-tools を実行してアップグレードします。
次のコマンドを実行して、Firebase CLI を承認します。
firebase login
cloud-functions-start ディレクトリにいることを確認し、Firebase プロジェクトを使用するように Firebase CLI を設定します。
firebase use --add
次に、プロジェクト ID を選択し、画面の手順に沿って操作します。プロンプトが表示されたら、codelab などのエイリアスを選択できます。
5. ウェブアプリをデプロイして実行する
プロジェクトのインポートと設定が完了したので、早速このウェブアプリを実行してみましょう。ターミナル ウィンドウを開き、cloud-functions-start フォルダに移動して、次のコマンドを使用してウェブアプリを Firebase Hosting にデプロイします。
firebase deploy --except functions
コンソールに次のような出力が表示されます。
i deploying database, storage, hosting
✔  database: rules ready to deploy.
i  storage: checking rules for compilation errors...
✔  storage: rules file compiled successfully
i  hosting: preparing ./ directory for upload...
✔  hosting: ./ folder uploaded successfully
✔ storage: rules file compiled successfully
✔ hosting: 8 files uploaded successfully
i starting release process (may take several minutes)...

✔ Deploy complete!

Project Console: https://console.firebase.google.com/project/friendlychat-1234/overview
Hosting URL: https://friendlychat-1234.firebaseapp.com
ウェブアプリを開く
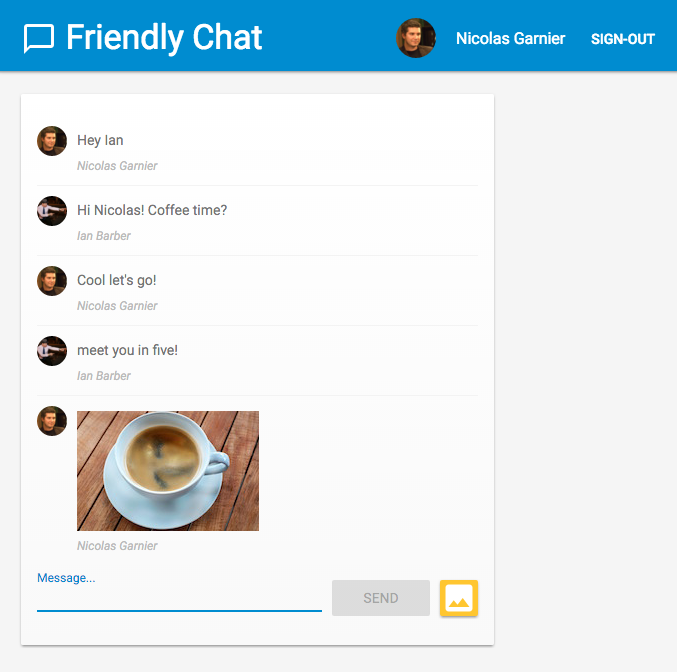
最後の行にホスティング URL が表示されます。これで、ウェブアプリはこの URL(https://<project-id>.firebaseapp.com の形式)から提供されるようになります。この URL を開きます。チャットアプリの実行時の UI が表示されます。
[Google でログイン] ボタンを使用してアプリにログインし、メッセージを追加したり、画像を投稿したりしてみてください。
新しいブラウザで初めてアプリにログインした場合、通知の許可を求められたら、許可してください。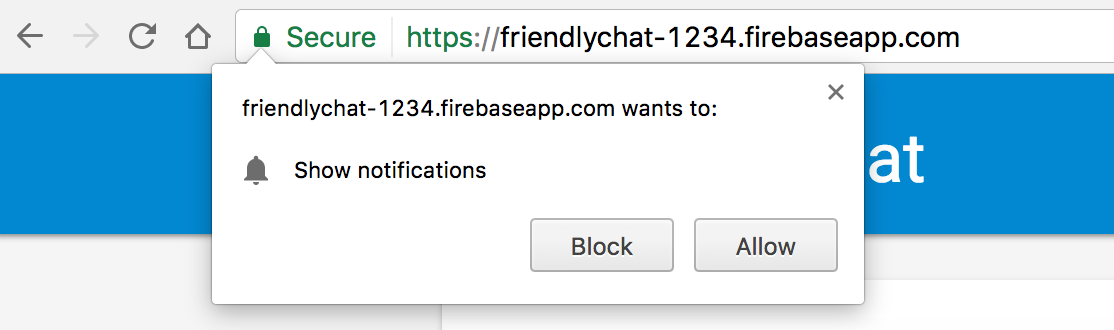
後で通知を有効にする必要があります。
誤って [ブロック] をクリックしてしまった場合は、Chrome アドレスバーで URL の左にある [🔒 保護された通信] ボタンをクリックし、[通知] の横にあるバーを切り替えて設定を変更します。

次に、Firebase SDK for Cloud Functions を使用して機能を追加します。
6. functions ディレクトリ
Cloud Functions では、サーバーを設定しなくても Cloud で実行可能なコードを簡単に追加できます。Firebase Auth、Cloud Storage、Firebase Firestore データベースのイベント発生時に実行する関数の作成方法について説明します。まず、Auth から始めましょう。
Firebase SDK for Cloud Functions を使用する場合、作成する関数のコードはデフォルトで functions ディレクトリに保存されます。関数のコードは Node.js アプリになるので、アプリの情報と依存関係を示す package.json が必要です。
この作業を簡単にするため、コードを配置する functions/index.js ファイルはすでに作成されています。先に進む前に、このファイルを確認してください。
cd functions
ls
Node.js に精通していない場合は、Codelab を続行する前に、Node.js について詳しく学習することをおすすめします。
package.json ファイルには、必要な 2 つの依存関係、Firebase SDK for Cloud Functions と Firebase Admin SDK がすでに記述されています。ローカルにインストールするには、functions フォルダに移動して次のコマンドを実行します。
npm install
次に、index.js ファイルを見てみましょう。
index.js
/**
 * Copyright 2017 Google Inc. All Rights Reserved.
 * ...
 */

// TODO(DEVELOPER): Import the Cloud Functions for Firebase and the Firebase Admin modules here.

// TODO(DEVELOPER): Write the addWelcomeMessage Function here.

// TODO(DEVELOPER): Write the blurImages Function here.

// TODO(DEVELOPER): Write the sendNotification Function here.
必要なモジュールをインポートし、TODO の代わりに 3 つの関数を記述します。まず、必要な Node モジュールをインポートします。
7. Cloud Functions モジュールと Firebase Admin モジュールをインポートする
この Codelab では 2 つのモジュールが必要です。firebase-functions を使用すると Cloud Functions のトリガーとログを書き込むことができ、firebase-admin を使用すると管理者アクセス権でサーバー上の Firebase プラットフォームを使用して Cloud Firestore への書き込みや FCM 通知の送信などのアクションを実行できます。
index.js ファイルで、最初の TODO を次のコードに置き換えます。
index.js
/**
 * Copyright 2017 Google Inc. All Rights Reserved.
 * ...
 */

// Import the Firebase SDK for Google Cloud Functions.
const functions = require('firebase-functions');
// Import and initialize the Firebase Admin SDK.
const admin = require('firebase-admin');
admin.initializeApp();

// TODO(DEVELOPER): Write the addWelcomeMessage Function here.

// TODO(DEVELOPER): Write the blurImages Function here.

// TODO(DEVELOPER): Write the sendNotification Function here.
Firebase Admin SDK は、Cloud Functions 環境やその他の Google Cloud Platform コンテナにデプロイするときに自動的に設定されるようにすることができます。これは、引数を指定せずに admin.initializeApp() を呼び出すと発生します。
次に、このチャットアプリにユーザーが初めてログインしたときに実行される関数を追加し、ユーザーに表示するチャット メッセージを追加します。
8. 新規ユーザーへのウェルカム メッセージ
チャット メッセージの構造
FriendlyChat のチャット フィードに投稿されたメッセージは、Cloud Firestore に保存されます。メッセージに使用するデータ構造を見てみましょう。これを行うには、チャットに「Hello World」という新しいメッセージを投稿します。

これは次のように表示されます。

Firebase コンソールの [構築] セクションで、[Firestore データベース] をクリックします。メッセージ コレクションと、書き込んだメッセージを含むドキュメントが 1 つ表示されます。
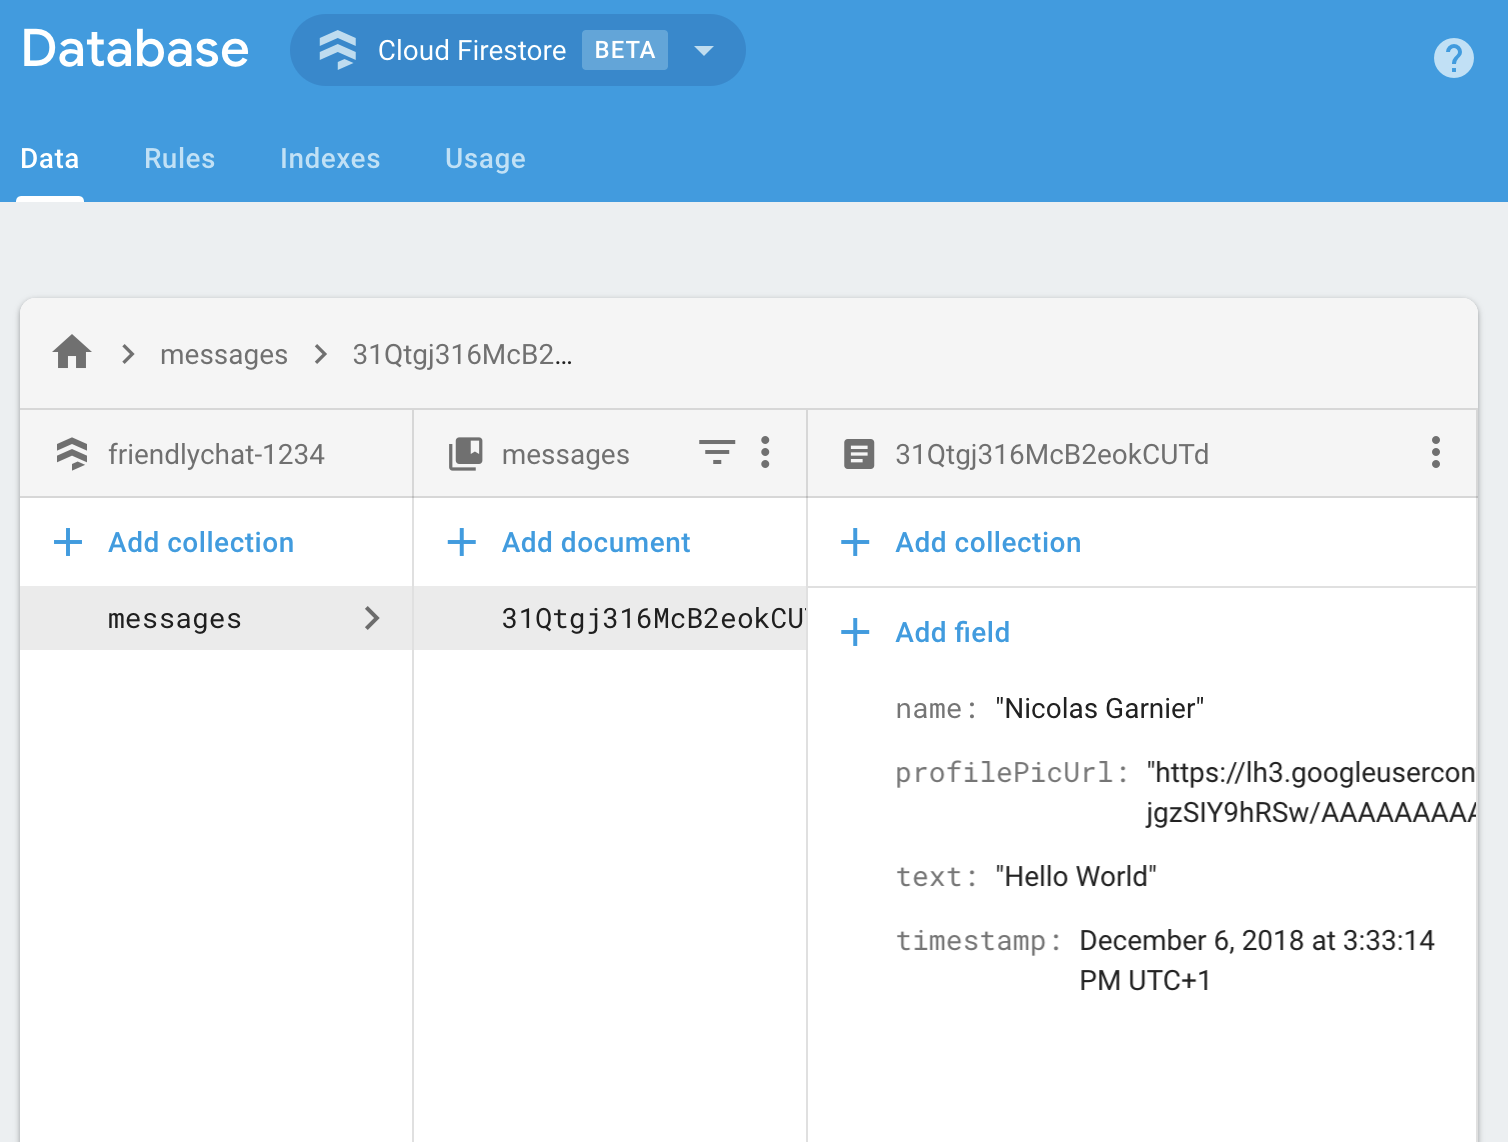
このように、Cloud Firestore でチャット メッセージは messages コレクションに name、profilePicUrl、text、timestamp という属性が追加されているドキュメントとして保存されています。
ウェルカム メッセージを追加する
最初の Cloud Function では、チャットに初めてログインするユーザーに表示するウェルカム メッセージを追加します。そのためには、トリガー functions.auth().onCreate を使用して、ユーザーが Firebase アプリに初めてログインするたびに関数を実行します。addWelcomeMessages 関数を index.js ファイルに追加します。
index.js
// Adds a message that welcomes new users into the chat.
exports.addWelcomeMessages = functions.auth.user().onCreate(async (user) => {
  functions.logger.log('A new user signed in for the first time.');
  const fullName = user.displayName || 'Anonymous';

  // Saves the new welcome message into the database
  // which then displays it in the FriendlyChat clients.
  await admin.firestore().collection('messages').add({
    name: 'Firebase Bot',
    profilePicUrl: '/images/firebase-logo.png', // Firebase logo
    text: `${fullName} signed in for the first time! Welcome!`,
    timestamp: admin.firestore.FieldValue.serverTimestamp(),
  });
  functions.logger.log('Welcome message written to database.');
});
この関数を特殊な exports オブジェクトに追加することにより、Node でこの関数を現在のファイルの外部から使用できるようにします。Cloud Functions ではこの処理が必要です。
上記の関数では、Firebase Bot によって投稿される新しいウェルカム メッセージをチャット メッセージのリストに追加します。これは、Cloud Firestore でチャットのメッセージが保存される messages コレクションの add メソッドを使用して行います。
これは非同期オペレーションであるため、Cloud Functions が早すぎるタイミングで実行されないように、Cloud Firestore の書き込みが完了したことを示す Promise を返す必要があります。
Cloud Functions の関数をデプロイする
Cloud Functions は、デプロイ後にのみ有効になります。これを行うには、コマンドラインで次のコマンドを実行します。
firebase deploy --only functions
コンソールに次のような出力が表示されます。
i  deploying functions
i  functions: ensuring necessary APIs are enabled...
⚠  functions: missing necessary APIs. Enabling now...
i  env: ensuring necessary APIs are enabled...
⚠  env: missing necessary APIs. Enabling now...
i  functions: waiting for APIs to activate...
i  env: waiting for APIs to activate...
✔  env: all necessary APIs are enabled
✔  functions: all necessary APIs are enabled
i  functions: preparing functions directory for uploading...
i  functions: packaged functions (X.XX KB) for uploading
✔  functions: functions folder uploaded successfully
i  starting release process (may take several minutes)...
i  functions: creating function addWelcomeMessages...
✔  functions[addWelcomeMessages]: Successful create operation.
✔  functions: all functions deployed successfully!

✔  Deploy complete!

Project Console: https://console.firebase.google.com/project/friendlypchat-1234/overview
関数をテストする
関数を正常にデプロイしたら、初めてログインするユーザーが必要です。
- ホスティング URL(
https://<project-id>.firebaseapp.comの形式)を使用して、ブラウザでアプリを開きます。 - 新しいユーザーで、[ログイン] ボタンを使用してアプリに初めてログインします。
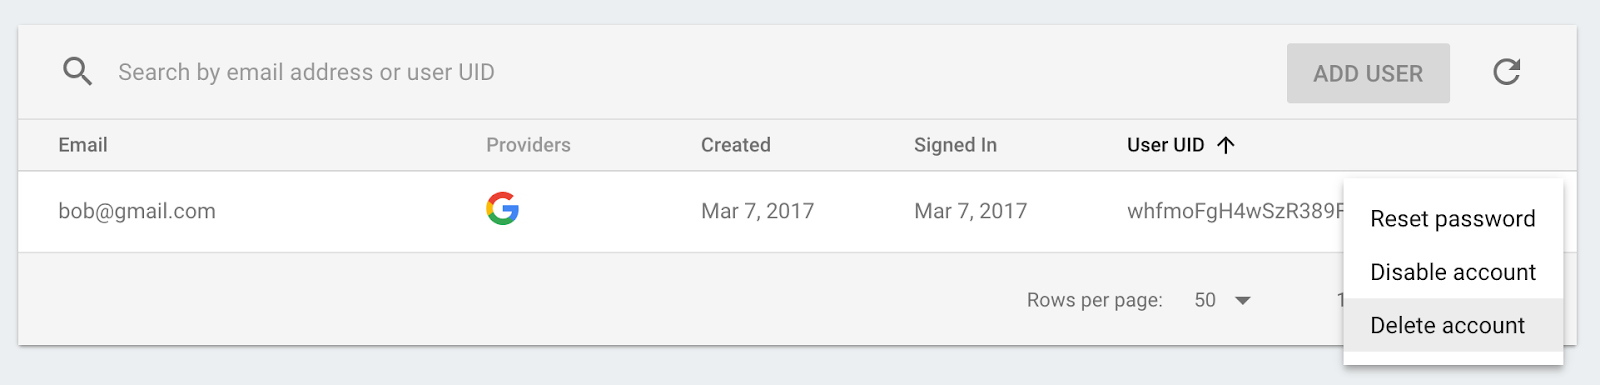
- すでにアプリにログインしている場合は、Firebase コンソールの [Authentication] セクションを開き、ユーザーのリストからあなたのアカウントを削除します。その後、再度ログインします。
- ログインすると、ウェルカム メッセージが自動的に表示されます。

9. 画像のモデレーション
ユーザーはさまざまな画像をチャットにアップロードする可能性があります。不適切な画像のモデレーションを行うことは重要であり、公開ソーシャル プラットフォームの場合は特に必要です。FriendlyChat では、チャットに公開される画像は Cloud Storage バケットに保存されます。
Cloud Functions では、functions.storage().onFinalize トリガーを使用して新しい画像のアップロードを検出できます。これは、Cloud Storage で新しいファイルがアップロードされるかファイルが変更されるたびに実行されます。
画像をモデレートする手順は次のとおりです。
- Cloud Vision API を使用して、画像にアダルト コンテンツや暴力的コンテンツが含まれていないか確認します。
- 含まれている場合は、実行中の Functions インスタンスでダウンロードします。
- ImageMagick を使用して画像にぼかしを入れます。
- ぼかしを入れた画像を Cloud Storage にアップロードします。
Cloud Vision API を有効にする
この関数では Google Cloud Vision API を使用するため、Firebase プロジェクトで API を有効にする必要があります。こちらのリンクにアクセスし、Firebase プロジェクトを選択して API を有効にします。
依存関係のインストール
画像を審査するには、Node.js 用の Google Cloud Vision クライアント ライブラリ @google-cloud/vision を使用して、Cloud Vision API で画像を処理し、不適切な画像を検出します。
このパッケージを Cloud Functions アプリにインストールするには、次の npm install --save コマンドを実行します。この操作は functions ディレクトリから行ってください。
npm install --save @google-cloud/vision@2.4.0
これにより、パッケージがローカルにインストールされ、宣言された依存関係として package.json ファイルに追加されます。
依存関係をインポートして構成する
インストールされた依存関係と、このセクションで必要となる Node.js コアモジュール(path、os、fs)をインポートするには、index.js ファイルの先頭に次の行を追加します。
index.js
const Vision = require('@google-cloud/vision');
const vision = new Vision.ImageAnnotatorClient();
const {promisify} = require('util');
const exec = promisify(require('child_process').exec);

const path = require('path');
const os = require('os');
const fs = require('fs');
関数は Google Cloud 環境内で実行されるため、Cloud Storage ライブラリと Cloud Vision ライブラリを設定する必要はありません。これらのライブラリは、プロジェクトを使用するように自動的に構成されます。
不適切な画像を検出する
functions.storage.onChange Cloud Functions トリガーを使用します。このトリガーは、Cloud Storage バケットでファイルまたはフォルダが作成または変更されると即座にコードを実行します。index.js ファイルに blurOffensiveImages 関数を追加します。
index.js
// Checks if uploaded images are flagged as Adult or Violence and if so blurs them.
exports.blurOffensiveImages = functions.runWith({memory: '2GB'}).storage.object().onFinalize(
    async (object) => {
      const imageUri = `gs://${object.bucket}/${object.name}`;
      // Check the image content using the Cloud Vision API.
      const batchAnnotateImagesResponse = await vision.safeSearchDetection(imageUri);
      const safeSearchResult = batchAnnotateImagesResponse[0].safeSearchAnnotation;
      const Likelihood = Vision.protos.google.cloud.vision.v1.Likelihood;
      if (Likelihood[safeSearchResult.adult] >= Likelihood.LIKELY ||
          Likelihood[safeSearchResult.violence] >= Likelihood.LIKELY) {
        functions.logger.log('The image', object.name, 'has been detected as inappropriate.');
        return blurImage(object.name);
      }
      functions.logger.log('The image', object.name, 'has been detected as OK.');
    });
Cloud Functions インスタンスに、この関数の実行に使用する設定を追加しています。.runWith({memory: '2GB'}) では、この関数のメモリ使用量が大きいため、デフォルトではなく 2 GB のメモリを取得することを要求しています。
この関数がトリガーされると、画像に対して Cloud Vision API が実行され、アダルト コンテンツや暴力的コンテンツが含まれていないかを検出します。これらの基準に基づいて画像が不適切と判断された場合は、画像にぼかしを入れます。これは、次のセクションで説明する blurImage 関数で行われます。
画像にぼかしを入れる
index.js ファイルに次の blurImage 関数を追加します。
index.js
// Blurs the given image located in the given bucket using ImageMagick.
async function blurImage(filePath) {
  const tempLocalFile = path.join(os.tmpdir(), path.basename(filePath));
  const messageId = filePath.split(path.sep)[1];
  const bucket = admin.storage().bucket();

  // Download file from bucket.
  await bucket.file(filePath).download({destination: tempLocalFile});
  functions.logger.log('Image has been downloaded to', tempLocalFile);
  // Blur the image using ImageMagick.
  await exec(`convert "${tempLocalFile}" -channel RGBA -blur 0x24 "${tempLocalFile}"`);
  functions.logger.log('Image has been blurred');
  // Uploading the Blurred image back into the bucket.
  await bucket.upload(tempLocalFile, {destination: filePath});
  functions.logger.log('Blurred image has been uploaded to', filePath);
  // Deleting the local file to free up disk space.
  fs.unlinkSync(tempLocalFile);
  functions.logger.log('Deleted local file.');
  // Indicate that the message has been moderated.
  await admin.firestore().collection('messages').doc(messageId).update({moderated: true});
  functions.logger.log('Marked the image as moderated in the database.');
}
上記の関数では、Cloud Storage から画像バイナリをダウンロードします。次に、ImageMagick の convert ツールを使用して画像にぼかしを入れ、その画像を Storage バケットにアップロードし直します。次に、Cloud Functions インスタンスでファイルを削除してディスク領域を解放します。これは、同じ Cloud Functions インスタンスを再利用できるためです。ファイルをクリーンアップしないと、ディスク領域が不足する可能性があります。最後に、画像のモデレーションを行ったことを示すブール値をチャット メッセージに追加します。これにより、クライアントのメッセージの更新がトリガーされます。
関数をデプロイする
関数はデプロイ後にのみ有効になります。コマンドラインで firebase deploy --only functions を実行します。
firebase deploy --only functions
コンソールに次のような出力が表示されます。
i  deploying functions
i  functions: ensuring necessary APIs are enabled...
✔  functions: all necessary APIs are enabled
i  functions: preparing functions directory for uploading...
i  functions: packaged functions (X.XX KB) for uploading
✔  functions: functions folder uploaded successfully
i  starting release process (may take several minutes)...
i  functions: updating function addWelcomeMessages...
i  functions: creating function blurOffensiveImages...
✔  functions[addWelcomeMessages]: Successful update operation.
✔  functions[blurOffensiveImages]: Successful create operation.
✔  functions: all functions deployed successfully!

✔  Deploy complete!

Project Console: https://console.firebase.google.com/project/friendlychat-1234/overview
関数をテストする
関数が正常にデプロイされたら、次の手順を行います。
- ホスティング URL(
https://<project-id>.firebaseapp.comの形式)を使用して、ブラウザでアプリを開きます。 - アプリにログインし、画像をアップロードします。

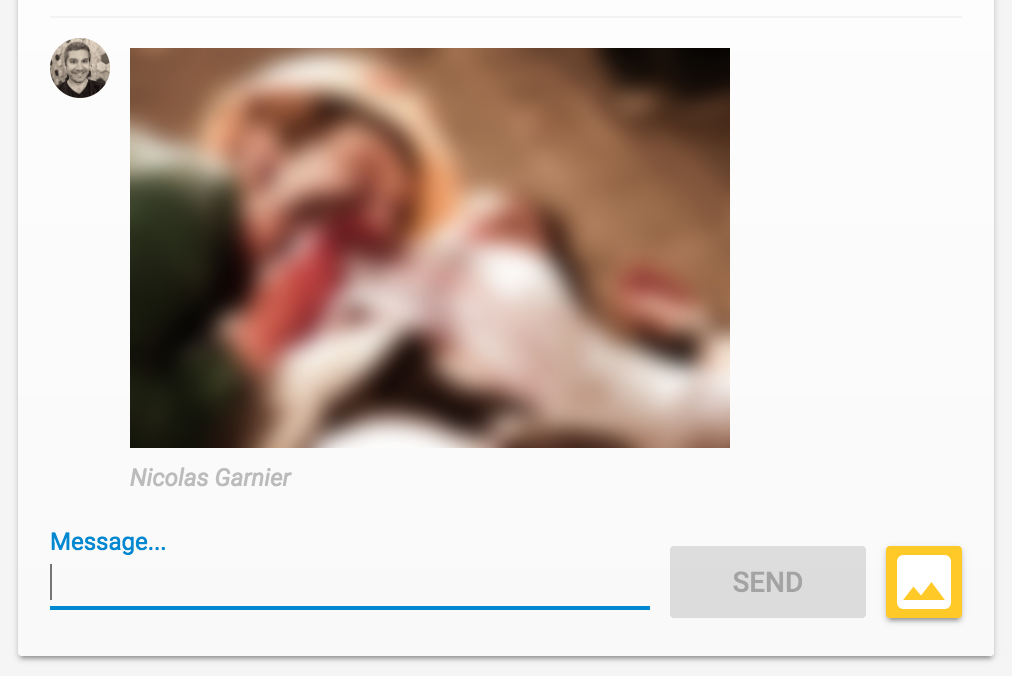
- こちらの肉食ゾンビの画像など、不適切な画像を選んでアップロードします。少し待つと、投稿の画像がぼかしを入れた画像に置き換わります。
10. 新しいメッセージの通知
このセクションでは、新しいメッセージが投稿されたときにチャット参加者に通知を送信する Cloud Function を追加します。
Firebase Cloud Messaging(FCM)を使用すると、プラットフォームをまたいでユーザーに通知を確実に送信できます。ユーザーに通知を送信するには、FCM デバイス トークンが必要です。使用するチャット ウェブアプリでは、ユーザーが新しいブラウザやデバイスで初めてアプリを開いたときに、すでにデバイス トークンを収集しています。これらのトークンは、Cloud Firestore の fcmTokens コレクションに保存されます。
ウェブアプリで FCM デバイストークンを取得する方法については、Firebase ウェブ Codelab をご覧ください。
通知を送信する
新しいメッセージが投稿されたことを検出するには、Cloud Functions トリガー functions.firestore.document().onCreate を使用します。このトリガーでは、Cloud Firestore の特定のパスで新しいオブジェクトが作成されると、コードが実行されます。index.js ファイルに sendNotifications 関数を追加します。
index.js
// Sends a notifications to all users when a new message is posted.
exports.sendNotifications = functions.firestore.document('messages/{messageId}').onCreate(
  async (snapshot) => {
    // Notification details.
    const text = snapshot.data().text;
    const payload = {
      notification: {
        title: `${snapshot.data().name} posted ${text ? 'a message' : 'an image'}`,
        body: text ? (text.length <= 100 ? text : text.substring(0, 97) + '...') : '',
        icon: snapshot.data().profilePicUrl || '/images/profile_placeholder.png',
        click_action: `https://${process.env.GCLOUD_PROJECT}.firebaseapp.com`,
      }
    };

    // Get the list of device tokens.
    const allTokens = await admin.firestore().collection('fcmTokens').get();
    const tokens = [];
    allTokens.forEach((tokenDoc) => {
      tokens.push(tokenDoc.id);
    });

    if (tokens.length > 0) {
      // Send notifications to all tokens.
      const response = await admin.messaging().sendToDevice(tokens, payload);
      await cleanupTokens(response, tokens);
      functions.logger.log('Notifications have been sent and tokens cleaned up.');
    }
  });
上の関数では、Cloud Firestore データベースからすべてのユーザーのデバイス トークンを取得し、admin.messaging().sendToDevice 関数で各トークンに通知を送信します。
トークンをクリーンアップする
最後に、有効ではなくなったトークンを削除します。この状況は、ユーザーから取得したトークンがそのブラウザやデバイスで使用されなくなると発生します。たとえば、ユーザーがブラウザ セッションの通知権限を取り消した場合に発生します。そのためには、index.js ファイルに次の cleanupTokens 関数を追加します。
index.js
// Cleans up the tokens that are no longer valid.
function cleanupTokens(response, tokens) {
 // For each notification we check if there was an error.
 const tokensDelete = [];
 response.results.forEach((result, index) => {
   const error = result.error;
   if (error) {
     functions.logger.error('Failure sending notification to', tokens[index], error);
     // Cleanup the tokens that are not registered anymore.
     if (error.code === 'messaging/invalid-registration-token' ||
         error.code === 'messaging/registration-token-not-registered') {
       const deleteTask = admin.firestore().collection('fcmTokens').doc(tokens[index]).delete();
       tokensDelete.push(deleteTask);
     }
   }
 });
 return Promise.all(tokensDelete);
}
関数をデプロイする
関数はデプロイ後にのみ有効になります。デプロイするには、コマンドラインで次のコマンドを実行します。
firebase deploy --only functions
コンソールに次のような出力が表示されます。
i  deploying functions
i  functions: ensuring necessary APIs are enabled...
✔  functions: all necessary APIs are enabled
i  functions: preparing functions directory for uploading...
i  functions: packaged functions (X.XX KB) for uploading
✔  functions: functions folder uploaded successfully
i  starting release process (may take several minutes)...
i  functions: updating function addWelcomeMessages...
i  functions: updating function blurOffensiveImages...
i  functions: creating function sendNotifications...
✔  functions[addWelcomeMessages]: Successful update operation.
✔  functions[blurOffensiveImages]: Successful updating operation.
✔  functions[sendNotifications]: Successful create operation.
✔  functions: all functions deployed successfully!

✔  Deploy complete!

Project Console: https://console.firebase.google.com/project/friendlychat-1234/overview
関数をテストする
- 関数が正常にデプロイされたら、ホスティング URL(
https://<project-id>.firebaseapp.comの形式)を使用してブラウザでアプリを開きます。 - アプリに初めてログインする場合は、通知の許可を求められたら、許可してください。
- チャットアプリのタブを閉じるか、別のタブを表示します。通知はアプリがバックグラウンドで動作しているときのみ表示されます。アプリがフォアグラウンドで動作しているときにもメッセージを受信する方法については、こちらのドキュメントをご確認ください。
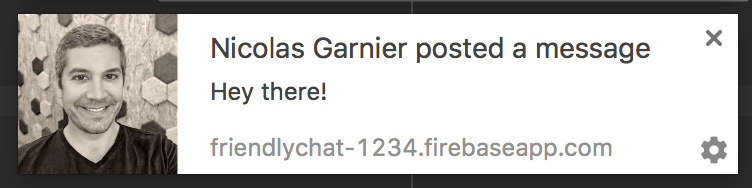
- 別のブラウザ(またはシークレット ウィンドウ)を使用してアプリにログインし、メッセージを投稿します。1 つ目のブラウザによって通知が表示されます。
11. 完了
Firebase SDK for Cloud Functions を使用してチャットアプリにサーバー側コンポーネントを追加しました。
学習した内容
- Firebase SDK for Cloud Functions を使用して Cloud Functions を作成する。
- Auth、Cloud Storage、Cloud Firestore イベントに基づいて Cloud Functions をトリガーする。
- ウェブアプリに Firebase Cloud Messaging サポートを追加する。
- Firebase CLI を使用して Cloud Functions をデプロイする。
次のステップ
- 他の Cloud Functions のトリガーの種類について学習する。
- 作成するアプリで Firebase と Cloud Functions を使ってみてください。