
1. 개요
이 Codelab에서는 Firebase용 Cloud Functions를 사용하여 채팅 앱 사용자에게 알림을 보내 채팅 웹 앱에 기능을 추가하는 방법을 알아봅니다.
학습할 내용
- Firebase SDK를 사용하여 Google Cloud Functions를 생성합니다.
- 인증, Cloud Storage 및 Cloud Firestore 이벤트를 기반으로 Cloud Functions를 트리거합니다.
- 웹 앱에 Firebase 클라우드 메시징 지원 기능을 추가합니다.
필요한 사항
2. 샘플 코드 가져오기
명령줄에서 GitHub 저장소를 클론합니다.
git clone https://github.com/firebase/friendlychat
시작 앱 가져오기
IDE를 사용하여 샘플 코드 디렉터리에서 
cloud-functions-start 디렉터리를 열거나 가져옵니다. 이 디렉터리에는 모든 기능을 갖춘 채팅 웹 앱으로 구성된 Codelab의 시작 코드가 포함되어 있습니다.
3. Firebase 프로젝트 만들기 및 앱 설정
프로젝트 만들기
- Google 계정을 사용하여 Firebase Console에 로그인합니다.
- 버튼을 클릭하여 새 프로젝트를 만든 다음 프로젝트 이름 (예:
FriendlyChat)을 입력합니다.
- 계속을 클릭합니다.
- 메시지가 표시되면 Firebase 약관을 검토하고 이에 동의한 다음 계속을 클릭합니다.
- (선택사항) Firebase Console에서 AI 지원('Firebase의 Gemini'라고 함)을 사용 설정합니다.
- 이 Codelab에서는 Google 애널리틱스가 필요하지 않으므로 Google 애널리틱스 옵션을 사용 중지합니다.
- 프로젝트 만들기를 클릭하고 프로젝트가 프로비저닝될 때까지 기다린 다음 계속을 클릭합니다.
Blaze 요금제로 업그레이드
Firebase용 Cloud Functions 및 Firebase용 Cloud Storage를 사용하려면 Firebase 프로젝트가 사용한 만큼만 지불 (Blaze) 요금제를 사용해야 합니다. 즉, Cloud Billing 계정에 연결되어 있어야 합니다.
- Cloud Billing 계정에는 신용카드와 같은 결제 수단이 필요합니다.
- Firebase와 Google Cloud를 처음 사용하는 경우 $300 크레딧과 무료 체험판 Cloud Billing 계정을 받을 자격이 되는지 확인하세요.
- 이 Codelab을 이벤트의 일환으로 진행하는 경우 주최자에게 사용 가능한 Cloud 크레딧이 있는지 문의하세요.
신용카드를 사용할 수 없거나 Blaze 요금제를 계속 사용하는 것이 불편한 경우 Firebase 에뮬레이터 도구 모음을 사용하여 로컬 머신에서 Cloud Functions를 무료로 에뮬레이션해 보세요.
Blaze 요금제를 사용하는 프로젝트를 비롯한 모든 Firebase 프로젝트는 Cloud Functions의 무료 사용량 할당량에 계속 액세스할 수 있습니다. 이 Codelab에 설명된 단계는 무료 등급 사용량 한도 내에 포함됩니다. 하지만 Cloud Functions 빌드 이미지를 호스팅하는 데 사용되는 Cloud Storage에서 소액의 요금 (약 $0.03)이 청구됩니다.
프로젝트를 Blaze 요금제로 업그레이드하려면 다음 단계를 따르세요.
- Firebase Console에서 요금제 업그레이드를 선택합니다.
- Blaze 요금제를 선택합니다. 화면에 표시된 안내에 따라 Cloud Billing 계정을 프로젝트에 연결합니다.
이 업그레이드의 일환으로 Cloud Billing 계정을 만들어야 하는 경우 업그레이드를 완료하기 위해 Firebase Console의 업그레이드 흐름으로 돌아가야 할 수 있습니다.
Google 인증 사용 설정
사용자가 앱에 로그인할 수 있도록 사용 설정해야 하는 Google 인증을 사용합니다.
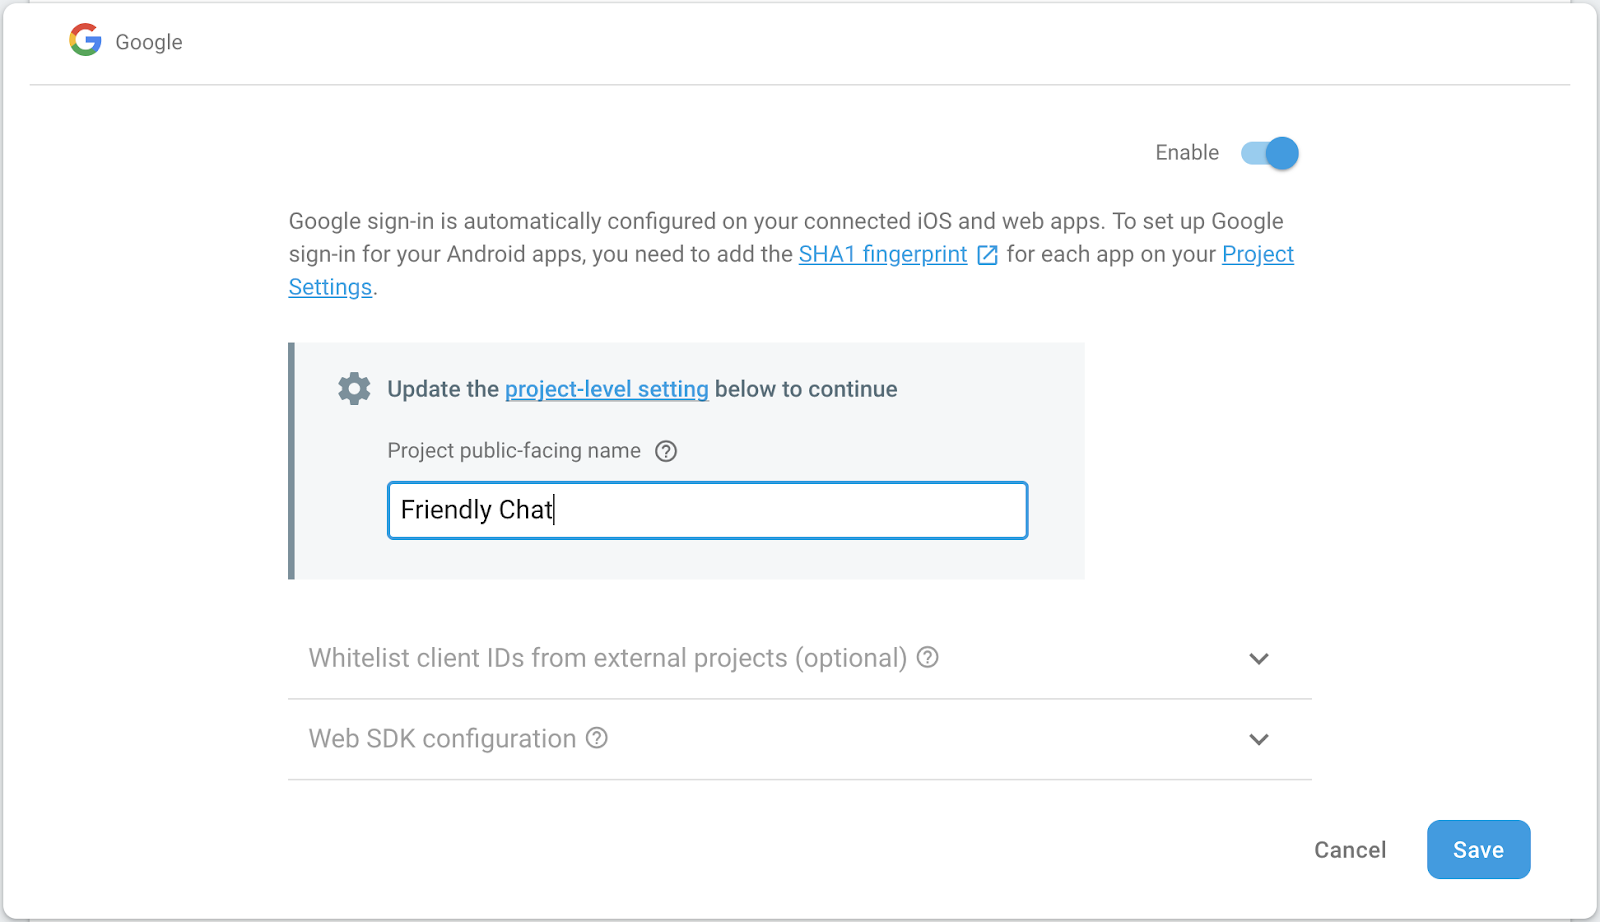
Firebase Console에서 빌드 섹션 > 인증 > 로그인 방법 탭을 엽니다 (또는 여기를 클릭하여 이동). 그런 다음 Google 로그인 제공업체를 사용 설정하고 저장을 클릭합니다. 이렇게 하면 사용자가 자신의 Google 계정으로 웹 앱에 로그인할 수 있습니다.
앱의 공개용 이름을 Friendly Chat으로 설정해도 됩니다.
Firebase용 Cloud Storage 설정
앱은 Cloud Storage를 사용하여 사진을 업로드합니다.
Firebase 프로젝트에서 Firebase용 Cloud Storage를 설정하는 방법은 다음과 같습니다.
- Firebase Console의 왼쪽 패널에서 빌드를 펼친 다음 스토리지를 선택합니다.
- 시작하기를 클릭합니다.
- 기본 스토리지 버킷의 위치를 선택합니다.
US-WEST1,US-CENTRAL1,US-EAST1의 버킷은 Google Cloud Storage의 '항상 무료' 등급을 활용할 수 있습니다. 다른 모든 위치의 버킷은 Google Cloud Storage 가격 책정 및 사용량을 따릅니다. - 테스트 모드로 시작을 클릭합니다. 보안 규칙에 관한 면책조항을 읽습니다.
스토리지 버킷에 대한 보안 규칙을 추가하지 않은 채 앱을 공개적으로 배포하거나 노출하지 마세요. - 만들기를 클릭합니다.
웹 앱 추가하기
Firebase Console에서 웹 앱을 추가합니다. 이렇게 하려면 프로젝트 설정으로 이동하여 앱 추가까지 아래로 스크롤합니다. 플랫폼으로 웹을 선택하고 Firebase 호스팅 설정 체크박스를 선택한 다음 앱을 등록하고 나머지 단계에서 다음을 클릭한 후 마지막으로 콘솔로 이동을 클릭합니다.
4. Firebase 명령줄 인터페이스 설치
Firebase 명령줄 인터페이스 (CLI)를 사용하면 로컬에서 웹 앱을 제공하고 웹 앱과 Cloud Functions를 배포할 수 있습니다.
CLI를 설치하거나 업그레이드하려면 다음 npm 명령어를 실행합니다.
npm -g install firebase-tools
CLI가 올바르게 설치되었는지 확인하려면 콘솔을 열고 다음을 실행합니다.
firebase --version
Cloud Functions에 필요한 최신 기능이 모두 있을 수 있도록 Firebase CLI의 버전이 4.0.0 이상인지 확인합니다. 그렇지 않은 경우 위와 같이 npm install -g firebase-tools를 실행하여 업그레이드합니다.
다음을 실행하여 Firebase CLI를 승인합니다.
firebase login
cloud-functions-start 디렉터리에 있는지 확인한 후 Firebase 프로젝트를 사용하도록 Firebase CLI를 설정합니다.
firebase use --add
그런 다음 프로젝트 ID를 선택하고 안내를 따릅니다. 메시지가 표시되면 codelab와 같은 별칭을 선택할 수 있습니다.
5. 웹 앱 배포 및 실행
프로젝트를 가져오고 구성했으므로 이제 처음으로 웹 앱을 실행할 수 있습니다. 터미널 창을 열고 cloud-functions-start 폴더로 이동한 후 다음을 사용하여 웹 앱을 Firebase 호스팅에 배포합니다.
firebase deploy --except functions
콘솔에 다음과 같은 결과가 표시됩니다.
i deploying database, storage, hosting
✔  database: rules ready to deploy.
i  storage: checking rules for compilation errors...
✔  storage: rules file compiled successfully
i  hosting: preparing ./ directory for upload...
✔  hosting: ./ folder uploaded successfully
✔ storage: rules file compiled successfully
✔ hosting: 8 files uploaded successfully
i starting release process (may take several minutes)...

✔ Deploy complete!

Project Console: https://console.firebase.google.com/project/friendlychat-1234/overview
Hosting URL: https://friendlychat-1234.firebaseapp.com
웹 앱 열기
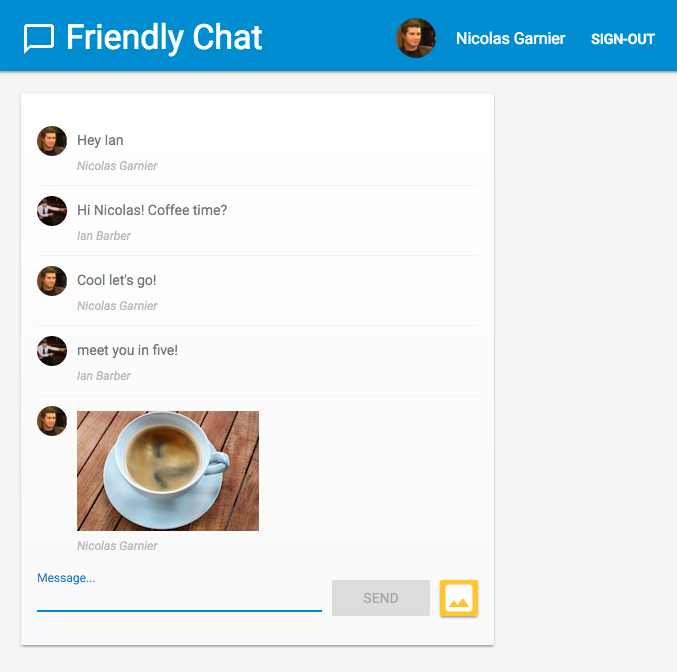
마지막 줄에 호스팅 URL이 표시됩니다. 이제 웹 앱이 이 URL에서 제공됩니다. URL은 https://<project-id>.firebaseapp.com 형식이어야 합니다. URL을 엽니다. 채팅 앱의 유효한 UI가 표시됩니다.
Google 계정으로 로그인 버튼을 사용하여 앱에 로그인하고 자유롭게 메시지를 추가하고 이미지를 게시할 수 있습니다.
새 브라우저에서 처음으로 앱에 로그인하는 경우 메시지가 표시되면 알림을 허용해야 합니다. 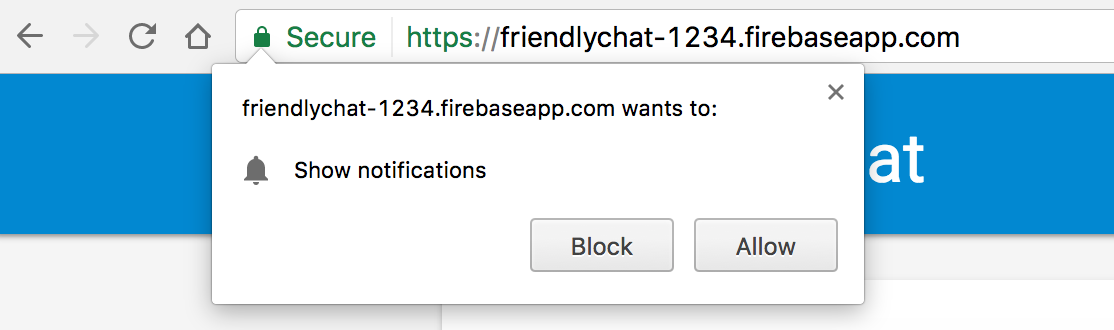
나중에 알림을 사용 설정해야 합니다.
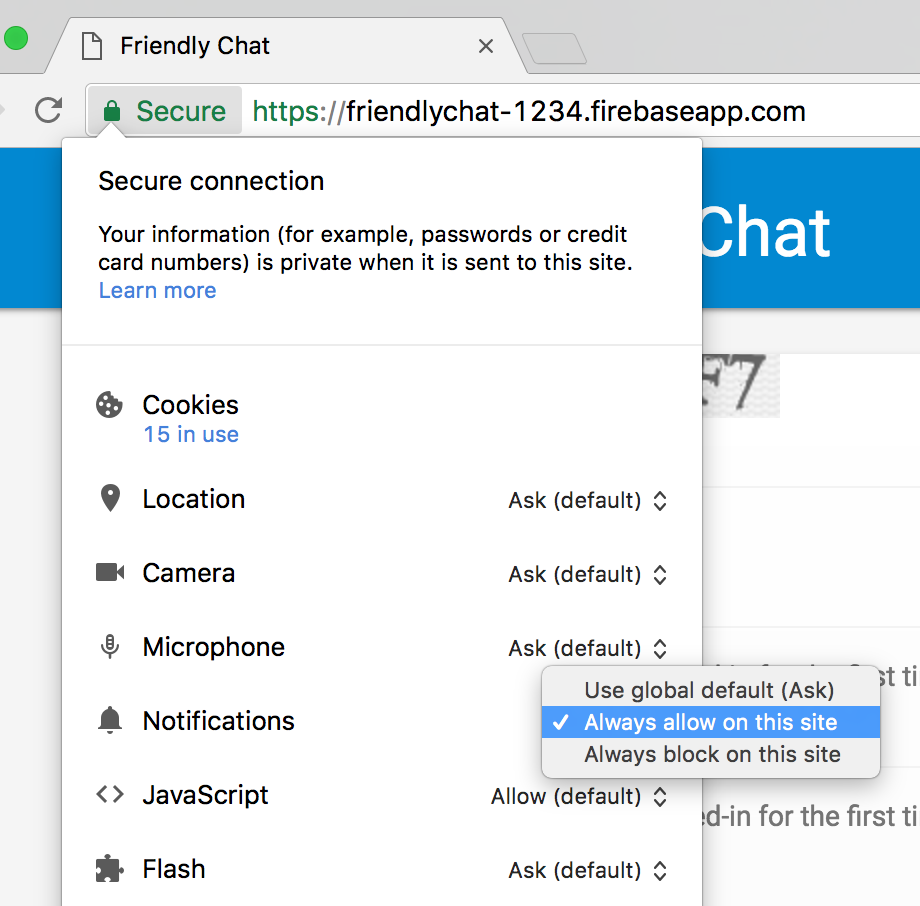
의도치 않게 차단을 클릭한 경우 Chrome Omnibar의 URL 왼쪽에 있는 🔒 보안 버튼을 클릭하고 알림 옆에 있는 막대를 전환하여 이 설정을 변경할 수 있습니다.
이제 Cloud Functions용 Firebase SDK를 사용하여 몇 가지 기능을 추가하겠습니다.
6. Functions 디렉터리
Cloud Functions를 사용하면 서버를 설정하지 않고도 클라우드에서 실행하는 코드를 쉽게 보유할 수 있습니다. Firebase 인증, Cloud Storage, Firebase Firestore 데이터베이스 이벤트에 반응하는 함수를 빌드하는 방법을 살펴봅니다. 인증부터 시작해 보겠습니다.
Cloud Functions용 Firebase SDK를 사용하면 기본적으로 Functions 코드가 functions 디렉터리에 있습니다. Functions 코드는 Node.js 앱이기도 하므로, 앱 관련 일부 정보를 제공하고 종속 항목을 나열하는 package.json이 필요합니다.
더 쉽게 진행할 수 있도록 코드가 들어갈 functions/index.js 파일을 이미 만들었습니다. 계속 진행하기 전에 이 파일을 자유롭게 검사하세요.
cd functions
ls
Node.js에 익숙하지 않다면 Codelab을 계속하기 전에 자세히 알아보는 것이 좋습니다.
package.json 파일에는 필요한 두 가지 종속 항목인 Cloud Functions용 Firebase SDK와 Firebase Admin SDK가 이미 있습니다. 로컬로 설치하려면 functions 폴더로 이동하여 다음을 실행하세요.
npm install
이제 index.js 파일을 살펴보겠습니다.
index.js
/**
 * Copyright 2017 Google Inc. All Rights Reserved.
 * ...
 */

// TODO(DEVELOPER): Import the Cloud Functions for Firebase and the Firebase Admin modules here.

// TODO(DEVELOPER): Write the addWelcomeMessage Function here.

// TODO(DEVELOPER): Write the blurImages Function here.

// TODO(DEVELOPER): Write the sendNotification Function here.
필요한 모듈을 가져온 다음 TODO 대신 세 개의 함수를 작성합니다. 필요한 Node 모듈을 가져오는 것부터 시작하겠습니다.
7. Cloud Functions 및 Firebase 관리자 모듈 가져오기
이 Codelab에서는 두 가지 모듈이 필요합니다. firebase-functions를 사용하면 Cloud Functions 트리거 및 로그를 작성할 수 있고 firebase-admin를 사용하면 관리자 액세스 권한이 있는 서버에서 Firebase 플랫폼을 사용하여 Cloud Firestore에 쓰거나 FCM 알림을 보내는 등의 작업을 할 수 있습니다.
index.js 파일에서 첫 번째 TODO을 다음으로 바꿉니다.
index.js
/**
 * Copyright 2017 Google Inc. All Rights Reserved.
 * ...
 */

// Import the Firebase SDK for Google Cloud Functions.
const functions = require('firebase-functions');
// Import and initialize the Firebase Admin SDK.
const admin = require('firebase-admin');
admin.initializeApp();

// TODO(DEVELOPER): Write the addWelcomeMessage Function here.

// TODO(DEVELOPER): Write the blurImages Function here.

// TODO(DEVELOPER): Write the sendNotification Function here.
Firebase Admin SDK는 Cloud Functions 환경이나 다른 Google Cloud Platform 컨테이너에 배포할 때 자동으로 구성될 수 있으며, 이는 인수 없이 admin.initializeApp()를 호출할 때 발생합니다.
이제 사용자가 채팅 앱에 처음으로 로그인할 때 실행되는 함수를 추가하고 사용자를 환영하는 채팅 메시지를 추가합니다.
8. 새 사용자 환영하기
채팅 메시지 구조
FriendlyChat 채팅 피드에 게시된 메시지는 Cloud Firestore에 저장됩니다. 메시지에 사용되는 데이터 구조를 살펴보겠습니다. 이렇게 하려면 채팅에 'Hello World'로 표시되는 새로운 메시지를 게시합니다.

다음과 같이 표시됩니다.

Firebase Console의 빌드 섹션에서 Firestore 데이터베이스를 클릭합니다. 메시지 컬렉션과 작성한 메시지가 포함된 문서가 표시됩니다.
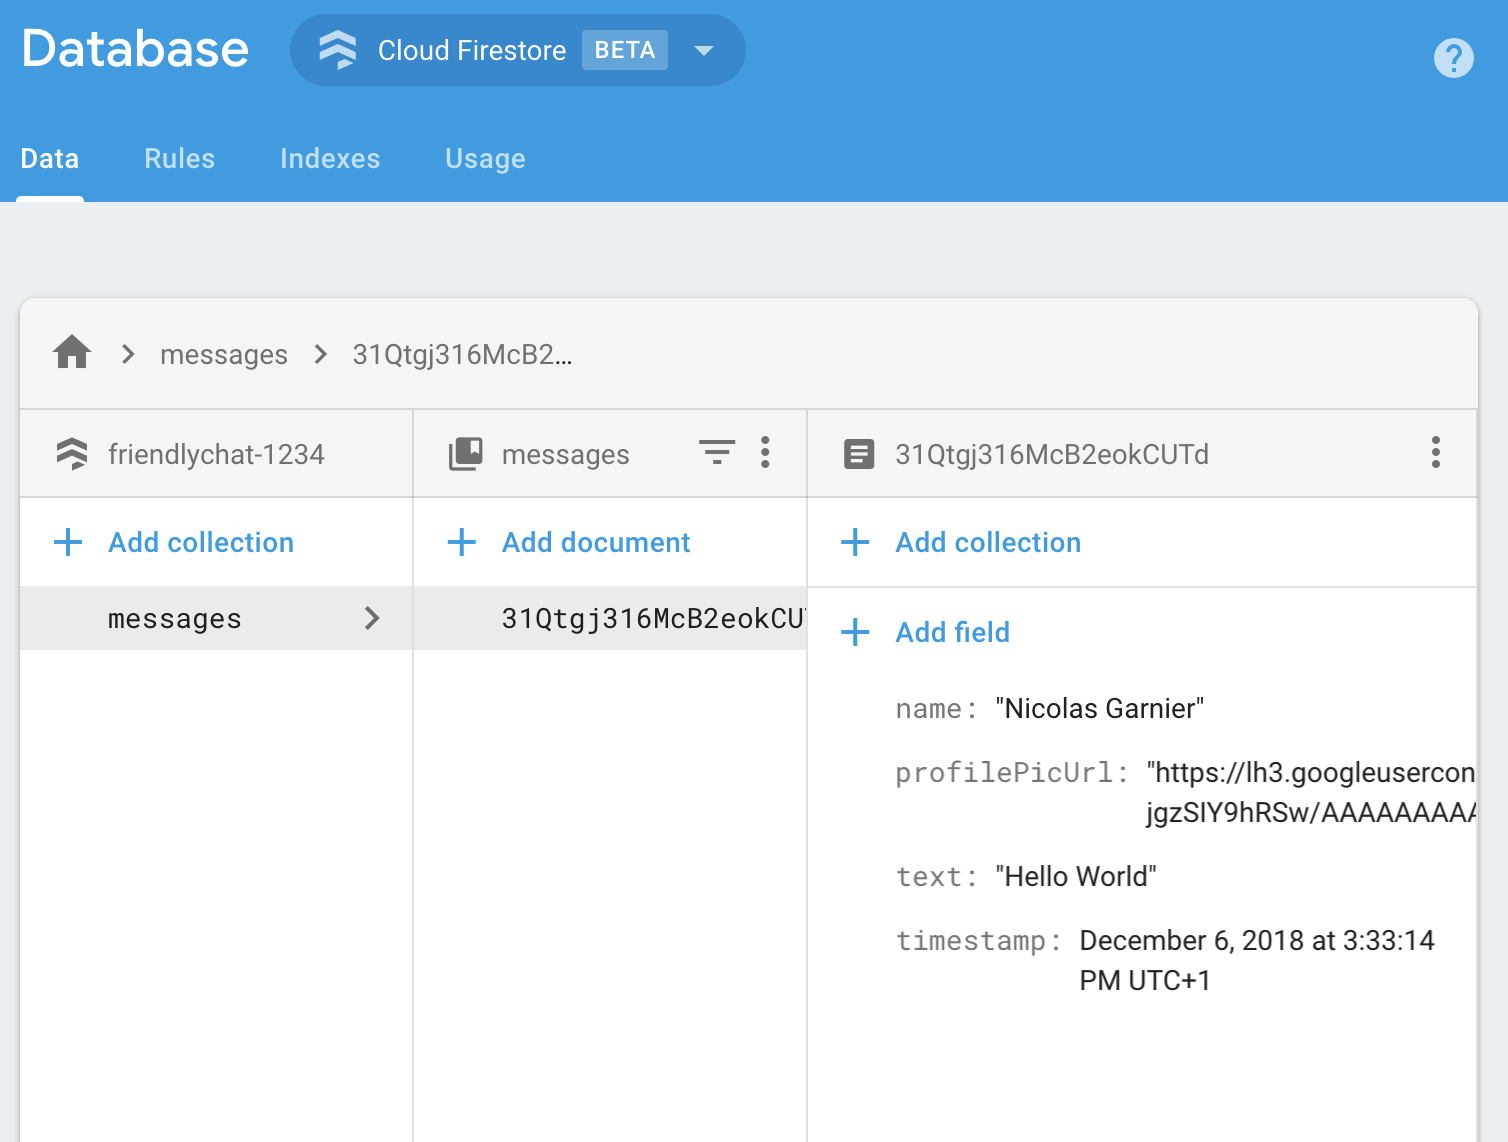
보시다시피 채팅 메시지는 messages 컬렉션에 추가된 name, profilePicUrl, text, timestamp 속성과 함께 Cloud Firestore에 문서로 저장됩니다.
환영 메시지 추가
첫 번째 Cloud 함수는 채팅에 처음으로 입장하는 신규 사용자를 환영하는 메시지를 추가합니다. 이를 위해 사용자가 Firebase 앱에 처음으로 로그인할 때마다 이 함수를 실행하는 functions.auth().onCreate 트리거를 사용할 수 있습니다. index.js 파일에 addWelcomeMessages 함수를 추가합니다.
index.js
// Adds a message that welcomes new users into the chat.
exports.addWelcomeMessages = functions.auth.user().onCreate(async (user) => {
  functions.logger.log('A new user signed in for the first time.');
  const fullName = user.displayName || 'Anonymous';

  // Saves the new welcome message into the database
  // which then displays it in the FriendlyChat clients.
  await admin.firestore().collection('messages').add({
    name: 'Firebase Bot',
    profilePicUrl: '/images/firebase-logo.png', // Firebase logo
    text: `${fullName} signed in for the first time! Welcome!`,
    timestamp: admin.firestore.FieldValue.serverTimestamp(),
  });
  functions.logger.log('Welcome message written to database.');
});
노드에서 이 함수를 특수 exports 객체에 추가하여 그 함수를 현재 파일 외부에서 액세스할 수 있도록 설정하는데, Cloud Functions에서는 이러한 방식이 필요합니다.
위 함수에서는 채팅 메시지 목록에 'Firebase 봇'이 게시하는 새로운 환영 메시지를 추가하고 있습니다. 채팅 메시지가 저장되어 있는 Cloud Firestore의 messages 컬렉션에 있는 add 메서드를 사용하여 이 작업을 수행합니다.
이는 비동기 작업이므로 Cloud Functions가 너무 빨리 실행되지 않도록 Cloud Firestore 쓰기가 완료되었음을 나타내는 Promise가 반환되어야 합니다.
Cloud Functions 배포
Cloud Functions는 배포한 후에만 활성화됩니다. 이렇게 하려면 명령줄에서 다음을 실행합니다.
firebase deploy --only functions
콘솔에 다음과 같은 결과가 표시됩니다.
i  deploying functions
i  functions: ensuring necessary APIs are enabled...
⚠  functions: missing necessary APIs. Enabling now...
i  env: ensuring necessary APIs are enabled...
⚠  env: missing necessary APIs. Enabling now...
i  functions: waiting for APIs to activate...
i  env: waiting for APIs to activate...
✔  env: all necessary APIs are enabled
✔  functions: all necessary APIs are enabled
i  functions: preparing functions directory for uploading...
i  functions: packaged functions (X.XX KB) for uploading
✔  functions: functions folder uploaded successfully
i  starting release process (may take several minutes)...
i  functions: creating function addWelcomeMessages...
✔  functions[addWelcomeMessages]: Successful create operation.
✔  functions: all functions deployed successfully!

✔  Deploy complete!

Project Console: https://console.firebase.google.com/project/friendlypchat-1234/overview
함수 테스트
함수가 배포되면 처음으로 로그인하는 사용자가 필요합니다.
- 호스팅 URL (
https://<project-id>.firebaseapp.com형식)을 사용하여 브라우저에서 앱을 엽니다. - 새 사용자로 로그인 버튼을 사용하여 앱에 처음으로 로그인합니다.
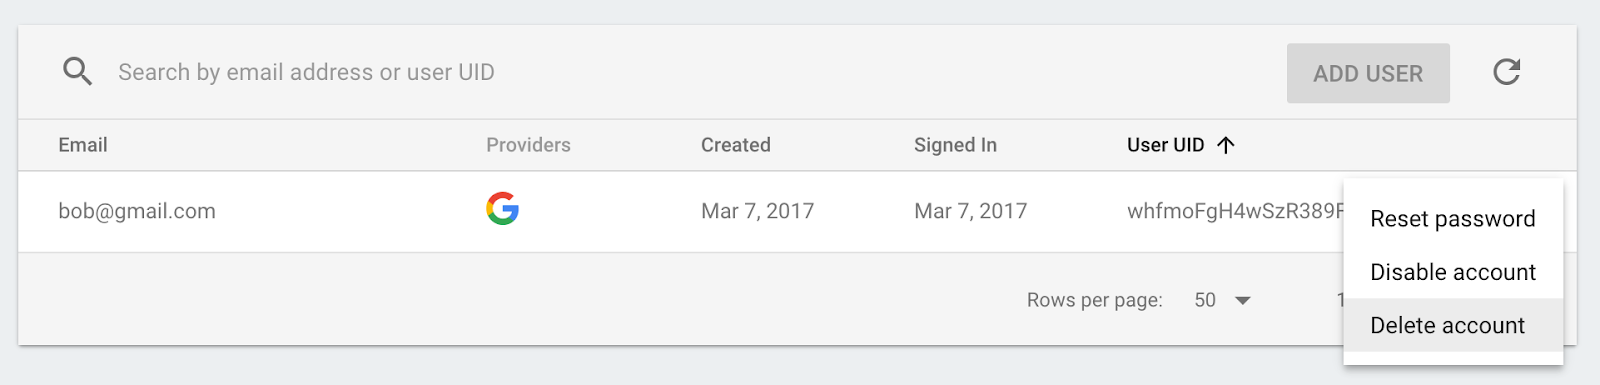
- 앱에 이미 로그인한 경우 Firebase Console 인증을 열어 사용자 목록에서 계정을 삭제할 수 있습니다. 그런 다음 다시 로그인합니다.
- 로그인하면 환영 메시지가 자동으로 표시됩니다.

9. 이미지 검토
사용자는 채팅 중에 모든 유형의 이미지를 업로드할 수 있으며, 특히 공개 소셜 플랫폼에서는 불쾌감을 주는 이미지를 검토하는 것이 중요합니다. FriendlyChat에서 채팅에 게시되는 이미지는 Cloud Storage 버킷에 저장됩니다.
Cloud Functions를 사용하면 functions.storage().onFinalize 트리거를 사용하여 새로 업로드되는 이미지를 감지할 수 있습니다. 이는 Cloud Storage에서 새로운 파일이 업로드되거나 수정될 때마다 실행됩니다.
이미지를 검토하기 위해 다음 프로세스를 거칩니다.
- Cloud Vision API를 사용하여 성인용 또는 폭력적이라고 신고된 이미지인지 확인합니다.
- 이미지가 신고된 경우 실행 중인 Functions 인스턴스에서 다운로드합니다.
- ImageMagick을 사용하여 이미지를 흐리게 처리합니다.
- Cloud Storage에 흐리게 처리된 이미지를 업로드합니다.
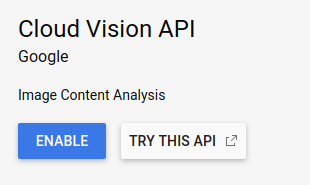
Cloud Vision API 사용 설정
이 함수에서 Google Cloud Vision API를 사용하므로 Firebase 프로젝트에서 API를 사용 설정해야 합니다. 이 링크를 따라 Firebase 프로젝트를 선택하고 API를 사용 설정합니다.
종속 항목 설치
이미지를 검토하기 위해 Node.js용 Google Cloud 비전 클라이언트 라이브러리 @google-cloud/vision에서 Cloud Vision API를 통해 이미지를 실행하여 부적절한 이미지를 감지합니다.
이 패키지를 Cloud Functions 앱에 설치하려면 다음 npm install --save 명령어를 실행합니다. functions 디렉터리에서 이 작업을 실행해야 합니다.
npm install --save @google-cloud/vision@2.4.0
이렇게 하면 패키지가 로컬로 설치되고 package.json 파일에 선언된 종속 항목으로 추가됩니다.
종속 항목 가져오기 및 구성
설치된 종속 항목과 이 섹션에서 필요한 일부 Node.js 핵심 모듈 (path, os, fs)을 가져오려면 index.js 파일의 상단에 다음 줄을 추가합니다.
index.js
const Vision = require('@google-cloud/vision');
const vision = new Vision.ImageAnnotatorClient();
const {promisify} = require('util');
const exec = promisify(require('child_process').exec);

const path = require('path');
const os = require('os');
const fs = require('fs');
함수가 Google Cloud 환경 내부에서 실행되므로 Cloud Storage 및 클라우드 비전 라이브러리를 구성하지 않아도 됩니다. 프로젝트를 사용하도록 자동으로 구성됩니다.
부적절한 이미지 감지
Cloud Storage 버킷에서 파일 또는 폴더가 생성 또는 수정되는 즉시 코드를 실행하는 functions.storage.onChange Cloud Functions 트리거를 사용합니다. blurOffensiveImages 함수를 index.js 파일에 추가합니다.
index.js
// Checks if uploaded images are flagged as Adult or Violence and if so blurs them.
exports.blurOffensiveImages = functions.runWith({memory: '2GB'}).storage.object().onFinalize(
    async (object) => {
      const imageUri = `gs://${object.bucket}/${object.name}`;
      // Check the image content using the Cloud Vision API.
      const batchAnnotateImagesResponse = await vision.safeSearchDetection(imageUri);
      const safeSearchResult = batchAnnotateImagesResponse[0].safeSearchAnnotation;
      const Likelihood = Vision.protos.google.cloud.vision.v1.Likelihood;
      if (Likelihood[safeSearchResult.adult] >= Likelihood.LIKELY ||
          Likelihood[safeSearchResult.violence] >= Likelihood.LIKELY) {
        functions.logger.log('The image', object.name, 'has been detected as inappropriate.');
        return blurImage(object.name);
      }
      functions.logger.log('The image', object.name, 'has been detected as OK.');
    });
함수를 실행하는 Cloud Functions 인스턴스의 일부 구성이 추가되었습니다. .runWith({memory: '2GB'})를 사용하면 이 함수가 메모리를 많이 사용하기 때문에 인스턴스가 기본값이 아닌 2GB의 메모리를 받도록 요청합니다.
함수가 트리거되면 이미지는 Cloud Vision API를 통해 실행되어 성인용 또는 폭력적이라고 신고된 이미지를 감지합니다. 이러한 기준에 따라 이미지가 부적절한 것으로 감지되면 이미지가 흐리게 처리됩니다. 이는 다음에 설명할 blurImage 함수에서 실행됩니다.
이미지 흐리게 처리
index.js 파일에 다음 blurImage 함수를 추가합니다.
index.js
// Blurs the given image located in the given bucket using ImageMagick.
async function blurImage(filePath) {
  const tempLocalFile = path.join(os.tmpdir(), path.basename(filePath));
  const messageId = filePath.split(path.sep)[1];
  const bucket = admin.storage().bucket();

  // Download file from bucket.
  await bucket.file(filePath).download({destination: tempLocalFile});
  functions.logger.log('Image has been downloaded to', tempLocalFile);
  // Blur the image using ImageMagick.
  await exec(`convert "${tempLocalFile}" -channel RGBA -blur 0x24 "${tempLocalFile}"`);
  functions.logger.log('Image has been blurred');
  // Uploading the Blurred image back into the bucket.
  await bucket.upload(tempLocalFile, {destination: filePath});
  functions.logger.log('Blurred image has been uploaded to', filePath);
  // Deleting the local file to free up disk space.
  fs.unlinkSync(tempLocalFile);
  functions.logger.log('Deleted local file.');
  // Indicate that the message has been moderated.
  await admin.firestore().collection('messages').doc(messageId).update({moderated: true});
  functions.logger.log('Marked the image as moderated in the database.');
}
위 함수에서는 Cloud Storage에서 이미지 바이너리가 다운로드됩니다. 그런 다음 ImageMagick의 convert 도구를 사용하여 이미지가 흐리게 표시되고 흐리게 표시된 버전이 Storage 버킷에 다시 업로드됩니다. 다음으로 Cloud Functions 인스턴스에서 파일을 삭제하여 디스크 공간을 확보합니다. 동일한 Cloud Functions 인스턴스가 다시 사용될 수 있으며 파일을 정리하지 않으면 디스크 공간이 부족해질 수 있기 때문입니다. 마지막으로 이미지가 검토되었음을 나타내는 부울을 채팅 메시지에 추가하여 클라이언트에서 메시지 새로고침을 트리거합니다.
함수 배포
함수는 배포한 후에만 활성화됩니다. 명령줄에서 firebase deploy --only functions를 실행합니다.
firebase deploy --only functions
콘솔에 다음과 같은 결과가 표시됩니다.
i  deploying functions
i  functions: ensuring necessary APIs are enabled...
✔  functions: all necessary APIs are enabled
i  functions: preparing functions directory for uploading...
i  functions: packaged functions (X.XX KB) for uploading
✔  functions: functions folder uploaded successfully
i  starting release process (may take several minutes)...
i  functions: updating function addWelcomeMessages...
i  functions: creating function blurOffensiveImages...
✔  functions[addWelcomeMessages]: Successful update operation.
✔  functions[blurOffensiveImages]: Successful create operation.
✔  functions: all functions deployed successfully!

✔  Deploy complete!

Project Console: https://console.firebase.google.com/project/friendlychat-1234/overview
함수 테스트
함수가 성공적으로 배포되면 다음을 수행합니다.
- 호스팅 URL (
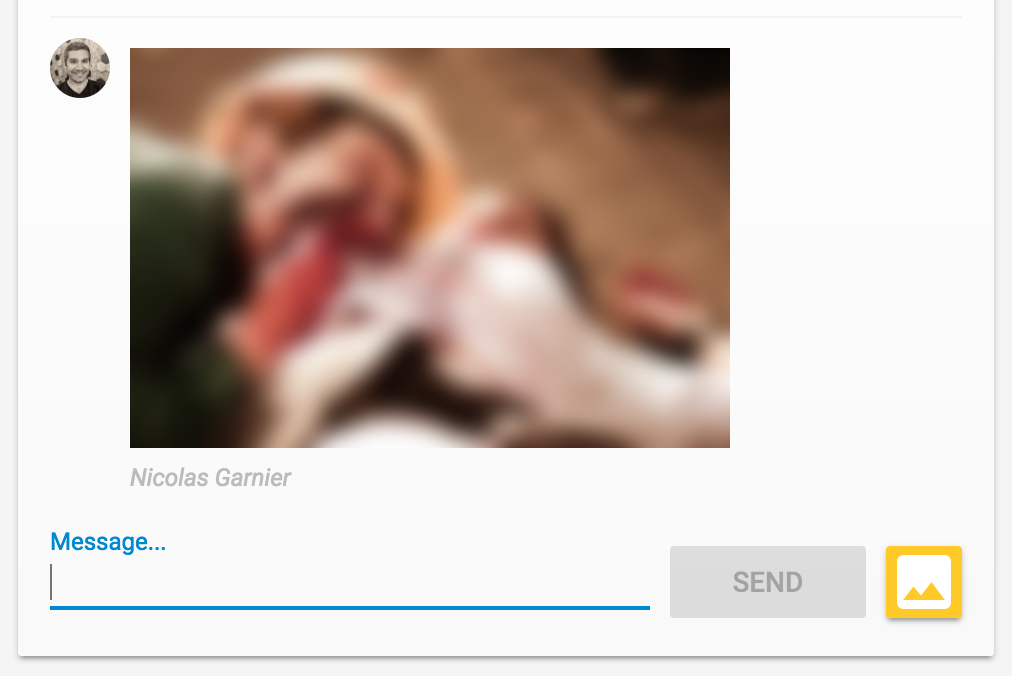
https://<project-id>.firebaseapp.com형식)을 사용하여 브라우저에서 앱을 엽니다. - 앱에 로그인한 후 이미지를 업로드합니다.

- 가장 불쾌감을 주는 업로드할 이미지를 선택합니다 (아니면 이 인육을 먹는 좀비 이미지를 사용할 수도 있습니다). 잠시 후 흐리게 표시된 버전의 이미지가 포함된 새 버전의 게시물이 표시되어야 합니다.
10. 새 메시지 알림
이 섹션에서는 새 메시지가 게시될 때 채팅 참여자에게 알림을 전송하는 Cloud 함수를 추가하겠습니다.
Firebase 클라우드 메시징 (FCM)을 사용하면 플랫폼 전반에서 사용자에게 안정적으로 알림을 전송할 수 있습니다. 사용자에게 알림을 전송하려면 해당 사용자의 FCM 기기 토큰이 필요합니다. 사용자가 새 브라우저 또는 기기에서 처음으로 앱을 열 때 사용 중인 채팅 웹 앱에서는 기기 토큰을 사용자에게서 이미 수집한 상태입니다. 이러한 토큰은 fcmTokens 컬렉션의 Cloud Firestore에 저장됩니다.
웹 앱에서 FCM 기기 토큰을 가져오는 방법을 알아보려면 Firebase 웹 Codelab을 참고하세요.
알림 보내기
새 메시지가 게시될 때를 감지하려면 주어진 Cloud Firestore 경로에서 새 객체가 생성될 때 코드를 실행하는 functions.firestore.document().onCreate Cloud Functions 트리거를 사용해야 합니다. sendNotifications 함수를 index.js 파일에 추가합니다.
index.js
// Sends a notifications to all users when a new message is posted.
exports.sendNotifications = functions.firestore.document('messages/{messageId}').onCreate(
async (snapshot) => {
// Notification details.
const text = snapshot.data().text;
const payload = {
notification: {
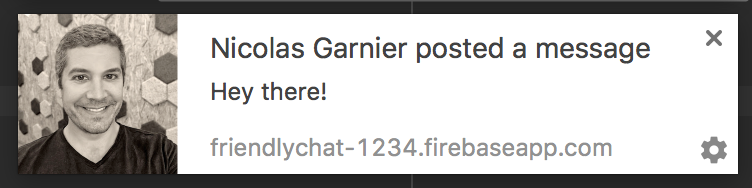
title: `${snapshot.data().name} posted ${text ? 'a message' : 'an image'}`,
body: text ? (text.length <= 100 ? text : text.substring(0, 97) + '...') : '',
icon: snapshot.data().profilePicUrl || '/images/profile_placeholder.png',
click_action: `https://${process.env.GCLOUD_PROJECT}.firebaseapp.com`,
}
};
// Get the list of device tokens.
const allTokens = await admin.firestore().collection('fcmTokens').get();
const tokens = [];
allTokens.forEach((tokenDoc) => {
tokens.push(tokenDoc.id);
});
if (tokens.length > 0) {
// Send notifications to all tokens.
const response = await admin.messaging().sendToDevice(tokens, payload);
await cleanupTokens(response, tokens);
functions.logger.log('Notifications have been sent and tokens cleaned up.');
}
});
위 함수에서는 Cloud Firestore 데이터베이스에서 모든 사용자의 기기 토큰을 수집한 후 admin.messaging().sendToDevice 함수를 사용하여 각 기기에 알림을 전송합니다.
토큰 정리
마지막으로 더 이상 유효하지 않은 토큰을 삭제해야 합니다. 이는 이전에 사용자로부터 획득한 토큰이 더 이상 브라우저나 기기에서 사용되지 않을 때 발생합니다. 예를 들어 사용자가 브라우저 세션의 알림 권한을 취소한 경우 이러한 상황이 발생합니다. 이렇게 하려면 index.js 파일에 다음 cleanupTokens 함수를 추가합니다.
index.js
// Cleans up the tokens that are no longer valid.
function cleanupTokens(response, tokens) {
 // For each notification we check if there was an error.
 const tokensDelete = [];
 response.results.forEach((result, index) => {
   const error = result.error;
   if (error) {
     functions.logger.error('Failure sending notification to', tokens[index], error);
     // Cleanup the tokens that are not registered anymore.
     if (error.code === 'messaging/invalid-registration-token' ||
         error.code === 'messaging/registration-token-not-registered') {
       const deleteTask = admin.firestore().collection('fcmTokens').doc(tokens[index]).delete();
       tokensDelete.push(deleteTask);
     }
   }
 });
 return Promise.all(tokensDelete);
}
함수 배포
함수는 배포한 후에만 활성화되며, 배포하려면 명령줄에서 다음을 실행하세요.
firebase deploy --only functions
콘솔에 다음과 같은 결과가 표시됩니다.
i  deploying functions
i  functions: ensuring necessary APIs are enabled...
✔  functions: all necessary APIs are enabled
i  functions: preparing functions directory for uploading...
i  functions: packaged functions (X.XX KB) for uploading
✔  functions: functions folder uploaded successfully
i  starting release process (may take several minutes)...
i  functions: updating function addWelcomeMessages...
i  functions: updating function blurOffensiveImages...
i  functions: creating function sendNotifications...
✔  functions[addWelcomeMessages]: Successful update operation.
✔  functions[blurOffensiveImages]: Successful updating operation.
✔  functions[sendNotifications]: Successful create operation.
✔  functions: all functions deployed successfully!

✔  Deploy complete!

Project Console: https://console.firebase.google.com/project/friendlychat-1234/overview
함수 테스트
- 함수가 성공적으로 배포되면 호스팅 URL (
https://<project-id>.firebaseapp.com형식)을 사용하여 브라우저에서 앱을 엽니다. - 앱에 처음 로그인하는 경우 메시지가 표시되면 알림을 허용해야 합니다.
- 채팅 앱 탭을 닫거나 다른 탭을 표시합니다. 앱이 백그라운드에 있을 때만 알림이 표시됩니다. 앱이 포그라운드에 있을 때도 메시지를 수신하는 방법에 대해 알아보려면 이 문서를 살펴보세요.
- 다른 브라우저 (또는 시크릿 창)를 사용해 앱에 로그인하여 메시지를 게시합니다. 첫 번째 브라우저에서 알림이 표시되어야 합니다.
11. 수고하셨습니다.
지금까지 Cloud Functions용 Firebase SDK를 사용하여 서버 측 구성요소를 채팅 앱에 추가해 보았습니다.
학습한 내용
- Cloud Functions용 Firebase SDK를 사용하여 Cloud Functions를 인증합니다.
- 인증, Cloud Storage 및 Cloud Firestore 이벤트를 기반으로 Cloud Functions를 트리거합니다.
- 웹 앱에 Firebase 클라우드 메시징 지원 기능을 추가합니다.
- Firebase CLI를 사용하여 Cloud Functions를 배포합니다.
다음 단계
- 기타 Cloud 함수 트리거 유형에 대해 알아봅니다.
- 내 앱에서 Firebase 및 Cloud Functions를 사용하세요.