1. ภาพรวม
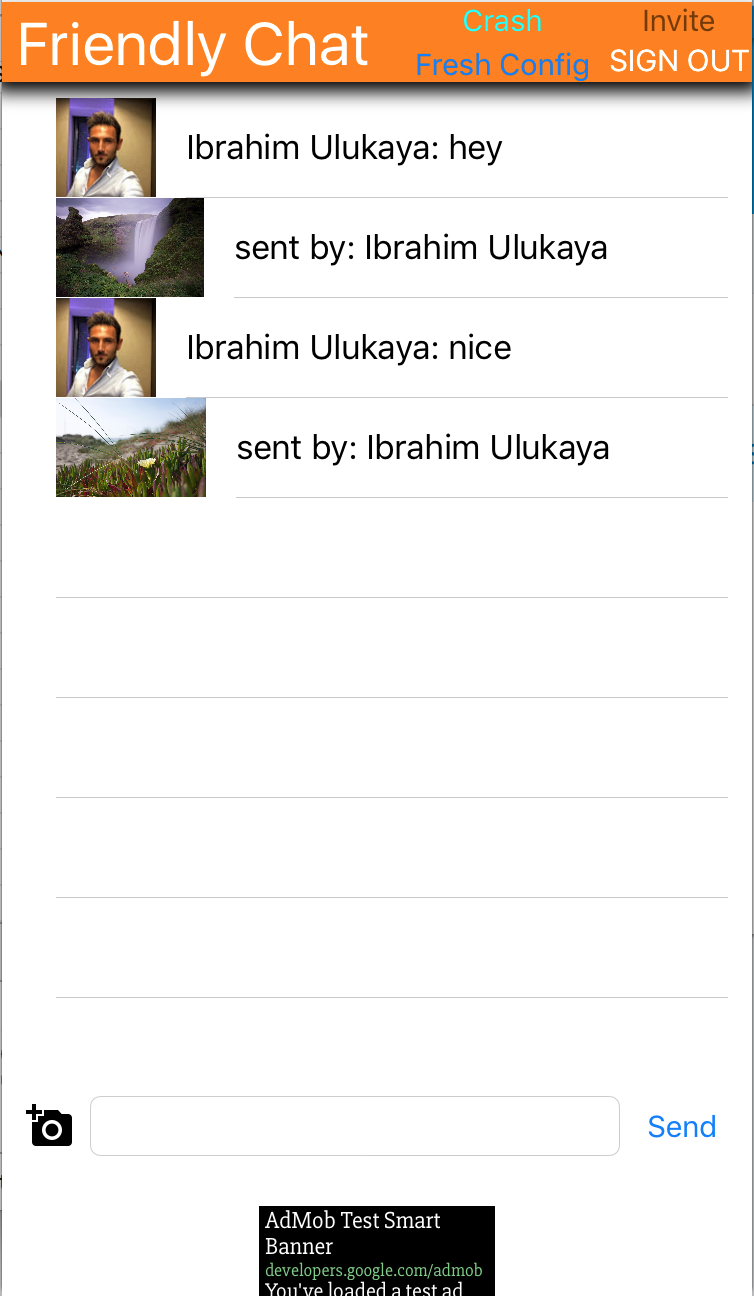
ยินดีต้อนรับสู่ Codelab ของ Friendly Chat ในโค้ดแล็บนี้ คุณจะได้เรียนรู้วิธีใช้แพลตฟอร์ม Firebase เพื่อสร้างแอปพลิเคชัน iOS คุณจะติดตั้งใช้งานไคลเอ็นต์แชทและตรวจสอบประสิทธิภาพโดยใช้ Firebase
สิ่งที่คุณจะได้เรียนรู้
- อนุญาตให้ผู้ใช้ลงชื่อเข้าใช้
- ซิงค์ข้อมูลโดยใช้ฐานข้อมูลเรียลไทม์ของ Firebase
- จัดเก็บไฟล์ไบนารีใน Firebase Storage
สิ่งที่คุณต้องมี
- Xcode
- CocoaPods
- อุปกรณ์ทดสอบที่ใช้ iOS 8.0 ขึ้นไปหรือเครื่องจำลอง
คุณจะใช้บทแนะนำนี้อย่างไร
คุณจะให้คะแนนประสบการณ์ในการสร้างแอป iOS เท่าใด
2. รับโค้ดตัวอย่าง
โคลนที่เก็บ GitHub จากบรรทัดคำสั่ง
$ git clone https://github.com/firebase/codelab-friendlychat-ios
3. สร้างแอปเริ่มต้น
วิธีสร้างแอปเริ่มต้น
- ในหน้าต่างเทอร์มินัล ให้ไปที่ไดเรกทอรี

ios-starter/swift-starterจากการดาวน์โหลดโค้ดตัวอย่าง - การเรียกใช้ครั้งที่
pod install --repo-update - เปิดไฟล์ FriendlyChatSwift.xcworkspace เพื่อเปิดโปรเจ็กต์ใน Xcode
- คลิกปุ่ม
 เรียกใช้
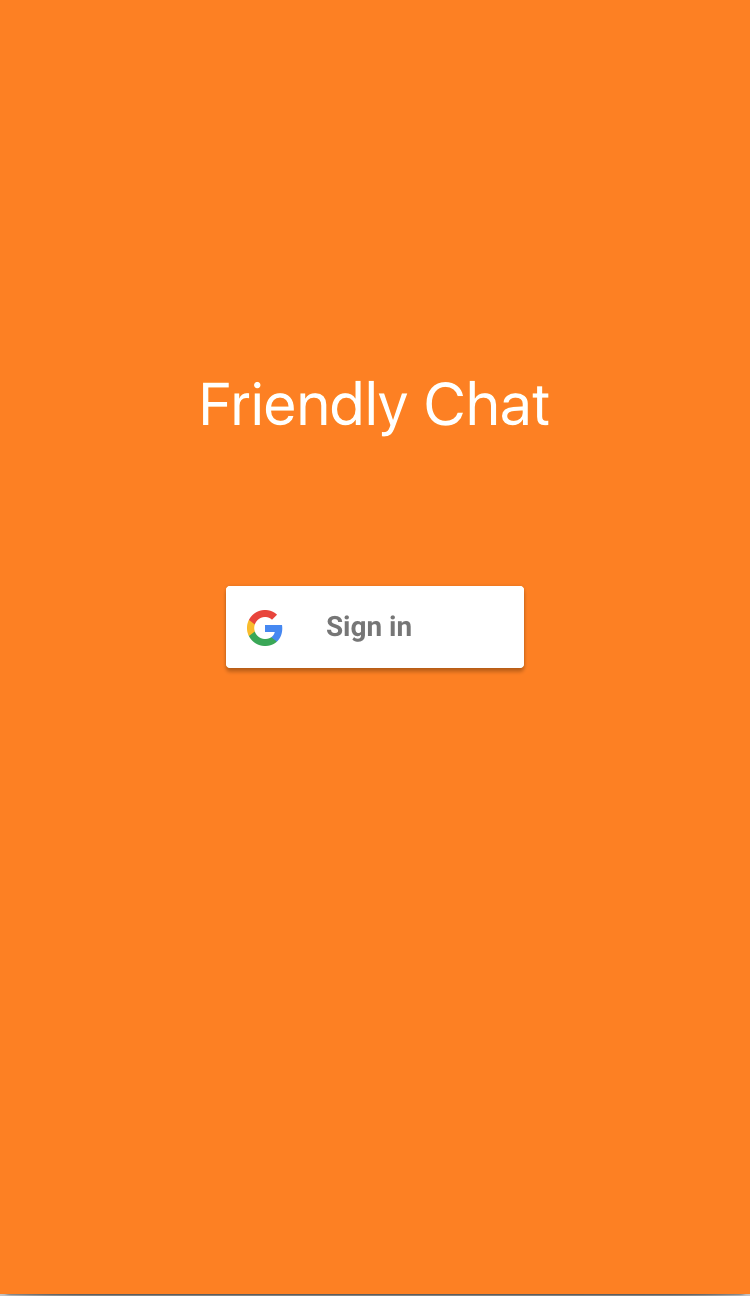
คุณควรเห็นหน้าจอหลักของแชทที่เป็นมิตรปรากฏขึ้นหลังจากผ่านไป 2-3 วินาที UI ควรปรากฏขึ้น อย่างไรก็ตาม ในตอนนี้คุณจะลงชื่อเข้าใช้ ส่ง หรือรับข้อความไม่ได้ แอปจะหยุดทำงานพร้อมข้อยกเว้นจนกว่าคุณจะทำขั้นตอนถัดไปเสร็จสมบูรณ์
4. ตั้งค่าโปรเจ็กต์ Firebase
สร้างโปรเจ็กต์ Firebase ใหม่
- ลงชื่อเข้าใช้คอนโซล Firebase โดยใช้บัญชี Google
- คลิกปุ่มเพื่อสร้างโปรเจ็กต์ใหม่ แล้วป้อนชื่อโปรเจ็กต์ (เช่น
FriendlyChat)
- คลิกต่อไป
- หากได้รับแจ้ง ให้อ่านและยอมรับข้อกำหนดของ Firebase แล้วคลิกต่อไป
- (ไม่บังคับ) เปิดใช้ความช่วยเหลือจาก AI ในคอนโซล Firebase (เรียกว่า "Gemini ใน Firebase")
- สำหรับ Codelab นี้ คุณไม่จำเป็นต้องใช้ Google Analytics ดังนั้นให้ปิดตัวเลือก Google Analytics
- คลิกสร้างโปรเจ็กต์ รอให้ระบบจัดสรรโปรเจ็กต์ แล้วคลิกดำเนินการต่อ
อัปเกรดแพ็กเกจราคาของ Firebase
หากต้องการใช้ Cloud Storage สำหรับ Firebase โปรเจ็กต์ Firebase ของคุณต้องอยู่ในแพ็กเกจราคาแบบจ่ายเมื่อใช้ (Blaze) ซึ่งหมายความว่าโปรเจ็กต์ดังกล่าวลิงก์กับบัญชีการเรียกเก็บเงินในระบบคลาวด์
- บัญชีสำหรับการเรียกเก็บเงินของ Cloud ต้องมีวิธีการชำระเงิน เช่น บัตรเครดิต
- หากเพิ่งเริ่มใช้ Firebase และ Google Cloud โปรดตรวจสอบว่าคุณมีสิทธิ์รับเครดิต$300 และบัญชีสำหรับการเรียกเก็บเงินในระบบคลาวด์แบบทดลองใช้ฟรีหรือไม่
- หากคุณกำลังทำ Codelab นี้เป็นส่วนหนึ่งของกิจกรรม โปรดสอบถามผู้จัดว่ามีเครดิต Cloud ให้หรือไม่
หากต้องการอัปเกรดโปรเจ็กต์เป็นแพ็กเกจ Blaze ให้ทำตามขั้นตอนต่อไปนี้
- ในคอนโซล Firebase ให้เลือกอัปเกรดแพ็กเกจ
- เลือกแพ็กเกจ Blaze ทำตามวิธีการบนหน้าจอเพื่อลิงก์บัญชีสำหรับการเรียกเก็บเงินใน Cloud กับโปรเจ็กต์
หากคุณต้องสร้างบัญชีสำหรับการเรียกเก็บเงินใน Cloud เป็นส่วนหนึ่งของการอัปเกรดนี้ คุณอาจต้องกลับไปที่ขั้นตอนการอัปเกรดใน Firebase Console เพื่อทำการอัปเกรดให้เสร็จสมบูรณ์
เชื่อมต่อแอป iOS
- จากหน้าจอภาพรวมของโปรเจ็กต์ในโปรเจ็กต์ใหม่ ให้คลิกเพิ่ม Firebase ในแอป iOS
- ป้อนรหัสแพ็กเกจเป็น "
com.google.firebase.codelab.FriendlyChatSwift" - ป้อนรหัส App Store เป็น "
123456" - คลิกลงทะเบียนแอป
เพิ่มไฟล์ GoogleService-Info.plist ลงในแอป
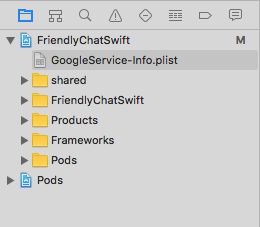
ในหน้าจอที่ 2 ให้คลิกดาวน์โหลด GoogleService-Info.plist เพื่อดาวน์โหลดไฟล์การกำหนดค่าที่มีข้อมูลเมตาของ Firebase ที่จำเป็นทั้งหมดสำหรับแอปของคุณ คัดลอกไฟล์นั้นไปยังแอปพลิเคชัน แล้วเพิ่มลงในเป้าหมาย FriendlyChatSwift
ตอนนี้คุณสามารถคลิก "x" ที่มุมขวาบนของป๊อปอัปเพื่อปิดได้ โดยข้ามขั้นตอนที่ 3 และ 4 เนื่องจากคุณจะทำตามขั้นตอนเหล่านั้นที่นี่
นำเข้าโมดูล Firebase
เริ่มต้นโดยตรวจสอบว่าได้นำเข้าโมดูล Firebase แล้ว
AppDelegate.swift, FCViewController.swift
import Firebase
กำหนดค่า Firebase ใน AppDelegate
ใช้เมธอด "configure" ใน FirebaseApp ภายในฟังก์ชัน application:didFinishLaunchingWithOptions เพื่อกำหนดค่าบริการ Firebase พื้นฐานจากไฟล์ .plist
AppDelegate.swift
  func application(_ application: UIApplication, didFinishLaunchingWithOptions
      launchOptions: [UIApplicationLaunchOptionsKey: Any]?) -> Bool {
  FirebaseApp.configure()
  GIDSignIn.sharedInstance().delegate = self
  return true
}
5. ระบุตัวตนผู้ใช้
ใช้กฎเพื่อจำกัดให้เฉพาะผู้ใช้ที่ผ่านการตรวจสอบสิทธิ์
ตอนนี้เราจะเพิ่มกฎเพื่อกำหนดให้มีการตรวจสอบสิทธิ์ก่อนอ่านหรือเขียนข้อความ เราจึงเพิ่มกฎต่อไปนี้ลงในออบเจ็กต์ข้อมูลข้อความ จากส่วนฐานข้อมูลของ Firebase Console ให้เลือก Realtime Database แล้วคลิกแท็บกฎ จากนั้นอัปเดตกฎให้มีลักษณะดังนี้
{
  "rules": {
    "messages": {
      ".read": "auth != null",
      ".write": "auth != null"
    }
  }
}
ดูข้อมูลเพิ่มเติมเกี่ยวกับวิธีการทำงานนี้ (รวมถึงเอกสารประกอบเกี่ยวกับตัวแปร "auth") ได้ที่เอกสารประกอบด้านความปลอดภัยของ Firebase
กำหนดค่า API การตรวจสอบสิทธิ์
ก่อนที่แอปพลิเคชันจะเข้าถึง Firebase Authentication API ในนามของผู้ใช้ได้ คุณจะต้องเปิดใช้ API ดังกล่าว
- ไปที่คอนโซล Firebase แล้วเลือกโปรเจ็กต์
- เลือกการตรวจสอบสิทธิ์
- เลือกแท็บวิธีการลงชื่อเข้าใช้
- สลับสวิตช์ Google เป็นเปิดใช้ (สีน้ำเงิน)
- กดบันทึกในกล่องโต้ตอบที่ปรากฏ
หากได้รับข้อผิดพลาดในภายหลังใน Codelab นี้พร้อมข้อความ "CONFIGURATION_NOT_FOUND" ให้กลับมาที่ขั้นตอนนี้และตรวจสอบงานของคุณอีกครั้ง
ยืนยันการขึ้นต่อกันของการตรวจสอบสิทธิ์ Firebase
ยืนยันว่ามีการขึ้นต่อกันของ Firebase Auth ในไฟล์ Podfile
Podfile
pod 'Firebase/Auth'
ตั้งค่า Info.plist สำหรับการลงชื่อเข้าใช้ด้วย Google
คุณจะต้องเพิ่มรูปแบบ URL ที่กำหนดเองลงในโปรเจ็กต์ XCode
- เปิดการกำหนดค่าโปรเจ็กต์โดยดับเบิลคลิกชื่อโปรเจ็กต์ในมุมมองแบบต้นไม้ทางด้านซ้าย เลือกแอปจากส่วนเป้าหมาย จากนั้นเลือกแท็บข้อมูล แล้วขยายส่วนประเภท URL
- คลิกปุ่ม + แล้วเพิ่มรูปแบบ URL สำหรับรหัสไคลเอ็นต์ที่กลับด้าน หากต้องการค้นหาค่านี้ ให้เปิดไฟล์การกำหนดค่า GoogleService-Info.plist แล้วมองหาคีย์ REVERSED_CLIENT_ID คัดลอกค่าของคีย์นั้น แล้ววางลงในช่องรูปแบบ URL ในหน้าการกำหนดค่า เว้นช่องอื่นๆ ว่างไว้
- เมื่อเสร็จแล้ว การกำหนดค่าควรมีลักษณะคล้ายกับตัวอย่างต่อไปนี้ (แต่มีค่าเฉพาะแอปพลิเคชันของคุณ)

ตั้งค่า clientID สำหรับการลงชื่อเข้าใช้ด้วย Google
หลังจากกำหนดค่า Firebase แล้ว เราจะใช้ clientID เพื่อตั้งค่าการลงชื่อเข้าใช้ด้วย Google ภายในเมธอด "didFinishLaunchingWithOptions:" ได้
AppDelegate.swift
  func application(_ application: UIApplication, didFinishLaunchingWithOptions
      launchOptions: [UIApplicationLaunchOptionsKey: Any]?) -> Bool {
  FirebaseApp.configure()
  GIDSignIn.sharedInstance().clientID = FirebaseApp.app()?.options.clientID
  GIDSignIn.sharedInstance().delegate = self
  return true
}
เพิ่มตัวแฮนเดิลการลงชื่อเข้าใช้
เมื่อลงชื่อเข้าใช้ด้วย Google สำเร็จแล้ว ให้ใช้บัญชีดังกล่าวเพื่อตรวจสอบสิทธิ์กับ Firebase
AppDelegate.swift
  func sign(_ signIn: GIDSignIn!, didSignInFor user: GIDGoogleUser!, withError error: Error?) {
    if let error = error {
      print("Error \(error)")
      return
    }

    guard let authentication = user.authentication else { return }
    let credential = GoogleAuthProvider.credential(withIDToken: authentication.idToken,
                                                      accessToken: authentication.accessToken)
    Auth.auth().signIn(with: credential) { (user, error) in
      if let error = error {
        print("Error \(error)")
        return
      }
    }
  }
ลงชื่อเข้าใช้ผู้ใช้โดยอัตโนมัติ จากนั้นเพิ่ม Listener ไปยัง Firebase Auth เพื่อให้ผู้ใช้เข้าสู่แอปได้หลังจากลงชื่อเข้าใช้สำเร็จ และนำ Listener ออกเมื่อ deinit
SignInViewController.swift
  override func viewDidLoad() {
    super.viewDidLoad()
    GIDSignIn.sharedInstance().uiDelegate = self
    GIDSignIn.sharedInstance().signInSilently()
    handle = Auth.auth().addStateDidChangeListener() { (auth, user) in
      if user != nil {
        MeasurementHelper.sendLoginEvent()
        self.performSegue(withIdentifier: Constants.Segues.SignInToFp, sender: nil)
      }
    }
  }

  deinit {
    if let handle = handle {
      Auth.auth().removeStateDidChangeListener(handle)
    }
  }
ออกจากระบบ
เพิ่มวิธีการออกจากระบบ
FCViewController.swift
  @IBAction func signOut(_ sender: UIButton) {
    let firebaseAuth = Auth.auth()
    do {
      try firebaseAuth.signOut()
      dismiss(animated: true, completion: nil)
    } catch let signOutError as NSError {
      print ("Error signing out: \(signOutError.localizedDescription)")
    }
  }
ทดสอบการอ่านข้อความในฐานะผู้ใช้ที่ลงชื่อเข้าใช้
- คลิกปุ่ม
 เรียกใช้
 - ระบบจะนำคุณไปยังหน้าจอลงชื่อเข้าใช้ทันที แตะปุ่มลงชื่อเข้าใช้ด้วย Google
- จากนั้นระบบจะนำคุณไปยังหน้าจอการรับส่งข้อความหากทุกอย่างทำงานได้ดี
6. เปิดใช้งาน Realtime Database

นำเข้าข้อความ
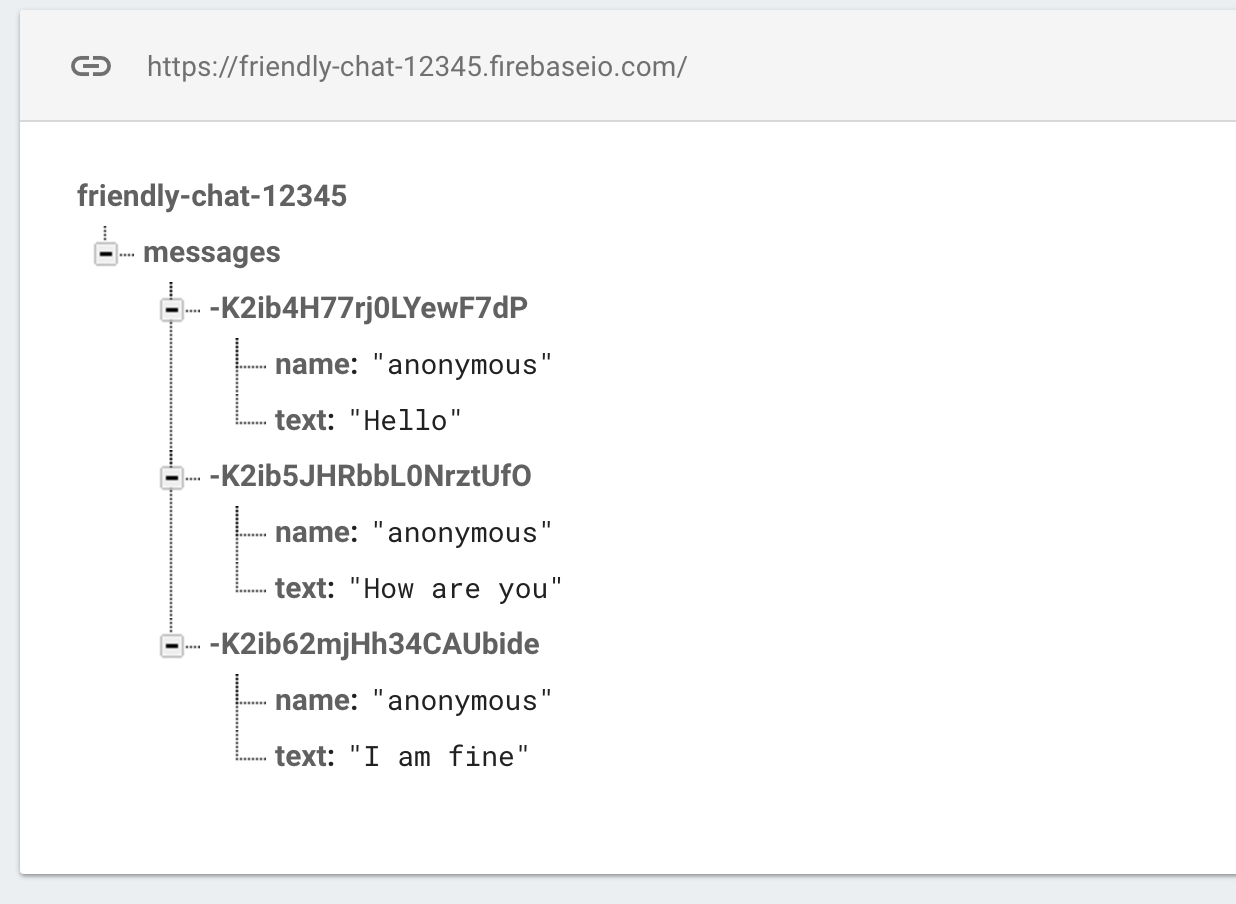
ในโปรเจ็กต์ในคอนโซล Firebase ให้เลือกรายการฐานข้อมูลในแถบนำทางด้านซ้าย ในเมนูรายการเพิ่มเติมของฐานข้อมูล ให้เลือกนำเข้า JSON ไปที่ไฟล์ initial_messages.json ในไดเรกทอรี friendlychat เลือกไฟล์ แล้วคลิกปุ่มนำเข้า การดำเนินการนี้จะแทนที่ข้อมูลใดก็ตามที่อยู่ในฐานข้อมูลของคุณในขณะนี้ นอกจากนี้ คุณยังแก้ไขฐานข้อมูลได้โดยตรงโดยใช้เครื่องหมาย + สีเขียวและ x สีแดงเพื่อเพิ่มและนำรายการออก
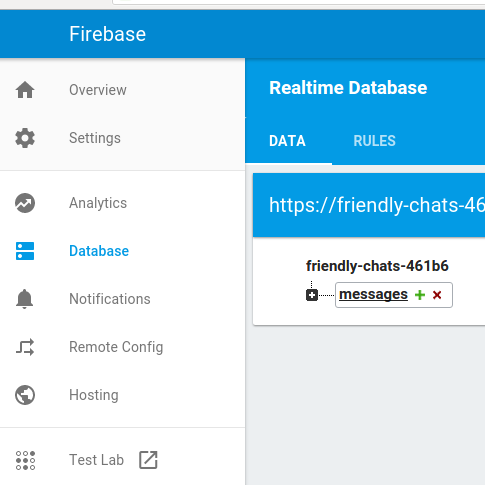
หลังจากนำเข้า ฐานข้อมูลควรมีลักษณะดังนี้
ยืนยันการขึ้นต่อกันของฐานข้อมูล Firebase
ในบล็อกการขึ้นต่อกันของไฟล์ Podfile ให้ยืนยันว่ามี Firebase/Database
Podfile
pod 'Firebase/Database'
ซิงค์ข้อความที่มีอยู่
เพิ่มโค้ดที่ซิงค์ข้อความที่เพิ่มใหม่กับ UI ของแอป
โค้ดที่คุณเพิ่มในส่วนนี้จะทำสิ่งต่อไปนี้
- เริ่มต้นฐานข้อมูล Firebase และเพิ่ม Listener เพื่อจัดการการเปลี่ยนแปลงที่เกิดขึ้นกับฐานข้อมูล
- อัปเดต
DataSnapshotเพื่อให้ข้อความใหม่แสดง
แก้ไขเมธอด "deinit", "configureDatabase" และ "tableView:cellForRow indexPath:" ของ FCViewController โดยแทนที่ด้วยโค้ดที่กำหนดไว้ด้านล่าง
FCViewController.swift
  deinit {
    if let refHandle = _refHandle {
      self.ref.child("messages").removeObserver(withHandle: _refHandle)
    }
  }


  func configureDatabase() {
    ref = Database.database().reference()
    // Listen for new messages in the Firebase database
    _refHandle = self.ref.child("messages").observe(.childAdded, with: { [weak self] (snapshot) -> Void in
      guard let strongSelf = self else { return }
      strongSelf.messages.append(snapshot)
      strongSelf.clientTable.insertRows(at: [IndexPath(row: strongSelf.messages.count-1, section: 0)], with: .automatic)
    })
  }


  func tableView(_ tableView: UITableView, cellForRowAt indexPath: IndexPath) -> UITableViewCell {
    // Dequeue cell
    let cell = self.clientTable.dequeueReusableCell(withIdentifier: "tableViewCell", for: indexPath)
    // Unpack message from Firebase DataSnapshot
    let messageSnapshot = self.messages[indexPath.row]
    guard let message = messageSnapshot.value as? [String: String] else { return cell }
    let name = message[Constants.MessageFields.name] ?? ""
    let text = message[Constants.MessageFields.text] ?? ""
    cell.textLabel?.text = name + ": " + text
    cell.imageView?.image = UIImage(named: "ic_account_circle")
    if let photoURL = message[Constants.MessageFields.photoURL], let URL = URL(string: photoURL),
        let data = try? Data(contentsOf: URL) {
      cell.imageView?.image = UIImage(data: data)
    }
    return cell
  }
ทดสอบการซิงค์ข้อความ
- คลิกปุ่ม
 เรียกใช้
 - คลิกปุ่มลงชื่อเข้าใช้เพื่อเริ่มต้นใช้งานเพื่อไปที่หน้าต่างข้อความ
- เพิ่มข้อความใหม่โดยตรงในคอนโซล Firebase โดยคลิกสัญลักษณ์ + สีเขียวข้างรายการ "ข้อความ" แล้วเพิ่มออบเจ็กต์ดังต่อไปนี้
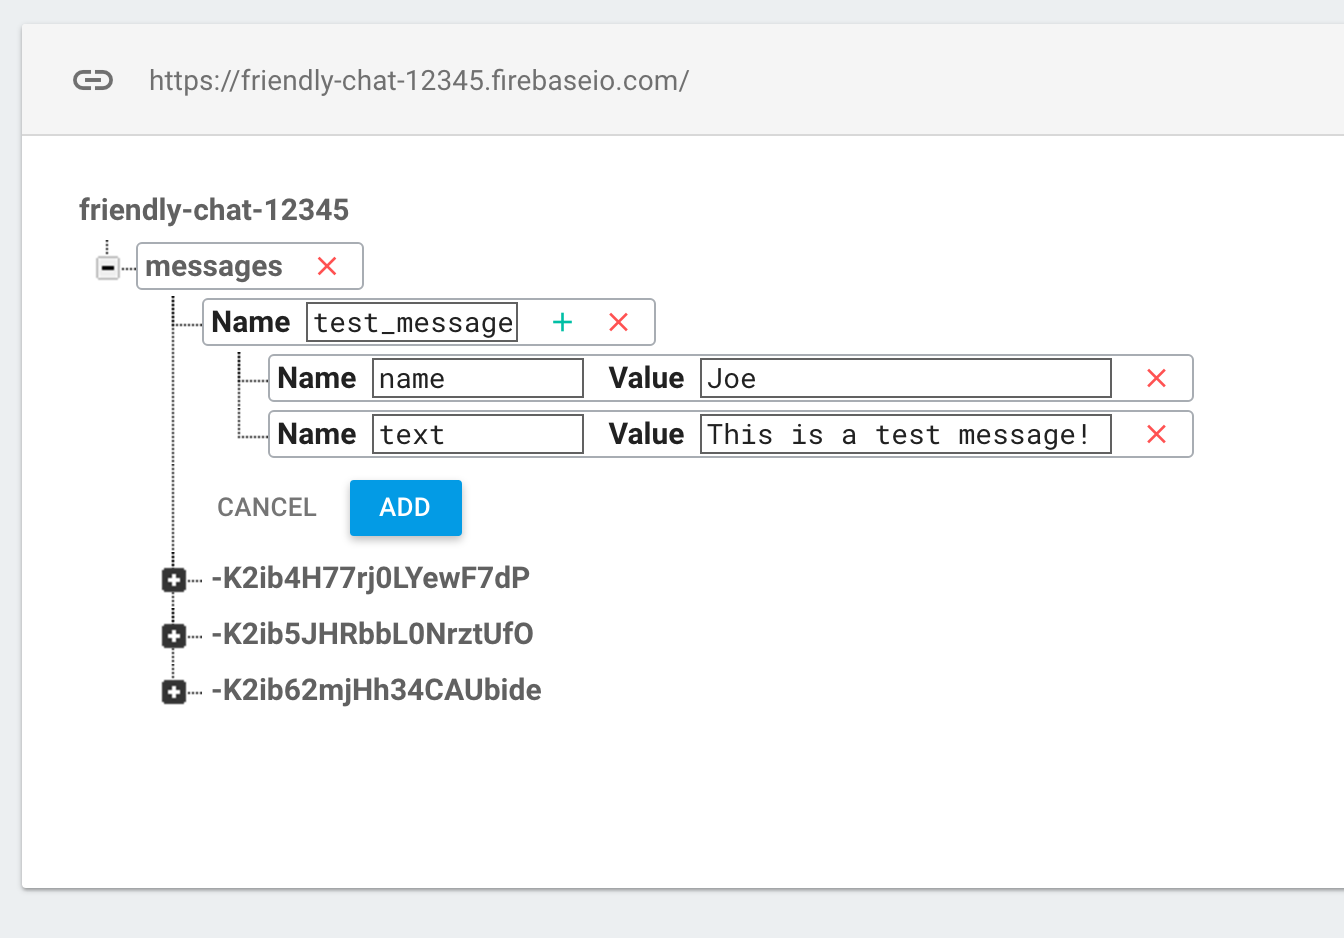
- ตรวจสอบว่าข้อความปรากฏใน UI ของ Friendly-Chat
7. ส่งข้อความ
ใช้ Send Message
พุชค่าไปยังฐานข้อมูล เมื่อใช้วิธีการ Push เพื่อเพิ่มข้อมูลลงในฐานข้อมูลเรียลไทม์ของ Firebase ระบบจะเพิ่มรหัสอัตโนมัติ รหัสที่สร้างขึ้นโดยอัตโนมัติเหล่านี้เป็นรหัสตามลำดับ ซึ่งช่วยให้มั่นใจได้ว่าระบบจะเพิ่มข้อความใหม่ตามลำดับที่ถูกต้อง
แก้ไขเมธอด "sendMessage:" ของ FCViewController โดยแทนที่ด้วยโค้ดที่กำหนดไว้ด้านล่าง
FCViewController.swift
  func sendMessage(withData data: [String: String]) {
    var mdata = data
    mdata[Constants.MessageFields.name] = Auth.auth().currentUser?.displayName
    if let photoURL = Auth.auth().currentUser?.photoURL {
      mdata[Constants.MessageFields.photoURL] = photoURL.absoluteString
    }

    // Push data to Firebase Database
    self.ref.child("messages").childByAutoId().setValue(mdata)
  }
ทดสอบการส่งข้อความ
- คลิกปุ่ม
 เรียกใช้
 - คลิกลงชื่อเข้าใช้เพื่อไปที่หน้าต่างข้อความ
- พิมพ์ข้อความแล้วกดส่ง ข้อความใหม่ควรปรากฏใน UI ของแอปและในคอนโซล Firebase
8. จัดเก็บและรับรูปภาพ
ยืนยันการขึ้นต่อกันของ Firebase Storage
ในบล็อกการขึ้นต่อกันของ Podfile ให้ยืนยันว่าได้รวม Firebase/Storage แล้ว
Podfile
pod 'Firebase/Storage'
ตั้งค่า Cloud Storage for Firebase
วิธีตั้งค่า Cloud Storage for Firebase ในโปรเจ็กต์ Firebase มีดังนี้
- ในแผงด้านซ้ายของคอนโซล Firebase ให้ขยายสร้าง แล้วเลือก Storage
- คลิกเริ่มต้นใช้งาน
- เลือกตำแหน่งสำหรับที่เก็บข้อมูลเริ่มต้น
ที่เก็บข้อมูลในUS-WEST1,US-CENTRAL1และUS-EAST1จะใช้ประโยชน์จากระดับ"ใช้งานฟรีเสมอ" สำหรับ Google Cloud Storage ได้ ที่เก็บข้อมูลในตำแหน่งอื่นๆ ทั้งหมดจะเป็นไปตามราคาและการใช้งาน Google Cloud Storage - คลิกเริ่มในโหมดทดสอบ อ่านข้อจำกัดความรับผิดเกี่ยวกับกฎความปลอดภัย
ในภายหลังใน Codelab นี้ คุณจะเพิ่มกฎความปลอดภัยเพื่อรักษาความปลอดภัยของข้อมูล อย่าเผยแพร่หรือแสดงแอปต่อสาธารณะโดยไม่ได้เพิ่มกฎความปลอดภัยสำหรับที่เก็บข้อมูล - คลิกสร้าง
กำหนดค่า FirebaseStorage
FCViewController.swift
  func configureStorage() {
    storageRef = Storage.storage().reference()
  }
รับรูปภาพในข้อความที่มีอยู่
เพิ่มโค้ดที่ดาวน์โหลดรูปภาพจาก Firebase Storage
แก้ไขเมธอด "tableView: cellForRowAt indexPath:" ของ FCViewController โดยแทนที่ด้วยโค้ดที่กำหนดไว้ด้านล่าง
FCViewController.swift
  func tableView(_ tableView: UITableView, cellForRowAt indexPath: IndexPath) -> UITableViewCell {
    // Dequeue cell
    let cell = self.clientTable .dequeueReusableCell(withIdentifier: "tableViewCell", for: indexPath)
    // Unpack message from Firebase DataSnapshot
    let messageSnapshot: DataSnapshot! = self.messages[indexPath.row]
    guard let message = messageSnapshot.value as? [String:String] else { return cell }
    let name = message[Constants.MessageFields.name] ?? ""
    if let imageURL = message[Constants.MessageFields.imageURL] {
      if imageURL.hasPrefix("gs://") {
        Storage.storage().reference(forURL: imageURL).getData(maxSize: INT64_MAX) {(data, error) in
          if let error = error {
            print("Error downloading: \(error)")
            return
          }
          DispatchQueue.main.async {
            cell.imageView?.image = UIImage.init(data: data!)
            cell.setNeedsLayout()
          }
        }
      } else if let URL = URL(string: imageURL), let data = try? Data(contentsOf: URL) {
        cell.imageView?.image = UIImage.init(data: data)
      }
      cell.textLabel?.text = "sent by: \(name)"
    } else {
      let text = message[Constants.MessageFields.text] ?? ""
      cell.textLabel?.text = name + ": " + text
      cell.imageView?.image = UIImage(named: "ic_account_circle")
      if let photoURL = message[Constants.MessageFields.photoURL], let URL = URL(string: photoURL),
          let data = try? Data(contentsOf: URL) {
        cell.imageView?.image = UIImage(data: data)
      }
    }
    return cell
  }
9. ส่งข้อความรูปภาพ
ใช้ฟีเจอร์จัดเก็บและส่งรูปภาพ
อัปโหลดรูปภาพจากผู้ใช้ จากนั้นซิงค์ URL ที่จัดเก็บของรูปภาพนี้กับฐานข้อมูลเพื่อให้ระบบส่งรูปภาพนี้ภายในข้อความ
แก้ไขเมธอด "imagePickerController: didFinishPickingMediaWithInfo:" ของ FCViewController โดยแทนที่ด้วยโค้ดที่กำหนดไว้ด้านล่าง
FCViewController.swift
  func imagePickerController(_ picker: UIImagePickerController,
    didFinishPickingMediaWithInfo info: [String : Any]) {
      picker.dismiss(animated: true, completion:nil)
    guard let uid = Auth.auth().currentUser?.uid else { return }

    // if it's a photo from the library, not an image from the camera
    if #available(iOS 8.0, *), let referenceURL = info[UIImagePickerControllerReferenceURL] as? URL {
      let assets = PHAsset.fetchAssets(withALAssetURLs: [referenceURL], options: nil)
      let asset = assets.firstObject
      asset?.requestContentEditingInput(with: nil, completionHandler: { [weak self] (contentEditingInput, info) in
        let imageFile = contentEditingInput?.fullSizeImageURL
        let filePath = "\(uid)/\(Int(Date.timeIntervalSinceReferenceDate * 1000))/\((referenceURL as AnyObject).lastPathComponent!)"
        guard let strongSelf = self else { return }
        strongSelf.storageRef.child(filePath)
          .putFile(from: imageFile!, metadata: nil) { (metadata, error) in
            if let error = error {
              let nsError = error as NSError
              print("Error uploading: \(nsError.localizedDescription)")
              return
            }
            strongSelf.sendMessage(withData: [Constants.MessageFields.imageURL: strongSelf.storageRef.child((metadata?.path)!).description])
          }
      })
    } else {
      guard let image = info[UIImagePickerControllerOriginalImage] as? UIImage else { return }
      let imageData = UIImageJPEGRepresentation(image, 0.8)
      let imagePath = "\(uid)/\(Int(Date.timeIntervalSinceReferenceDate * 1000)).jpg"
      let metadata = StorageMetadata()
      metadata.contentType = "image/jpeg"
      self.storageRef.child(imagePath)
        .putData(imageData!, metadata: metadata) { [weak self] (metadata, error) in
          if let error = error {
            print("Error uploading: \(error)")
            return
          }
          guard let strongSelf = self else { return }
          strongSelf.sendMessage(withData: [Constants.MessageFields.imageURL: strongSelf.storageRef.child((metadata?.path)!).description])
      }
    }
  }
ทดสอบการส่งและรับข้อความรูปภาพ
- คลิกปุ่ม
 เรียกใช้
 - คลิกลงชื่อเข้าใช้เพื่อไปที่หน้าต่างข้อความ
- คลิกไอคอน "เพิ่มรูปภาพ" เพื่อเลือกรูปภาพ ข้อความใหม่พร้อมรูปภาพควรปรากฏใน UI ของแอปและในคอนโซล Firebase
10. ยินดีด้วย
คุณใช้ Firebase เพื่อสร้างแอปพลิเคชันแชทแบบเรียลไทม์ได้อย่างง่ายดาย
สิ่งที่เราได้พูดถึง
- Realtime Database
- การลงชื่อเข้าใช้แบบรวมศูนย์
- พื้นที่เก็บข้อมูล


