
1. Before you begin
In this codelab, you'll learn how to deploy to Firebase App Hosting using a Next.js web app called Friendly Eats, which is a website for restaurant reviews.
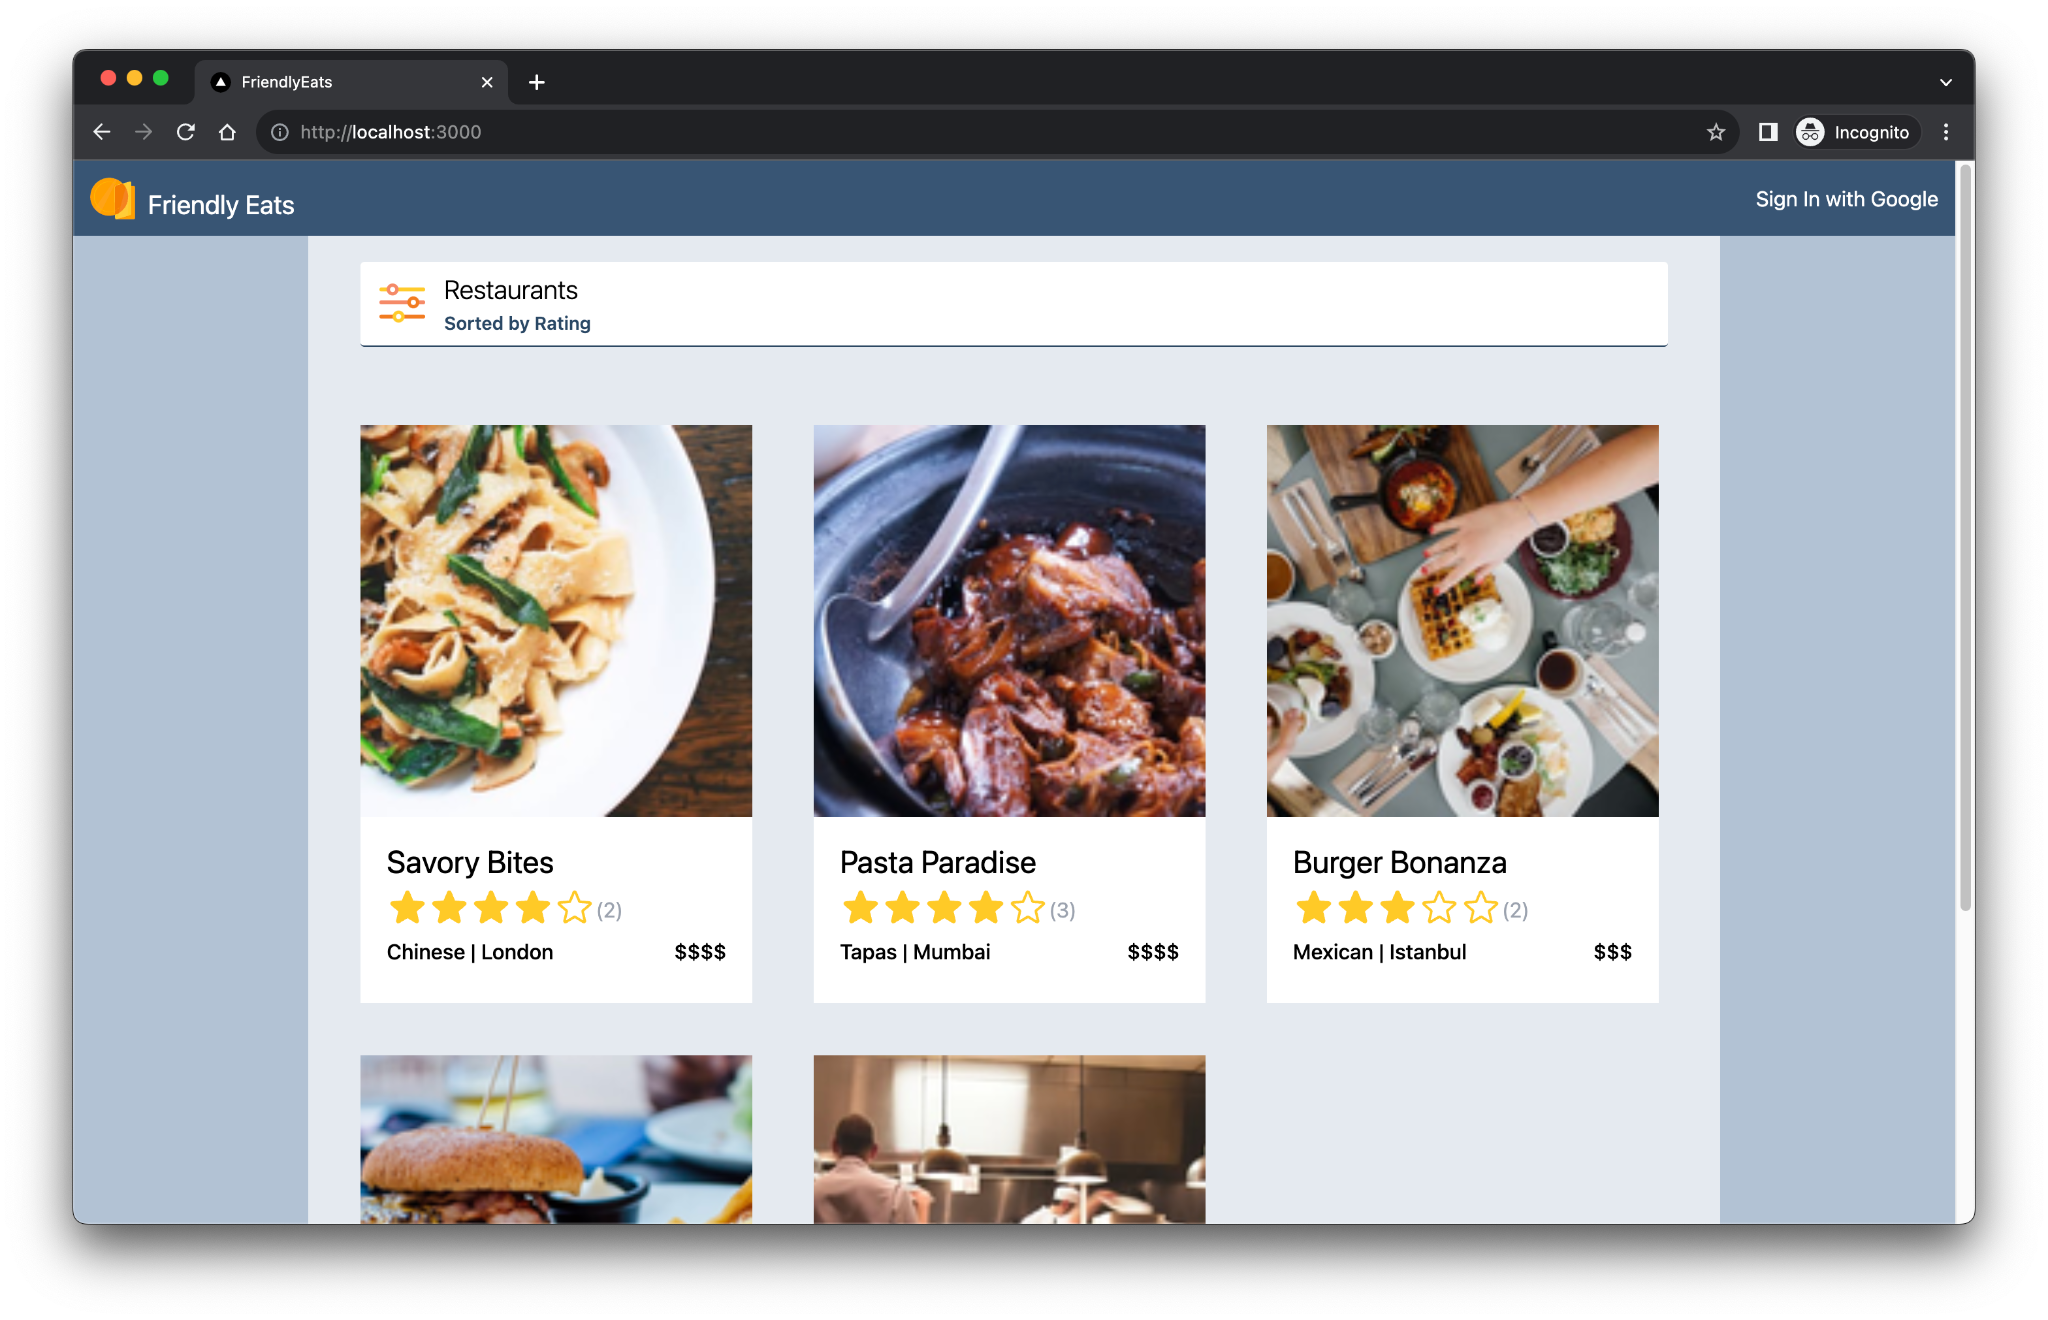
The completed web app offers useful features that demonstrate how Firebase can help you build Next.js apps.
- Automatic build and deploy: This codelab shows you how to use Firebase App Hosting to automatically build and deploy your Next.js code every time you push to a configured branch.
- Sign-in and sign-out: The completed web app lets users sign in/out with Google. User login and persistence is managed entirely through Firebase Authentication.
- Images: The completed web app lets signed-in users upload restaurant images. Image assets are stored in Cloud Storage for Firebase. The Firebase JavaScript SDK provides a public URL to uploaded images. This public URL is then stored in the relevant restaurant document in Cloud Firestore.
- Filters: The completed web app lets signed-in users filter the list of restaurants based on category, location, and price. You can also customize the sorting method used. Data is accessed from Cloud Firestore, and Firestore queries are applied based on the filters used.
- Reviews: The completed web app lets signed-in users post reviews of restaurants that consist of a star rating and a text-based message. Review information is stored in Cloud Firestore.
- Review summaries: The completed web app automatically summarizes reviews using a Gemini model. AI-generated summaries are stored in Cloud Firestore.
Prerequisites
- Knowledge of Next.js and JavaScript
What you'll learn
- How to use Firebase with the Next.js App Router and server-side rendering
- How to authorize calls to the Gemini API using server-side only Secrets
What you'll need
- A browser of your choice, such as Google Chrome
- Access to IDX.dev (a web-based workspace)
- A Google account for the creation and management of your Firebase project
- A GitHub account (it doesn't need to be the same email account as the above)
2. Set up your development environment and GitHub repository
This codelab provides the app's starter codebase and relies on the Firebase CLI and IDX.dev.
Create a new GitHub repository and import it into IDX
Firebase App Hosting allows you to set up a GitHub repository so that it builds and deploys your Next.js code every time you push to a configured branch.
- Create a new GitHub repository for this codelab: https://github.com/new. Name it anything you'd like, for example
MyFriendlyEatsCodelab. - Copy your new repository URL. It will look like this:
https://github.com/USER_NAME/REPOSITORY_NAME.git - Go to https://idx.google.com and sign in.
- Click Import a repo and paste in your copied GitHub URL.
IDX will prompt you to link to GitHub, then it will clone your (empty) repository.
View the codelab's source code repository
View the codelab source at https://github.com/firebase/friendlyeats-web. The friendlyeats-web repository contains sample projects for multiple platforms.
This codelab that you're working through focuses only on Firebase App Hosting and the Gemini API, and it's a shortened version of the full codelab "Integrate Firebase with a Next.js App". This shortened codelab requires that you only work with the source code in the #io-connect branch of the friendlyeats-web repository, specifically the nextjs-step10 directory.
Take note of the following additional directories of the friendlyeats-web repository. Even though you don't need these directories for this codelab, it's helpful to know what they are.
nextjs-start: contains the starter code for the full codelab "Integrate Firebase with a Next.js App".nextjs-end: contains the solution code for the finished web app.
Copy the codelab source into your new repository
Here's how to copy the nextjs-step10 directory into your own repository:
- In IDX, open up the terminal using Menu > Terminal > New Terminal.
- Use the giget npm package to fetch only the
nextjs-step10directory from theio-connectbranch:npx giget@latest gh:firebase/friendlyeats-web/nextjs-step10#io-connect . --force - Track changes locally with git:
git add -A
git commit -m "codelab starting point"
git branch -M main
git push -u origin main
You should now see the starter code in your GitHub repository.
3. Review the starter codebase
In this section, you'll review a few areas of the app's starter codebase to which you'll add functionality in this codelab.
Folder and file structure
The following table contains an overview of the folder and file structure of the app:
Folders and files | Description |
| React components for filters, headers, restaurant details, and reviews |
| Utility functions that aren't necessarily bound to React or Next.js |
| Firebase-specific code and Firebase configuration |
| Static assets in the web app, like icons |
| Routing with the Next.js App Router |
| An API route handler |
| Project dependencies with npm |
| Next.js-specific configuration (server actions are enabled) |
| JavaScript language-service configuration |
Server and client components
The app is a Next.js web app that uses the App Router. Server rendering is used throughout the app. For example, the src/app/page.js file is a server component responsible for the main page. The src/components/RestaurantListings.jsx file is a client component denoted by the "use client" directive at the beginning of the file.
Import statements
In some files, you might notice import statements like the following:
import RatingPicker from "@/src/components/RatingPicker.jsx";
The app uses the @ symbol to avoid clunky relative import paths and is made possible by path aliases.
Firebase-specific APIs
All Firebase API code is wrapped in the src/lib/firebase directory. Individual React components then import the wrapped functions from the src/lib/firebase directory, rather than importing Firebase functions directly.
Mock data
Mock restaurant and review data is contained in the src/lib/randomData.js file. Data from that file is assembled in the code in the src/lib/fakeRestaurants.js file.
4. Set up your Firebase project
In this section, you'll set up a Firebase project and associate a Firebase web app with it. You'll also set up the Firebase services used by the sample web app.
Create a Firebase project
- Sign into the Firebase console using the same Google Account you used in the previous step.
- Click the button to create a new project, and then enter a project name (for example,
FriendlyEats Codelab).
- Click Continue.
- If prompted, review and accept the Firebase terms, and then click Continue.
- (Optional) Enable AI assistance in the Firebase console (called "Gemini in Firebase").
- For this codelab, you do not need Google Analytics, so toggle off the Google Analytics option.
- Click Create project, wait for your project to provision, and then click Continue.
Upgrade your Firebase pricing plan
To use Firebase App Hosting and Cloud Storage for Firebase, your Firebase project needs to be on the pay-as-you go (Blaze) pricing plan, which means it's linked to a Cloud Billing account.
- A Cloud Billing account requires a payment method, like a credit card.
- If you're new to Firebase and Google Cloud, check if you're eligible for a $300 credit and a Free Trial Cloud Billing account.
- If you're doing this codelab as part of an event, ask your organizer if there are any Cloud credits available.
To upgrade your project to the Blaze plan, follow these steps:
- In the Firebase console, select to upgrade your plan.
- Select the Blaze plan. Follow the on-screen instructions to link a Cloud Billing account to your project.
If you needed to create a Cloud Billing account as part of this upgrade, you might need to navigate back to the upgrade flow in the Firebase console to complete the upgrade.
5. Create an App Hosting backend
In this section, you'll set up an App Hosting backend to watch a branch on your git repository. You'll also configure all the services that the backend will be talking to.
By the end of this section, you'll have an App Hosting backend connected to your repository in GitHub that will automatically re-build and roll out a new version of your app whenever you push a new commit to your main branch.
Create a backend
- In the Firebase console, navigate to the App Hosting page:
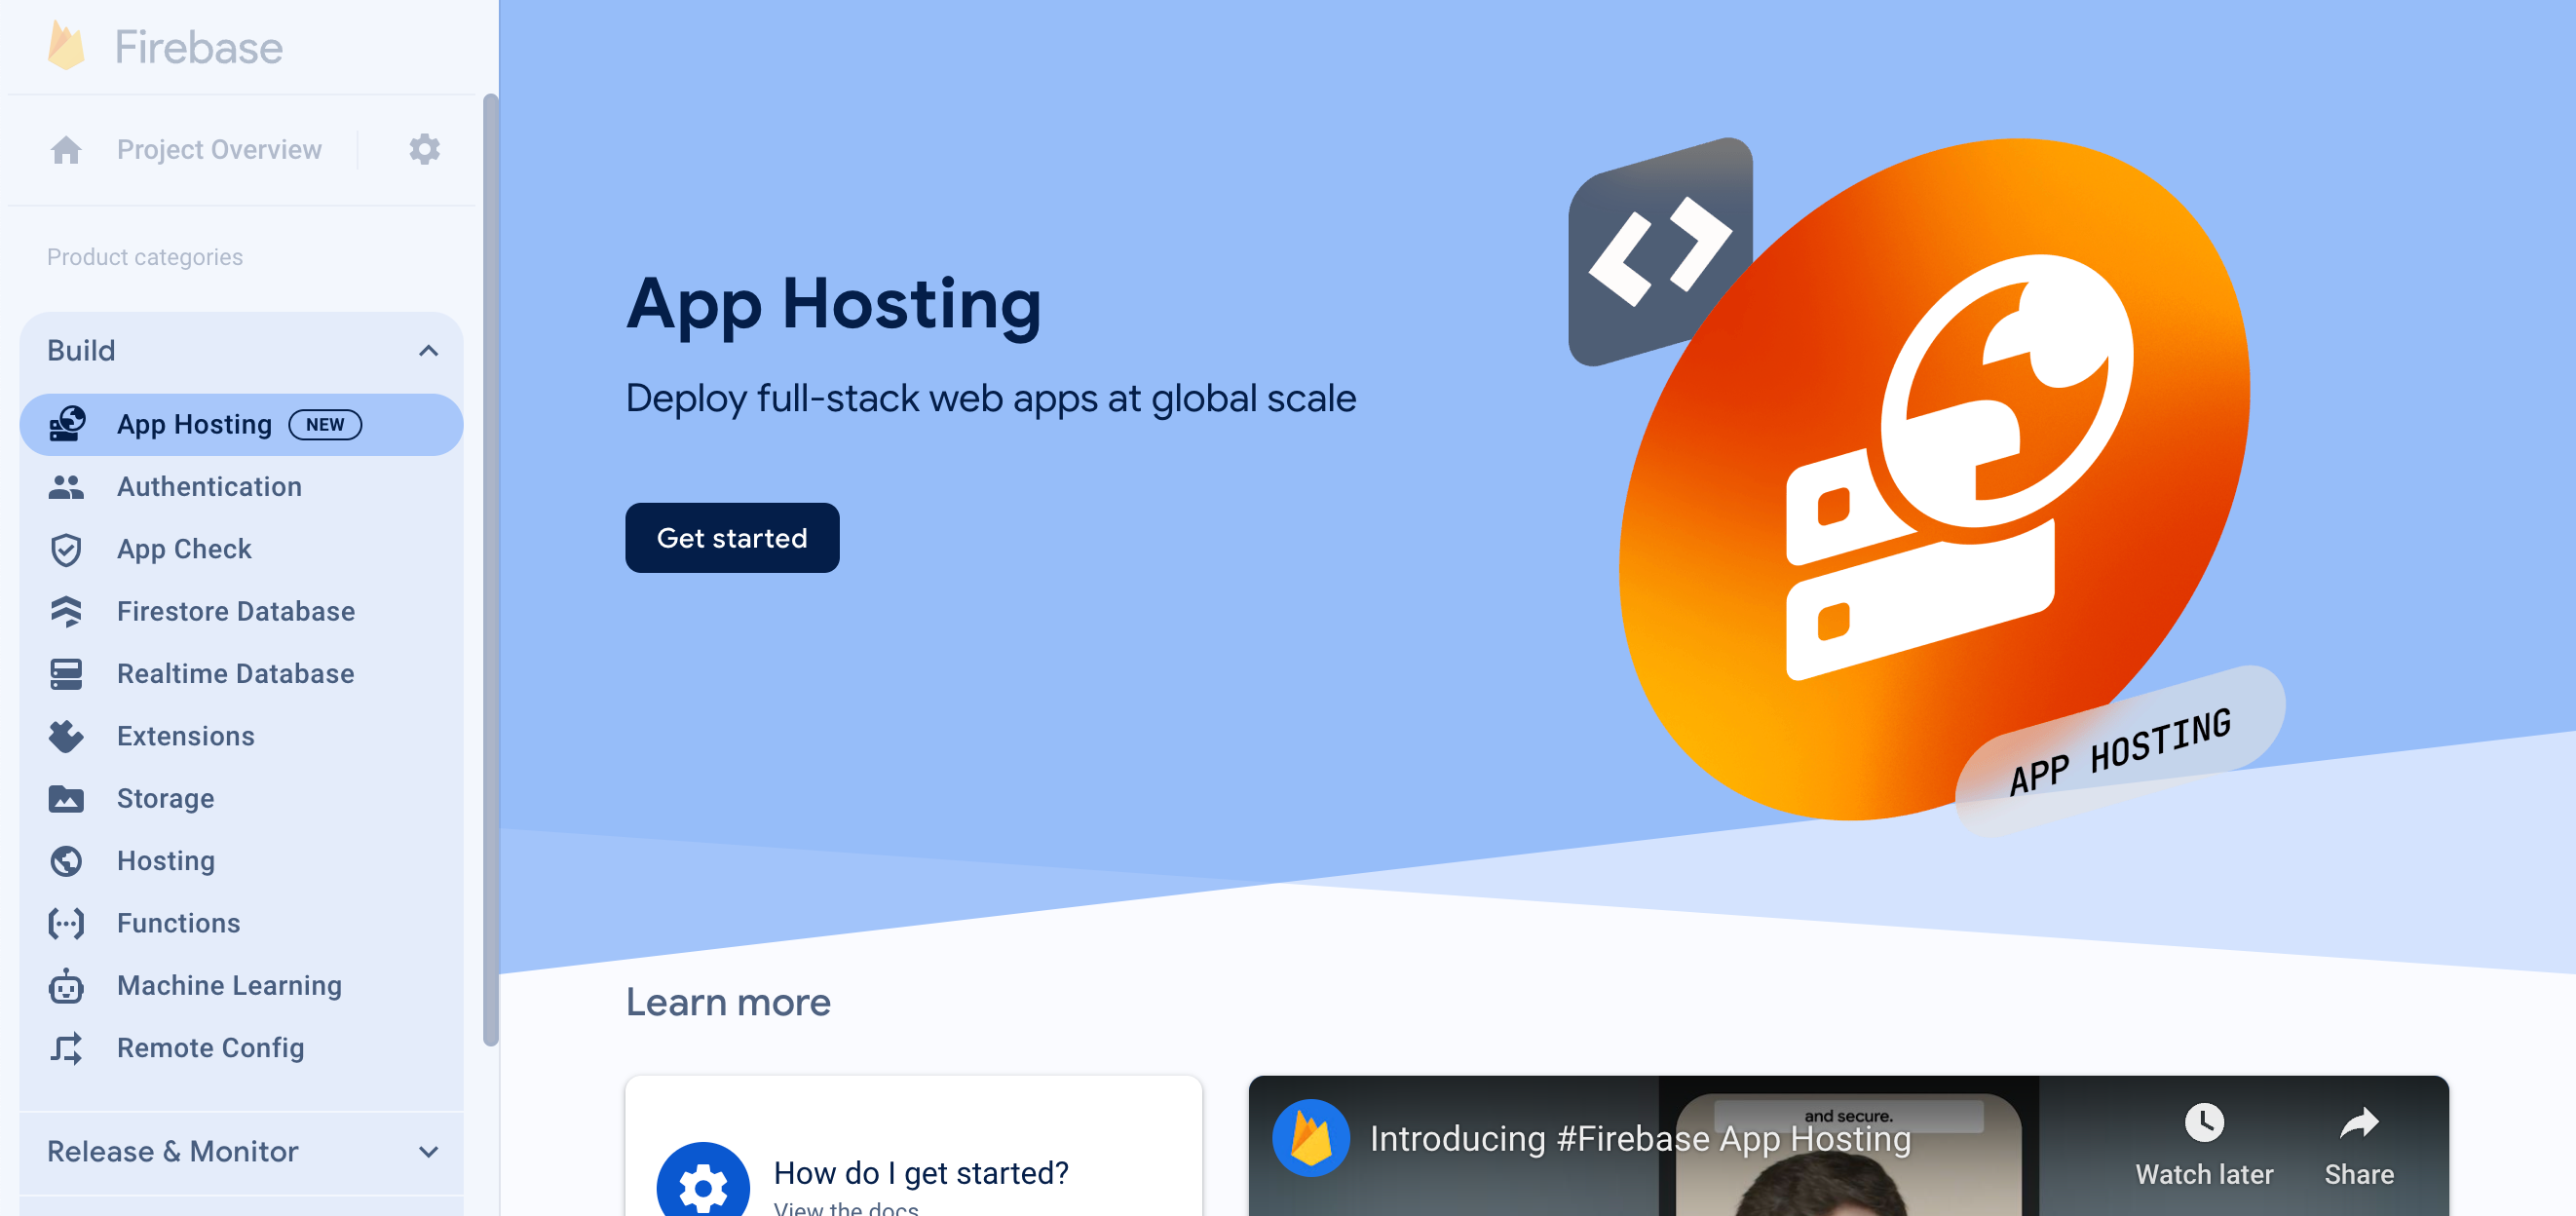
- Click Get started to start the backend creation flow.
- Follow the prompts to import and connect the GitHub repository you created earlier.
- Set deployment settings:
- Keep the root directory as
/ - Set the live branch to
main - Enable automatic rollouts
- Keep the root directory as
- Name your backend
friendlyeats-codelab(or a backend name of your choice). This becomes part of the domain used to access the backend.
This workflow also automatically creates a Firebase Web App in your Firebase project. Later in this codelab, you'll use the configuration values of this Web App to connect your codebase to your Firebase project. - Click Finish and deploy. After a moment, you'll be taken to a new page where you can see the status of your new App Hosting backend!
- From the App Hosting dashboard, copy your new domain.
It'll have a pattern likeBACKEND_ID--PROJECT_ID.REGION.hosted.app. You'll need this domain to set up Firebase Authentication later.
It might take a few minutes for the domain to begin working due to DNS propagation and SSL cert creation. While your backend is being created, continue on to setting up the rest of the Firebase project and configuring your backend (next steps of this codelab).
Every time you push a new commit to the main branch of your GitHub repository, you'll see a new build and rollout begin in the Firebase console, and your site will automatically update once the rollout completes.
6. Set up other Firebase services
Even though this codelab focuses only on Firebase App Hosting and the Gemini API, the working web app requires other Firebase services to function. The code to make all these services work in your app are part of the codebase you copied into your own GitHub repo, but you still need to set up these services in your Firebase project.
Set up Authentication
- In the Firebase console, navigate to Authentication.
- Click Get started.
- In the Additional providers column, click Google > Enable.
- In the Public-facing name for project text box, enter a name, such as
My FriendlyEatsCodelab app. - From the Support email for project drop-down, select your email address.
- Click Save.
- In the Public-facing name for project text box, enter a name, such as
- Click the Settings tab in the Authentication page.
- Click Authorized Domains from the left-side menu in the screen.
- Click Add Domain, and then add your newly-created App Hosting domain (it ends with
.hosted.app). - Click Add to save.
Set up Cloud Firestore
- In the left-panel of the Firebase console, expand Build and then select Firestore database.
- Click Create database.
- Leave the Database ID set to
(default). - Select a location for your database, then click Next.
For a real app, you want to choose a location that's close to your users. - Click Start in test mode. Read the disclaimer about the security rules.
Later in this codelab, you'll add Security Rules to secure your data. Do not distribute or expose an app publicly without adding Security Rules for your database. - Click Create.
Set up Cloud Storage for Firebase
- In the left-panel of the Firebase console, expand Build and then select Storage.
- Click Get started.
- Select a location for your default Storage bucket.
Buckets inUS-WEST1,US-CENTRAL1, andUS-EAST1can take advantage of the "Always Free" tier for Google Cloud Storage. Buckets in all other locations follow Google Cloud Storage pricing and usage. - Click Start in test mode. Read the disclaimer about the security rules.
Later in this codelab, you'll add security rules to secure your data. Do not distribute or expose an app publicly without adding Security Rules for your Storage bucket. - Click Create.
7. Configure your Web App
Now that you've created a Firebase project and enabled all the Firebase services used in your app, you're ready to start working in IDX to configure your web app to use those services.
Log into the Firebase CLI within IDX
IDX already has Node.js and the Firebase CLI installed, so you can skip their installation and just start setting up the CLI.
- In the terminal within IDX, run these commands to configure the CLI to use the Firebase project you created earlier:
firebase login --no-localhost
firebase use --add
codelab. - Depending on whether you want Firebase to collect data, enter
YorN. Either option works for this codelab. - In your browser, select your Google account, and then click Allow.
Deploy Security Rules and indexes
The code you copied into your GitHub repo already has sets of security rules for Firestore (in firestore.rules) and for Cloud Storage for Firebase (in storage.rules). After you deploy the Security Rules, the data in your database and your bucket are better protected from misuse.
You can also use the CLI to deploy a set of indexes for Firestore (in firestore.indexes.json) to enable advanced queries.
- In the terminal within IDX, run this command to deploy these Security Rules and indexes:
firebase deploy --only firestore,storage
- If you're asked:
"Cloud Storage for Firebase needs an IAM Role to use cross-service rules. Grant the new role?", pressEnterto select Yes.
Add your Firebase configuration to your web app code
- In the Firebase console, do the following:
- Navigate to your Project settings.
- Scroll down to the Your Apps section, and then select the app with the same name as your App Hosting backend.
- Under SDK setup and configuration, choose the Config option, then copy the
firebaseConfigvariable's properties and their values.
- In IDX, do the following:
- Open the
apphosting.yamlfile. This is where you'll setup your environment variables on App Hosting, as well as secrets and runtime configuration. - Fill in the provided environment variable values with the configuration values you copied from the Firebase console.For example (replace with your own values):
runConfig: minInstances: 0 maxInstances: 2 env: # Get these values from the Firebase console - variable: NEXT_PUBLIC_FIREBASE_API_KEY value: xxxxxxxxxxxxxxxxxxxxxxxxxxxx-xxxxxxxxxx - variable: NEXT_PUBLIC_FIREBASE_AUTH_DOMAIN value: project-id.firebaseapp.com - variable: NEXT_PUBLIC_FIREBASE_PROJECT_ID value: project-id - variable: NEXT_PUBLIC_FIREBASE_STORAGE_BUCKET value: project-id.firebasestorage.app - variable: NEXT_PUBLIC_FIREBASE_MESSAGING_SENDER_ID value: 111111111111 - variable: NEXT_PUBLIC_FIREBASE_APP_ID value: 1:111111111111:web:aaaaaaaaaaaaaaaaaaaaaa - Save the file. Then, in the terminal within IDX, run these commands to push the changes to GitHub:
git commit -a -m "Setup Firebase Config"

git push
- Open the
- Go back to the Firebase console, and navigate back to the App Hosting page, and then do the following:
- Click View Dashboard for your backend.
- Observe that a new build has been triggered from your git push! This should take around 3 minutes to finish building and rolling out to Cloud Run. You can monitor its progress by clicking the
build-IDchip. - Refresh the console page to check if the rollout has finished. Once it completes, click the link for your domain (ending in
.hosted.app) under domains to open it up and view the newly-deployed app!
Congrats, you've deployed the initial web app! Let's dig in a bit more.
8. Try out the web app in a browser
Verify you can login with Firebase Authentication
- In your browser, refresh the page displaying your web app.
- Click Sign in with Google.
- Sign out and sign in again. The page updates in real-time without a page refresh. You can repeat this step with different users.
- Optional: In your browser, refresh the web app. Right-click the web app, select View page source, and search for the display name. It appears in the raw HTML source returned from the server.
View restaurant information
The web app includes mock data for restaurants and reviews.
To insert mock restaurant data into your Cloud Firestore database, select  > Add sample restaurants.
Verify that the restaurant listings load at server run time
Using the Next.js framework, it might not be obvious when data is loaded at server run time or client-side run time.
To verify that restaurant listings load at server run time, follow these steps:
- In the web app, open DevTools and disable JavaScript.

- Refresh the web app. The restaurant listings still load. Restaurant information is returned in the server response. When JavaScript is enabled, the restaurant information is hydrated through the client-side JavaScript code.
- In DevTools, re-enable JavaScript.
- In the web app, select
 > Add sample restaurants. If your snapshot function is implemented correctly, the restaurants appear in real-time without a page refresh.
Add reviews for a restaurant
To add a review and verify that it's inserted into Cloud Firestore, follow these steps:
- Refresh the web app, and select a restaurant from the home page.
- On the restaurant's page, click
 .
. - Select a star rating.
- Write a review.
- Click Submit. Your review appears at the top of the list of reviews.
9. Summarize restaurant reviews with generative ai
In this section, you'll add a review summary feature so that a user can quickly understand what everyone thinks of a restaurant without having to read every review.
Store a Gemini API key in Cloud Secret Manager
App Hosting integrates with Cloud Secret Manager to allow you to store sensitive values like API keys securely.
- To use the Gemini API, you'll need an API key. Create a key in Google AI Studio.
When prompted, select the same project that you've been using for this codelab (behind the scenes, a Firebase project is a Google Cloud project). - In the terminal within IDX, run this command to create a new secret:
firebase apphosting:secrets:set gemini-api-key - When prompted for the secret value, copy and paste your Gemini API key from Google AI Studio.
- If you're asked:
"To use this secret, your backend's service account must be granted access. Would you like to grant access now?", pressEnterto select Yes. - When asked if the new secret should be added to
apphosting.yaml, enterYto accept, then pressEnterto select GEMINI_API_KEY as the environment variable name.
Your Gemini API key is now stored securely in Cloud Secret manager, and is accessible to your App Hosting backend. You can also view the value in the Secrets Manager Dashboard in the Google Cloud Console.
- Open the
apphosting.yamlfile and note that your secret's name, was recorded, but not the values.It should look like the following:runConfig: minInstances: 0 maxInstances: 2 env: # Get these values from the Firebase console - variable: NEXT_PUBLIC_FIREBASE_API_KEY value: xxxxxxxxxxxxxxxxxxxxxxxxxxxx-xxxxxxxxxx - variable: NEXT_PUBLIC_FIREBASE_AUTH_DOMAIN value: project-id.firebaseapp.com - variable: NEXT_PUBLIC_FIREBASE_PROJECT_ID value: project-id - variable: NEXT_PUBLIC_FIREBASE_STORAGE_BUCKET value: project-id.firebasestorage.app - variable: NEXT_PUBLIC_FIREBASE_MESSAGING_SENDER_ID value: 111111111111 - variable: NEXT_PUBLIC_FIREBASE_APP_ID value: 1:111111111111:web:aaaaaaaaaaaaaaaaaaaaaa - variable: GEMINI_API_KEY secret: gemini-api-key
Implement the review summary component
- In IDX, open
src/components/Reviews/ReviewSummary.jsx. - Replace the
GeminiSummaryfunction with the following code:export async function GeminiSummary({ restaurantId }) { const { firebaseServerApp } = await getAuthenticatedAppForUser(); const reviews = await getReviewsByRestaurantId( getFirestore(firebaseServerApp), restaurantId ); const genAI = new GoogleGenerativeAI(process.env.GEMINI_API_KEY); const model = genAI.getGenerativeModel({ model: "gemini-2.5-flash-lite", safety_settings: [ { category: HarmCategory.HARM_CATEGORY_DANGEROUS_CONTENT, threshold: HarmBlockThreshold.BLOCK_NONE, }, ], }); const reviewSeparator = "@"; const prompt = ` Based on the following restaurant reviews, where each review is separated by a '${reviewSeparator}' character, create a one-sentence summary of what people think of the restaurant. Here are the reviews: ${reviews.map(review => review.text).join(reviewSeparator)} `; try { const result = await model.generateContent(prompt); const response = await result.response; const text = response.text(); return ( <div className="restaurant__review_summary"> <p>{text}</p> <p>✨ Summarized with Gemini</p> </div> ); } catch (e) { console.error(e); return <p>Error contacting Gemini</p>; } } - In the terminal within IDX, run these commands to create a commit and push it to your GitHub repository.
git commit -a -m "Use AI to summarize reviews" git push - In the Firebase console, open the App Hosting page, and wait for your new rollout to complete.
- In your browser, click a restaurant card. At the top of the screen, you should see a one-sentence summary of all the reviews for the restaurant.
- Add a new review and refresh the page. You should see the summary change.
10. Conclusion
Congratulations! You learned how to use Firebase App Hosting to deploy a Next.js app and use the Gemini API to summarize text. Specifically, you used the following:
- Firebase App Hosting to automatically build and deploy your Next.js code every time you push to a configured GitHub branch.
- Cloud Secret Manager (integrated with App Hosting) to securely store your Gemini API key so that you can build generative AI features in your app.
Learn more
Dig into the full codelab "Integrate Firebase with a Next.js app" to learn how we added Firebase Authentication, Cloud Firestore, and Cloud Storage for Firebase to this app.
Also, check out more codelabs: