
1. Before you begin
In this codelab, you learn how to add the ability to engage with users whether they are using your app in the foreground or your app is in the background.
Prerequisites
None
What you'll learn
- Add Firebase to your Android App
- Add FCM and FIAM dependencies
- Send test FCM message to your app
- Send test FIAM message to your app
What you'll need
- Android Studio 4.1
- Android device or emulator
2. Get started
Get the sample code
Clone the GitHub repository from the command line:
Import the starter app
From Android Studio, select the codelab-fcm-and-fiam directory (  ). It would be the one cloned in the previous step (File > Open > .../codelab-fcm-and-fiam).
You should now have the FcmAndFiam project open in Android Studio. If you see a warning about a google-services.json file missing, don't worry. It will be added in the next step.
3. Set up a Firebase project and your app to use Firebase
Create a Firebase project
- Sign into the Firebase console using your Google Account.
- Click the button to create a new project, and then enter a project name (for example,
Send messages codelab). - Click Continue.
- If prompted, review and accept the Firebase terms, and then click Continue.
- (Optional) Enable AI assistance in the Firebase console (called "Gemini in Firebase").
- For this codelab, you need Google Analytics to optimally use Firebase products, so keep the toggle on for the Google Analytics option. Follow the on-screen instructions to set up Google Analytics.
- Click Create project, wait for your project to provision, and then click Continue.
Add Firebase to your app
- From the overview screen of your new project, click the Android icon to launch the setup workflow.
- Enter the codelab's package name:
com.google.firebase.codelab.fcmandfiam - After adding the package name click Register App then Download google-services.json to obtain your Firebase Android config file then copy the google-services.json file into the
appdirectory in your project. After the file is downloaded you can click Skip for the next steps shown in the console (they've already been done for you in the build-android-start project). - Add google-services plugin to your app**
The google-services plugin uses the google-services.json file to configure your application to use Firebase. The google-services plugin dependency and the plugin itself should already be added to the project and app level build files respectively. Confirm the following entries:build.gradlebuildscript { ... dependencies { ... classpath 'com.google.gms:google-services:4.3.8' } }plugins { ... id: 'com.google.gms.google-services' }
Add dependencies
FCM and FIAM require the following dependencies. These dependencies should already be added to the app level build file. Confirm the following dependencies are added:
app/build.gradle
dependencies {
  ...
  implementation platform('com.google.firebase:firebase-bom:28.4.2')
  implementation 'com.google.firebase:firebase-analytics'
  implementation 'com.google.firebase:firebase-messaging'
  implementation 'com.google.firebase:firebase-inappmessaging-display'
}
Sync your project with gradle files
To be sure that all dependencies are available to your app, you should sync your project with gradle files at this point. Select File > Sync Project with Gradle Files from the Android Studio toolbar.
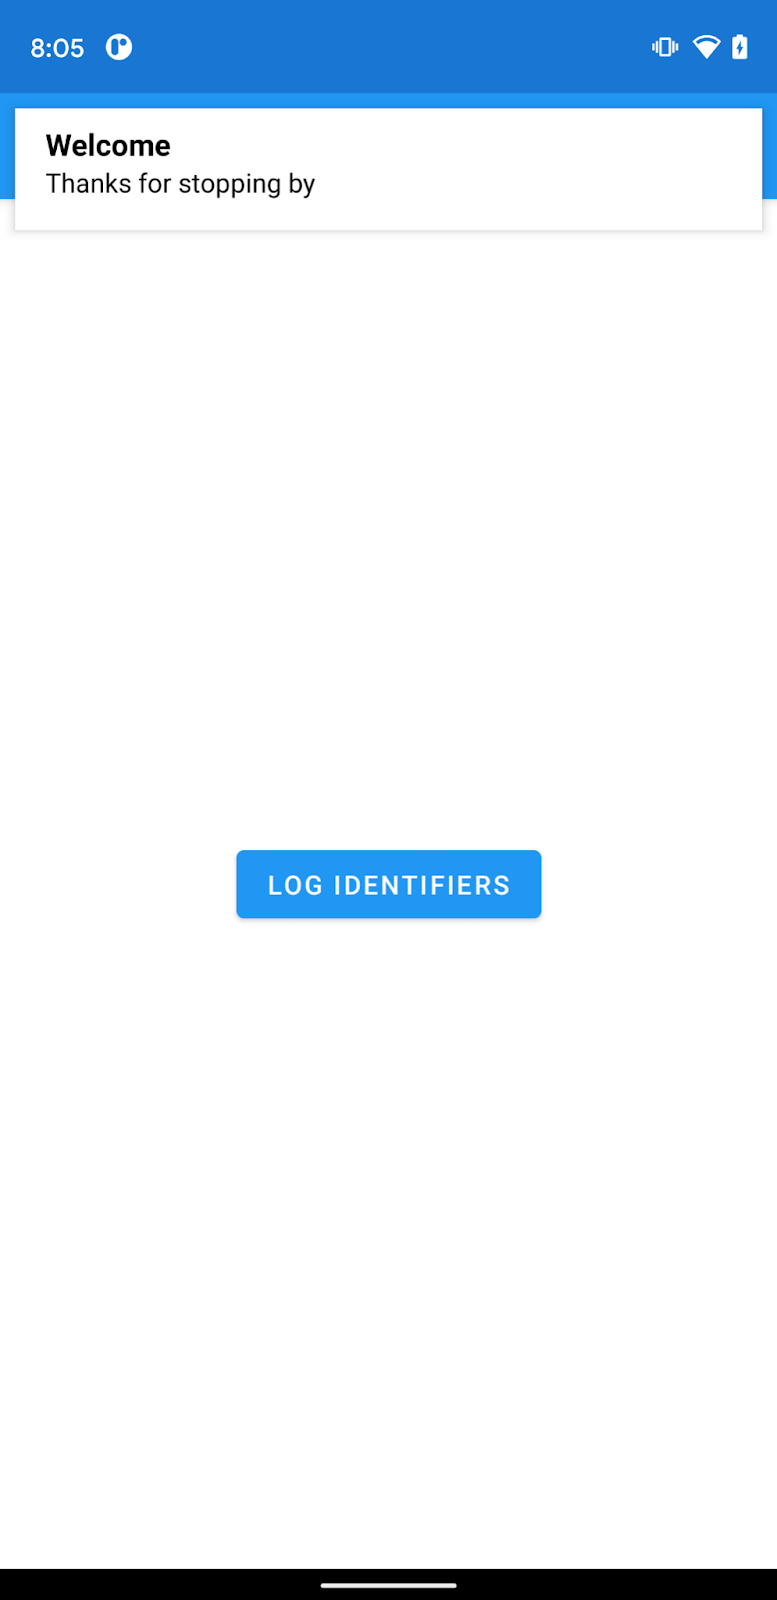
4. Log Identifiers
Firebase Cloud Messaging and Firebase In App Messaging both use identifiers to send messages to apps. FCM uses a registration token and FIAM uses an installation ID.
- In
MainActivity.ktreplace the TODO with the code below to log the identifiers needed to send messages:
FirebaseMessaging.getInstance().token.addOnCompleteListener { regTokenTask ->
   if (regTokenTask.isSuccessful) {
       Log.d(TAG, "FCM registration token: ${regTokenTask.result}")
   } else {
       Log.e(TAG, "Unable to retrieve registration token",
           regTokenTask.exception)
   }
}
FirebaseInstallations.getInstance().id.addOnCompleteListener { installationIdTask ->
   if (installationIdTask.isSuccessful) {
       Log.d(TAG, "Firebase Installations ID: ${installationIdTask.result}")
   } else {
       Log.e(TAG, "Unable to retrieve installations ID",
           installationIdTask.exception)
   }
}
- Connect your Android device, and click Run (
 )in the Android Studio toolbar. Tapping on the Log Identifiers button will log the FCM registration token and the Firebase Installations ID to logcat. The output should look like this:
D/FcmAndFiam: Firebase Installations ID: emMc5...AsJfb
  FCM registration token: emMc5LART6GV7...r0Q
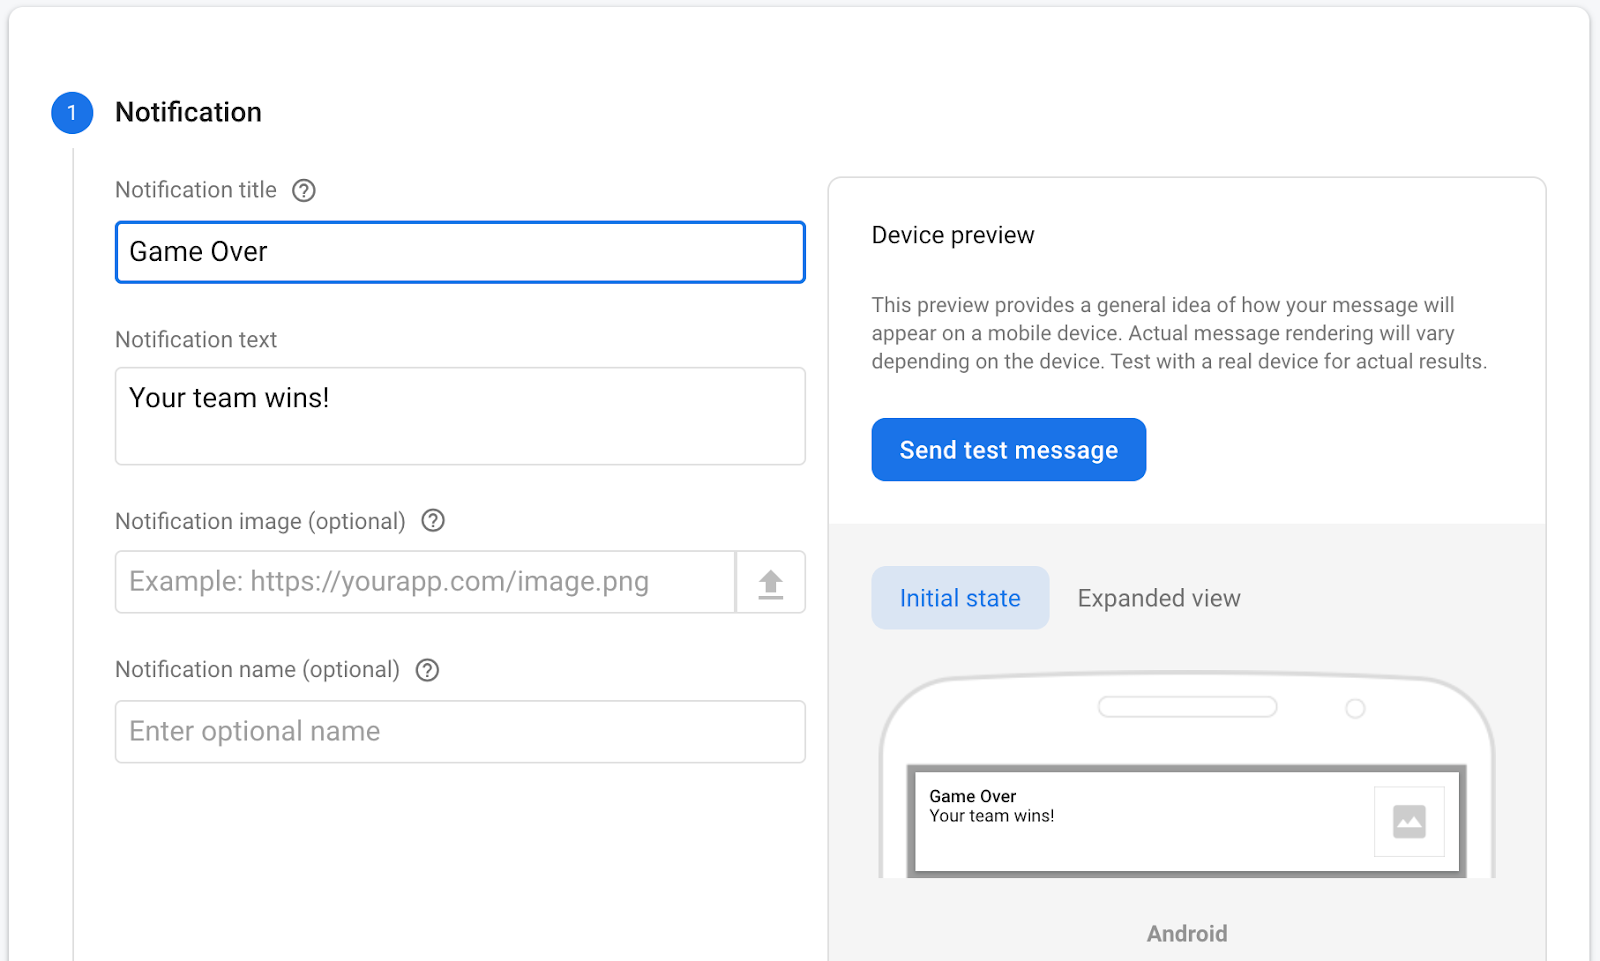
5. Send test FCM message
FCM messages can be sent both from the Firebase console and from the FCM REST API. In this codelab we will compose an FCM notification message and send it to our device. Notification messages are those that are displayed in the system's notification area. Send a test FCM message by:
- Ensure app is in the background (go to home screen)
- Go to the Firebase console and select Cloud Messaging in the left navigation
- Select Send your first message
- Add a title and body for the message, then click Send test message
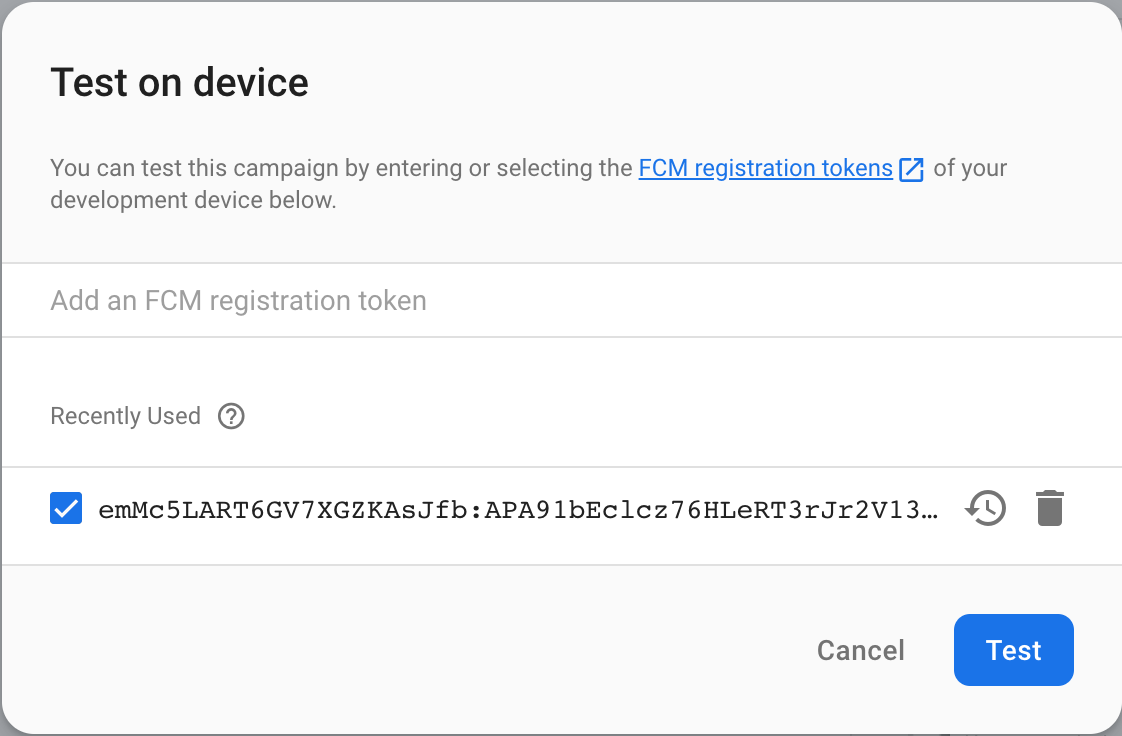
- Add the FCM registration token, then click test
- Observe display notification on device
- Tapping on the notification opens the app
6. Send test FIAM message
Firebase In App Messaging can be triggered as a result of a variety of user events. The test message uses the app open event to trigger the In App Message. Send a test FIAM message by:
- Ensure app is in the background (go to home screen)
- Go to the Firebase console and select In-App Messaging in the left navigation
- Select Create your first campaign
- Select top banner campaign and enter title and body of the message
- Click Test on device

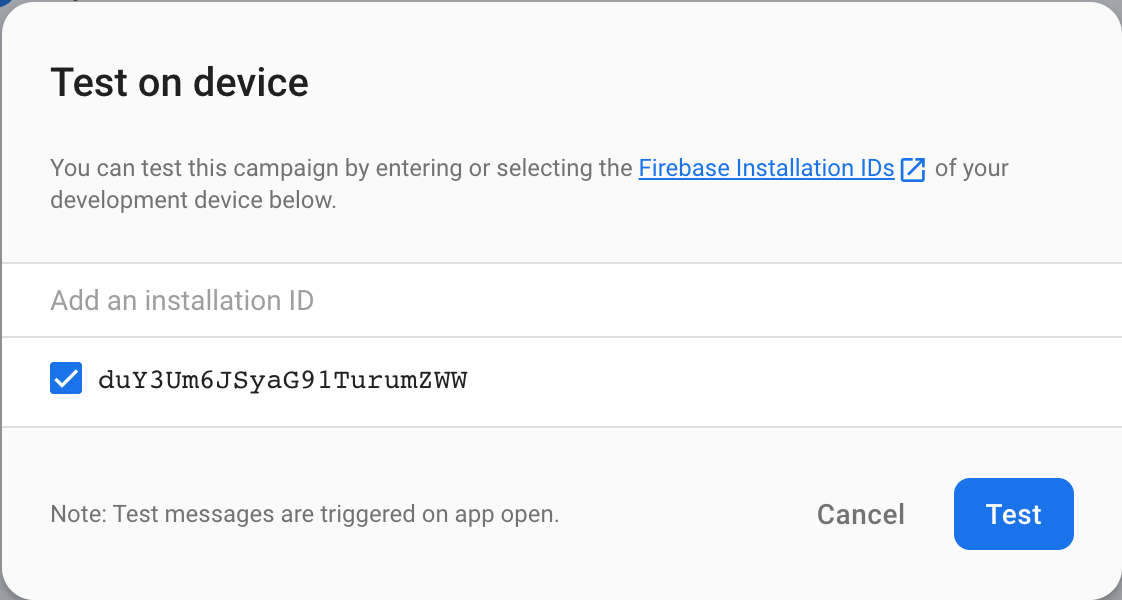
- Add Installations ID and click Test
- Reopen app
- Observe in app message
7. Congratulations
Congratulations, you've successfully sent both FCM and FIAM messages. Now you know how to engage with your users whether they are using your app in the foreground or your app is in the background.
Further reading
What's Next
- Send messages to users in your own Android app.