
Con una app existente de Next.js o Angular (versiones de Next.js 13.5.x o posteriores, o Angular 18.2.x o posteriores) en un repositorio de GitHub, comenzar a usar App Hosting puede ser tan sencillo como crear un backend de App Hosting y, luego, iniciar un lanzamiento con una confirmación en tu rama activa. Si no tienes una app, usa una de nuestras apps de ejemplo para seguir los pasos que se describen en esta guía.
En esta guía, se describe cómo configurar App Hosting en la consola de Firebase para implementar automáticamente cada vez que se realice una confirmación nueva en un repositorio de GitHub. Al final de este flujo, tendrás una app de ejemplo activa de Next.js o Angular que se volverá a implementar cada vez que confirmes un cambio nuevo en la rama main de tu repositorio de GitHub.
Si bien esta guía se enfoca en el flujo recomendado de la consola de Firebase, existen otras formas de realizar la implementación, incluido el uso de la CLI de Firebase para implementar código local sin una conexión de GitHub.
Paso 1: Bifurca el repositorio de demostración
Visita https://github.com/firebase/apphosting-adapters y selecciona Bifurcar.
Paso 2: Crea un backend de App Hosting
En la consola de Firebase, navega a Hosting & Serverless > App Hosting.
Haz clic en Comenzar.
Si se te solicita, actualiza al plan de precios Blaze de pago por uso para usar App Hosting.
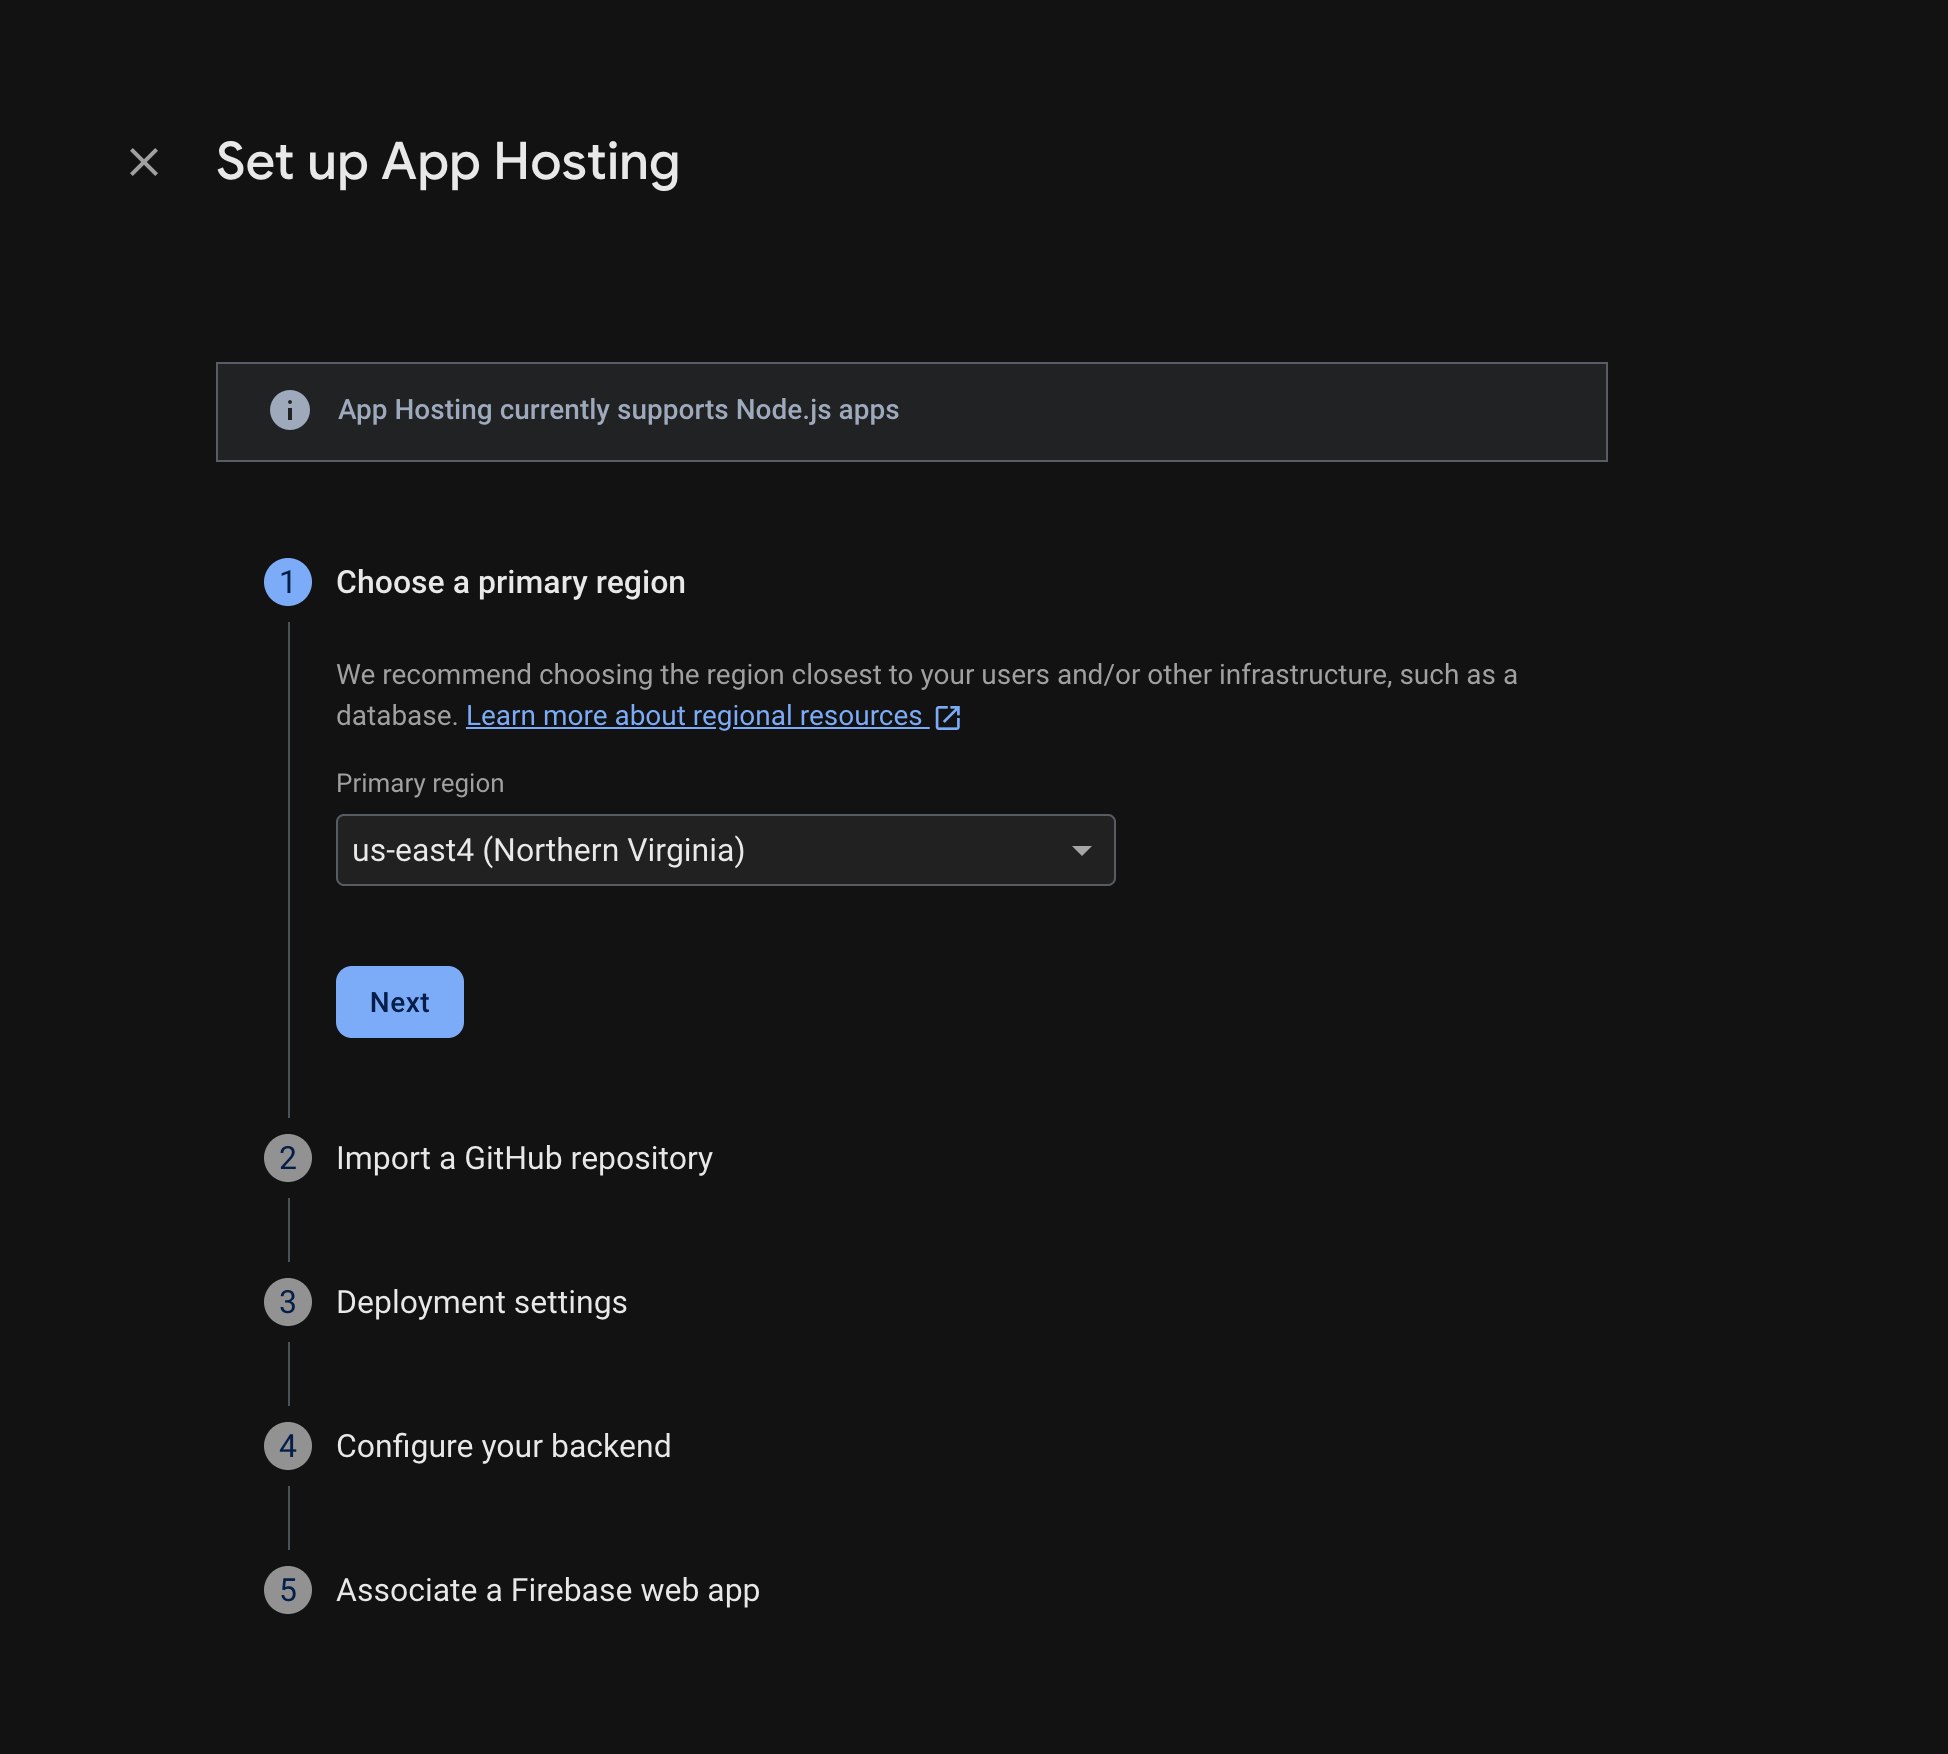
Sigue las indicaciones para completar estos pasos:
- Elige una región principal (por lo general, la región más cercana a tus usuarios).
- Conéctate a GitHub. Elige el repositorio que acabas de crear bifurcando el repositorio firebase-framework-tools.
- Establece el directorio raíz de tu app en uno de los siguientes:
- Establece la rama activa como principal.
- Habilita los lanzamientos automáticos (están habilitados de forma predeterminada).
- Asigna un nombre a tu backend.
- Selecciona tu entorno de ejecución. De forma predeterminada, se preselecciona la versión más reciente recomendada de Node.js.
- Configura las actualizaciones automáticas de imágenes base (ABIU). La ABIU está habilitada de forma predeterminada y aplica automáticamente parches de seguridad a tu entorno subyacente. Puedes inhabilitar la ABIU seleccionando "No especificado" para tu entorno de ejecución.
- Crea una app web nueva de Firebase.
Selecciona Finalizar e implementar.
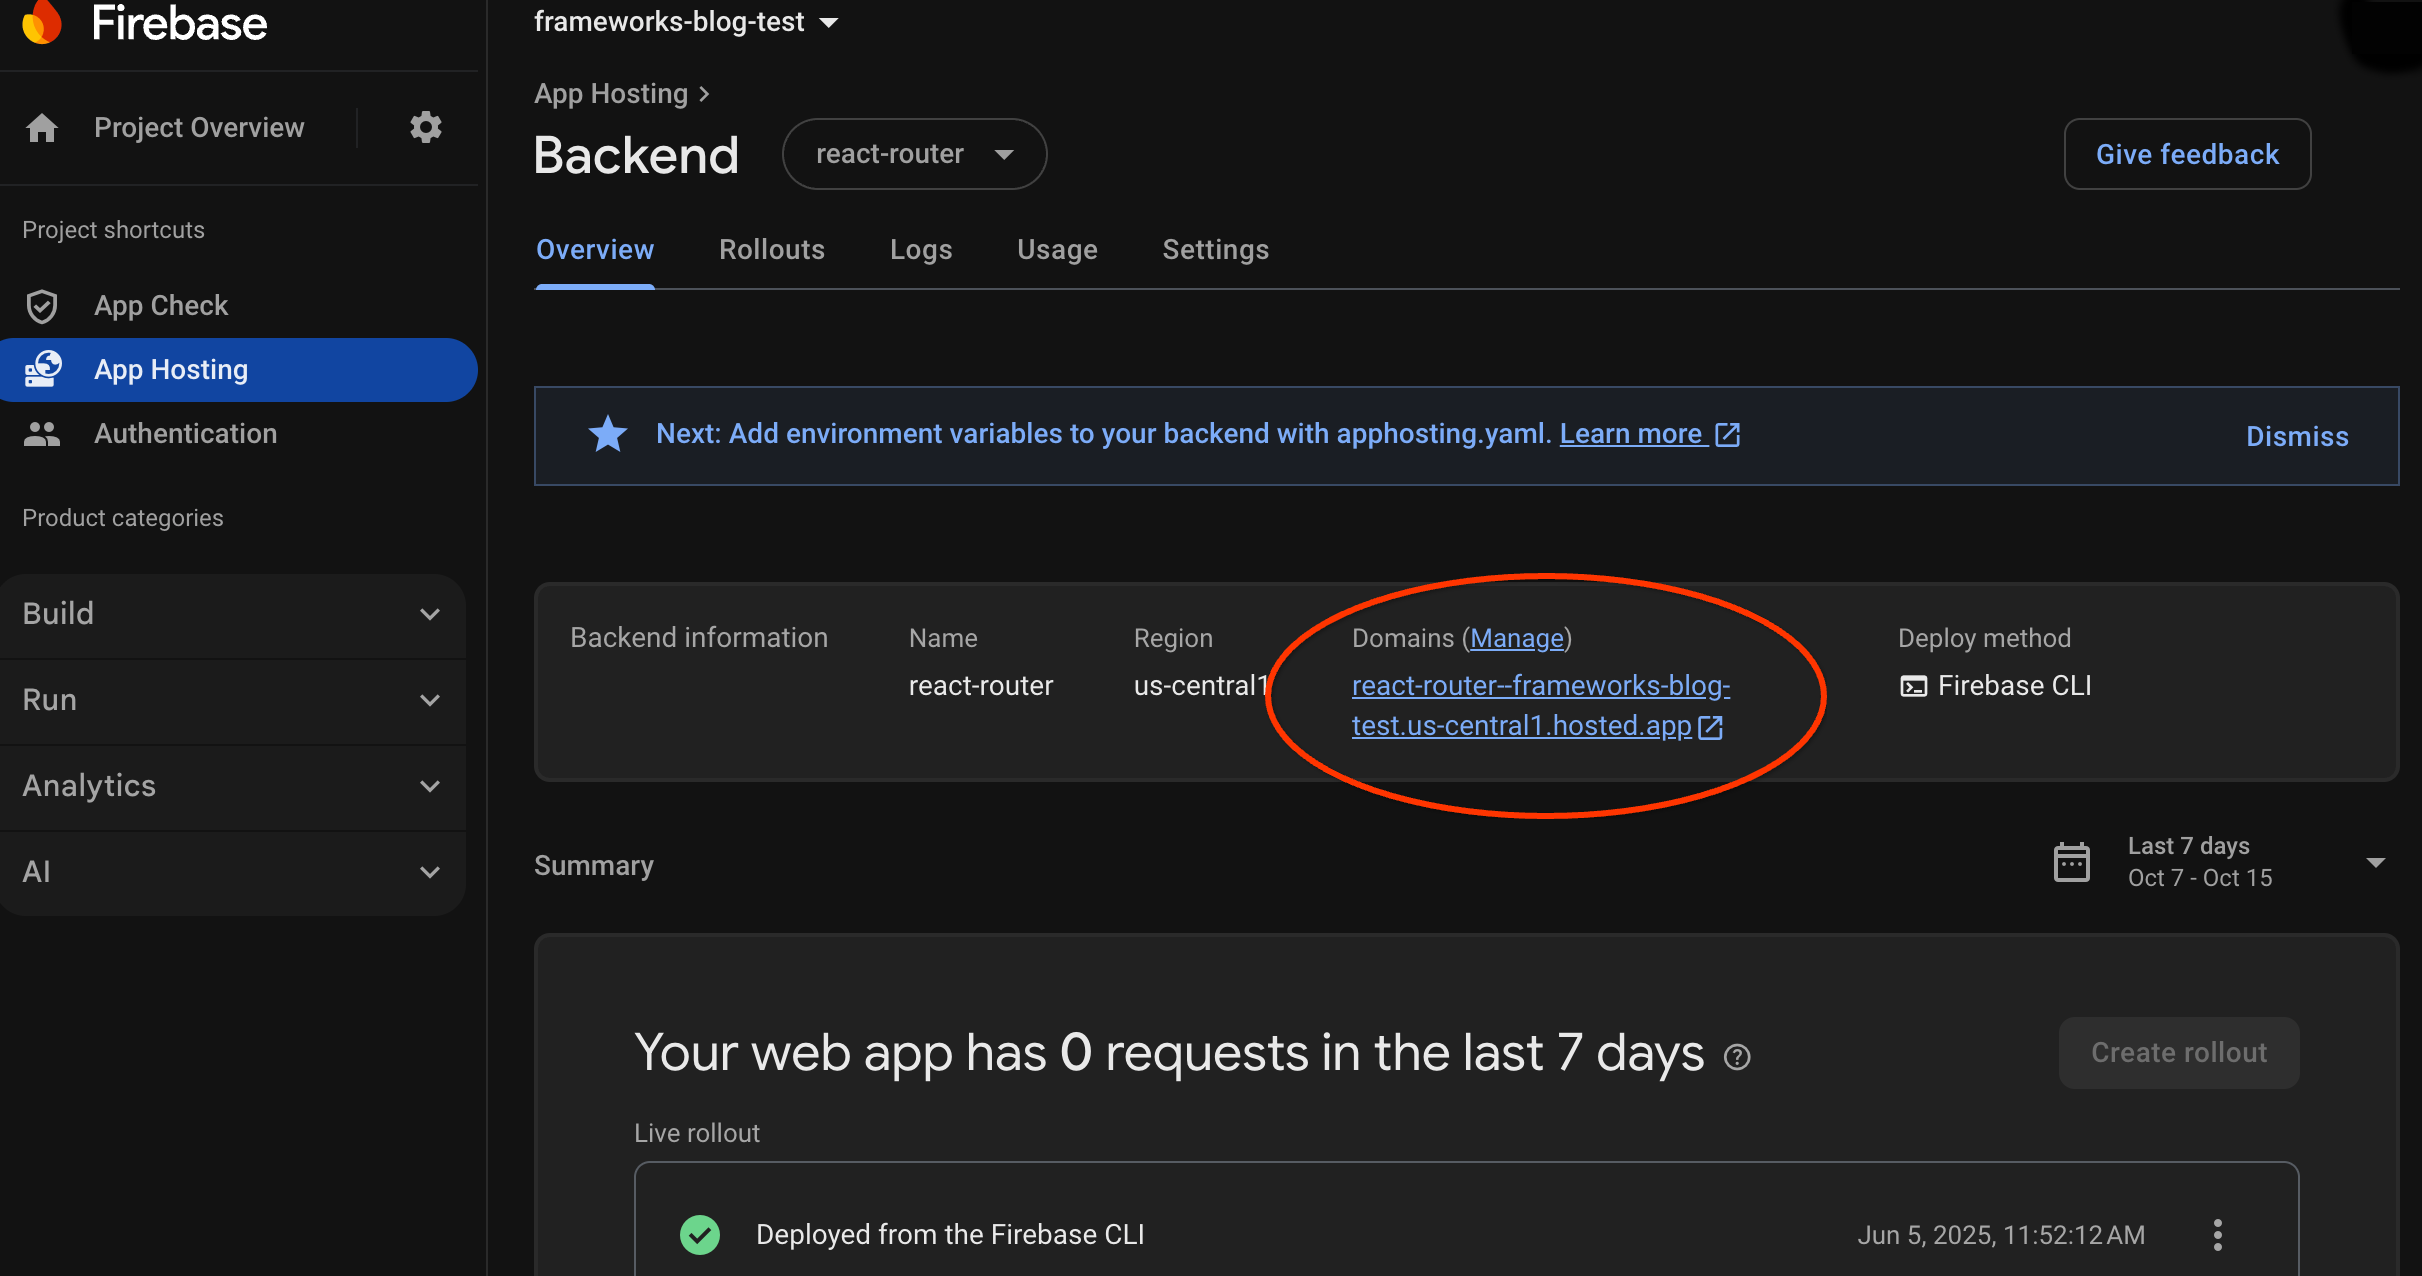
Paso 3: Consulta la app implementada
Cuando creas un backend, Firebase te proporciona un subdominio sin costo en el que los usuarios finales pueden visitar tu app web. Su formato es backend-id--project-id.us-central1.hosted.app.
En la fila Backend information del panel de tu backend, selecciona el vínculo a tu backend activo para ver tu nuevo sitio web:
Paso 4: Inicia una versión presionando un cambio
Una vez que se cree tu backend y tengas una URL publicada, podrás activar el lanzamiento de una nueva versión de tu app web cada vez que envíes cambios a la rama activa de tu repositorio de GitHub. Para realizar una prueba de tu configuración de App Hosting, sigue estos pasos:
En tu bifurcación del repositorio de GitHub de demostración, navega a la fuente de la página principal de la app de demostración, realiza cualquier edición reconocible que desees y, luego, envía tu cambio a la rama principal. Para encontrar tu página principal, sigue estos pasos:
- Next.js:
/starters/nextjs/basic/src/app/page.tsx - Angular:
/starters/angular/basic/src/app/pages/home/home.component.html
- Next.js:
En la consola de Firebase, supervisa App Hosting a medida que se lanza tu nuevo cambio en producción. Cuando se complete el lanzamiento, podrás ver el cambio en la página principal de la app.
Próximos pasos
- Profundiza tus conocimientos: Realiza un codelab de Firebase que integre una app alojada con funciones de Firebase Authentication y Google AI: Next.js | Angular
- Conecta un dominio personalizado.
- Configura tu backend: Establece variables de entorno, almacena parámetros secretos y mucho más.
- Supervisa los lanzamientos, el uso del sitio y los registros.