
אם אחרי שרשמתם את האפליקציה שלכם ל-App Check, אתם רוצים להריץ את האפליקציה בסביבה ש-App Check בדרך כלל לא מסווגת כסביבה תקפה, כמו סימולטור או מכשיר במהלך פיתוח, או מסביבת שילוב רציף (CI), אתם יכולים ליצור גרסת ניפוי באגים של האפליקציה שמשתמשת בספק ניפוי הבאגים של App Check במקום בספק אימות אמיתי.
שימוש בספק לניפוי באגים בפיתוח
כדי להשתמש בספק הניפוי באגים בזמן הפעלת האפליקציה באופן אינטראקטיבי (במהלך הפיתוח, למשל):
בגרסת build לניפוי באגים, לפני שמשתמשים בשירותי קצה עורפי של Firebase, צריך ליצור ולהגדיר את App Check debug provider factory:
Swift
let providerFactory = AppCheckDebugProviderFactory()
AppCheck.setAppCheckProviderFactory(providerFactory)

FirebaseApp.configure()
Objective-C
FIRAppCheckDebugProviderFactory *providerFactory =
      [[FIRAppCheckDebugProviderFactory alloc] init];
[FIRAppCheck setAppCheckProviderFactory:providerFactory];

// Use Firebase library to configure APIs
[FIRApp configure];
מפעילים את האפליקציה. אסימון ניפוי באגים מקומי יתועד ביומן כשה-SDK ינסה לשלוח בקשה לשרת העורפי. לדוגמה:
<Warning> [AppCheckCore][I-GAC004001] App Check debug token:
'123a4567-b89c-12d3-e456-789012345678'.
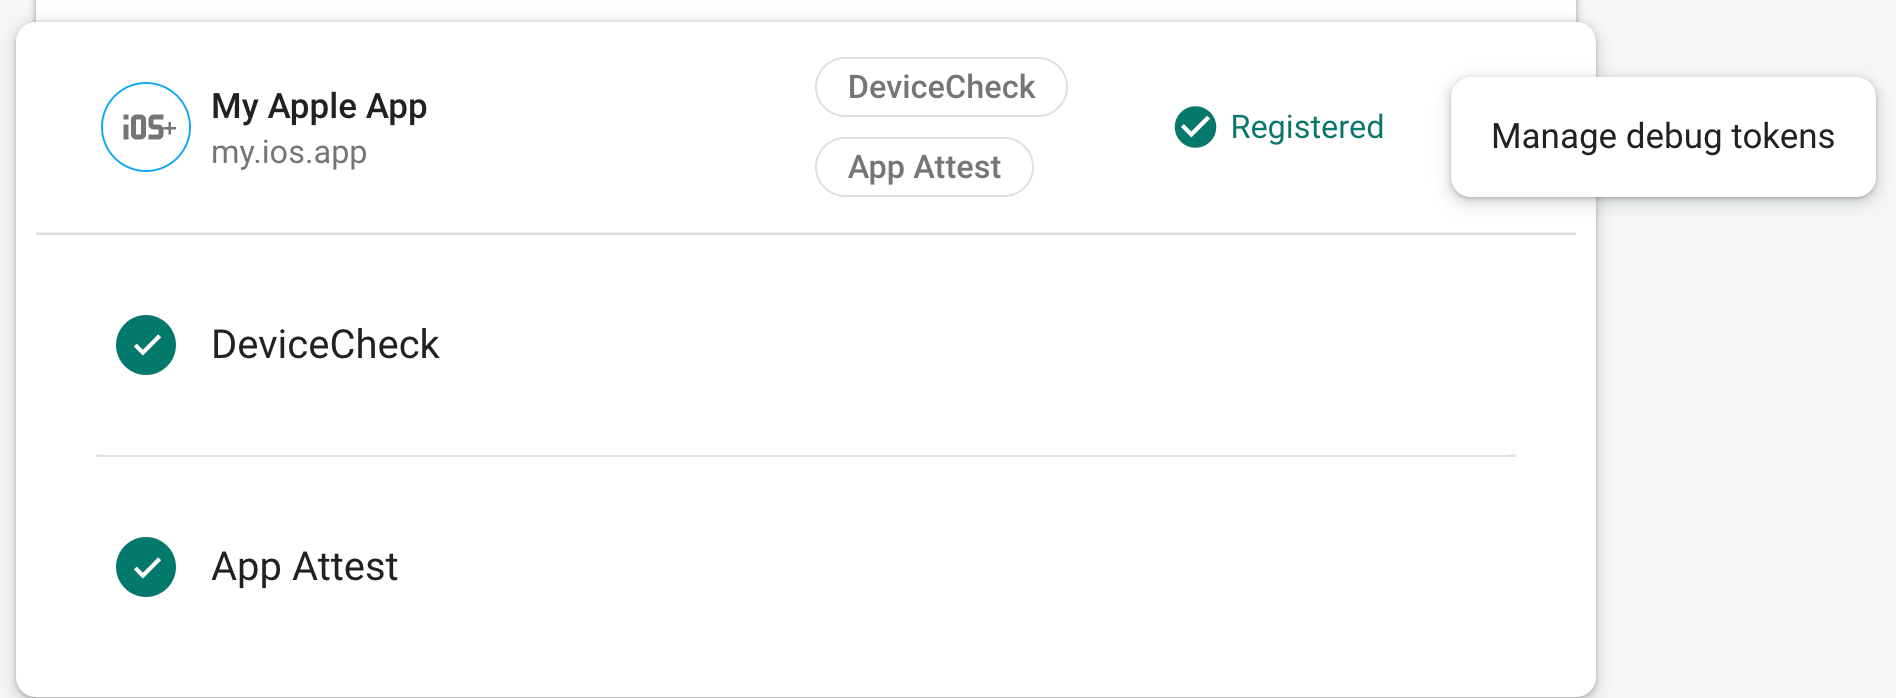
במסוף Firebase, עוברים אל Security (אבטחה) > App Check (בדיקת אפליקציות) > Apps (אפליקציות).
רושמים את טוקן הניפוי באגים שזה עתה נרשם ביומן.
- בתפריט האפשרויות הנוספות של האפליקציה, בוחרים באפשרות ניהול אסימוני ניפוי באגים.
- פועלים לפי ההוראות במסך כדי לרשום את אסימון הניפוי באגים.
אחרי שרושמים את האסימון, שירותי הקצה העורפי של Firebase יקבלו אותו כאסימון תקף.
הטוקן הזה מאפשר גישה למשאבי Firebase בלי מכשיר תקין, ולכן חשוב לשמור אותו פרטי. אל תבצעו commit של הטוקן למאגר ציבורי, ואם טוקן רשום נפרץ, צריך לבטל אותו מיד במסוף Firebase.
שימוש בספק ניפוי הבאגים בסביבת CI
כדי להשתמש בפלאגין שמתממשק עם שירותים חיצוניים לניפוי באגים בסביבת אינטגרציה רציפה (CI):
במסוף Firebase, עוברים אל Security (אבטחה) > App Check (בדיקת אפליקציות) > Apps (אפליקציות).
יוצרים טוקן לניפוי באגים. תצטרכו את האסימון הזה בשלב הבא.
- בתפריט האפשרויות הנוספות של האפליקציה, בוחרים באפשרות ניהול אסימוני ניפוי באגים.
- פועלים לפי ההוראות במסך כדי ליצור אסימון חדש לניפוי באגים.
הטוקן הזה מאפשר גישה למשאבי Firebase בלי מכשיר תקין, ולכן חשוב לשמור אותו בסודיות. אל תבצעו commit של הטוקן למאגר ציבורי, ואם טוקן רשום נפרץ, צריך לבטל אותו מיד במסוף Firebase.
מוסיפים את אסימון הניפוי באגים שיצרתם למאגר המפתחות המאובטח של מערכת ה-CI (לדוגמה, encrypted secrets ב-GitHub Actions או encrypted variables ב-Travis CI).
אם צריך, מגדירים את מערכת ה-CI כך שאסימון הניפוי הבאגים יהיה זמין בסביבת ה-CI כמשתנה סביבה. נותנים למשתנה שם כמו
APP_CHECK_DEBUG_TOKEN_FROM_CI.ב-Xcode, מוסיפים משתנה סביבה לתוכנית הבדיקה עם השם
AppCheckDebugTokenוערך כמו$(APP_CHECK_DEBUG_TOKEN).מגדירים את סקריפט הבדיקה של CI כך שיעביר את טוקן הניפוי באגים כמשתנה סביבה. לדוגמה:
xcodebuild test -scheme YourTestScheme -workspace YourProject.xcworkspace \
APP_CHECK_DEBUG_TOKEN=$(APP_CHECK_DEBUG_TOKEN_FROM_CI)
בגרסת build לניפוי באגים, לפני שמשתמשים בשירותי קצה עורפי של Firebase, צריך ליצור ולהגדיר את App Check debug provider factory:
Swift
let providerFactory = AppCheckDebugProviderFactory()
AppCheck.setAppCheckProviderFactory(providerFactory)

FirebaseApp.configure()
Objective-C
FIRAppCheckDebugProviderFactory *providerFactory =
      [[FIRAppCheckDebugProviderFactory alloc] init];
[FIRAppCheck setAppCheckProviderFactory:providerFactory];

// Use Firebase library to configure APIs
[FIRApp configure];
כשהאפליקציה פועלת בסביבת CI, שירותי ה-Backend של Firebase יקבלו את האסימון שהיא שולחת כאסימון תקין.