
Если у вас уже есть приложение Next.js или Angular (версии Next.js 13.5.x+ или Angular 18.2.x+) в репозитории GitHub, начать работу с App Hosting можно очень просто: достаточно создать бэкенд App Hosting и запустить развертывание, отправив изменения в рабочую ветку. Если у вас нет приложения, воспользуйтесь одним из наших примеров приложений, чтобы пройти шаги, описанные в этом руководстве.
В этом руководстве описано, как настроить App Hosting в консоли Firebase для автоматического развертывания при каждом новом коммите в репозитории GitHub. В результате вы получите работающее примерное приложение Next.js или Angular, которое будет переразвертываться каждый раз, когда вы вносите новые изменения в main ветку вашего репозитория GitHub.
Хотя это руководство посвящено рекомендуемому способу развертывания через консоль Firebase , существуют и другие способы развертывания , в том числе использование Firebase CLI для развертывания локального кода без подключения к GitHub.
Шаг 1: Создайте форк репозитория демо-версии.
Перейдите по ссылке https://github.com/firebase/apphosting-adapters и выберите «Fork» .
Шаг 2: Создайте бэкэнд App Hosting
В консоли Firebase перейдите в раздел «Хостинг и бессерверные вычисления» > «Хостинг приложений» .
Нажмите « Начать» .
При появлении запроса перейдите на тарифный план Blaze с оплатой по факту использования , чтобы воспользоваться App Hosting .
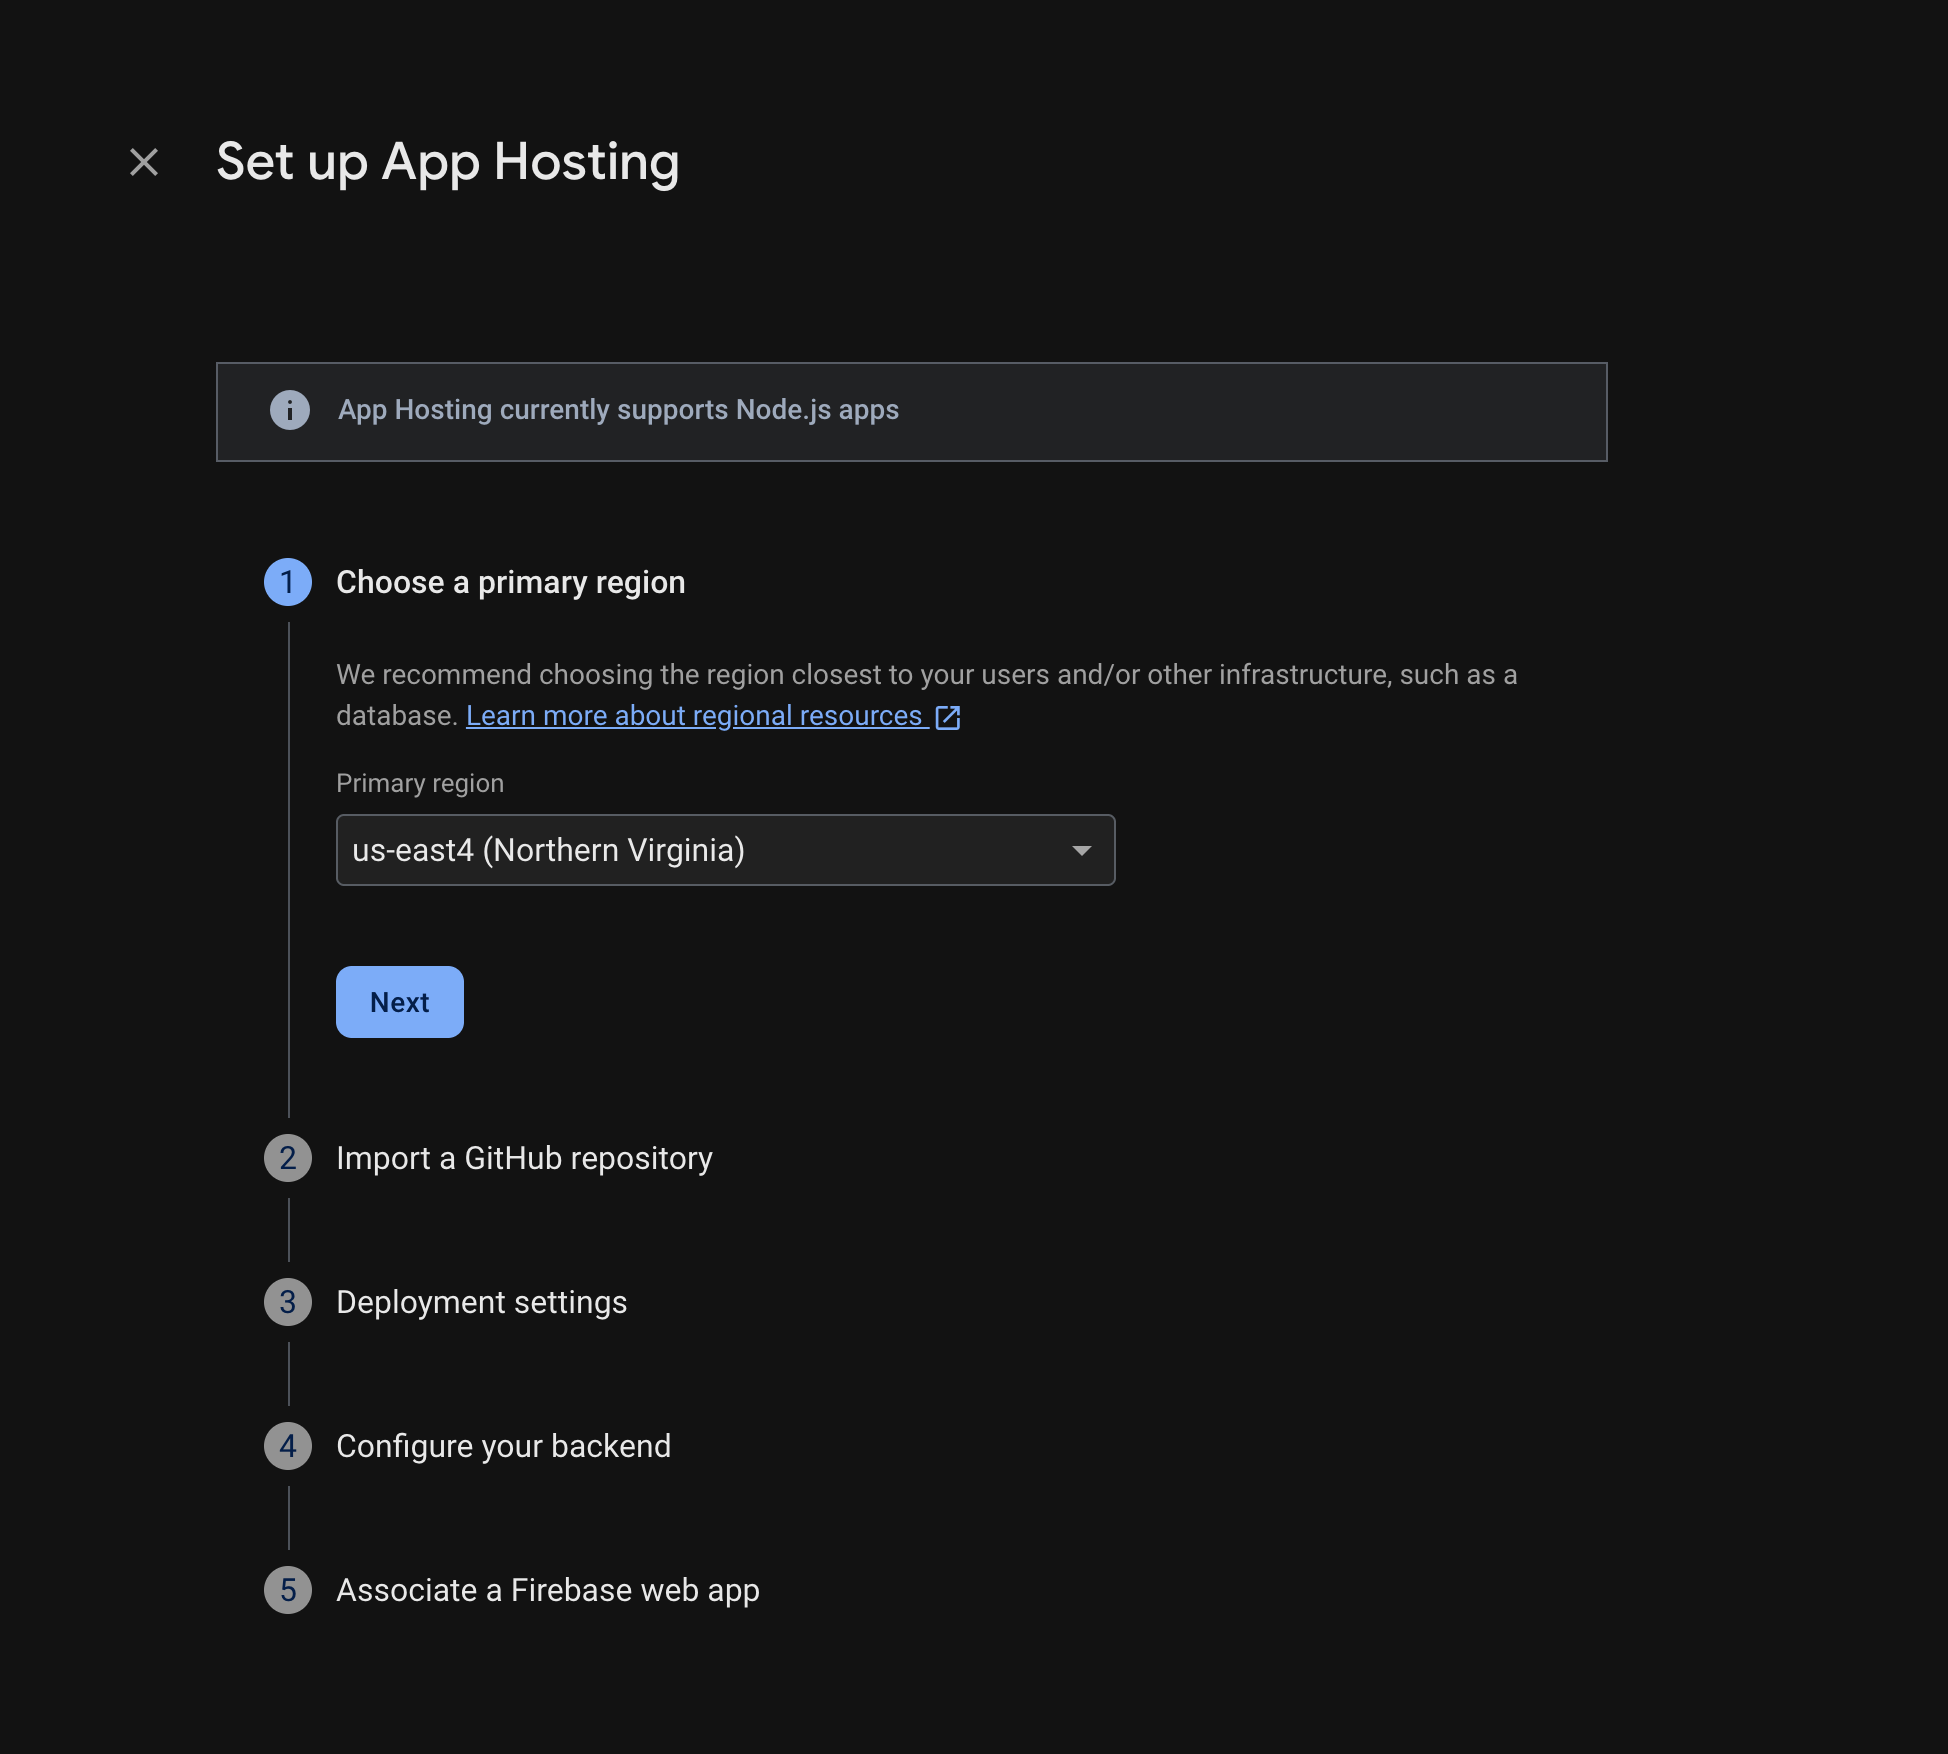
Следуйте инструкциям, чтобы выполнить следующие шаги:
- Выберите основной регион (обычно это регион, наиболее близкий к вашим пользователям).
- Подключитесь к GitHub. Выберите репозиторий, который вы только что создали, форкнув репозиторий firebase-framework-tools.
- Укажите корневой каталог вашего приложения в одном из следующих мест:
- Установите рабочую ветку в качестве основной.
- Включите автоматическое развертывание (автоматическое развертывание включено по умолчанию).
- Присвойте имя своему бэкэнду.
- Выберите среду выполнения. По умолчанию для вас предварительно выбрана новейшая рекомендуемая версия Node.js.
- Настройте автоматическое обновление базового образа (ABIU) . ABIU включено по умолчанию и автоматически применяет исправления безопасности к вашей базовой среде. Вы можете отключить ABIU, выбрав «Не указано» для вашей среды выполнения.
- Создайте новое веб-приложение Firebase.
Выберите «Завершить» и развернуть .
Шаг 3: Просмотр развернутого приложения
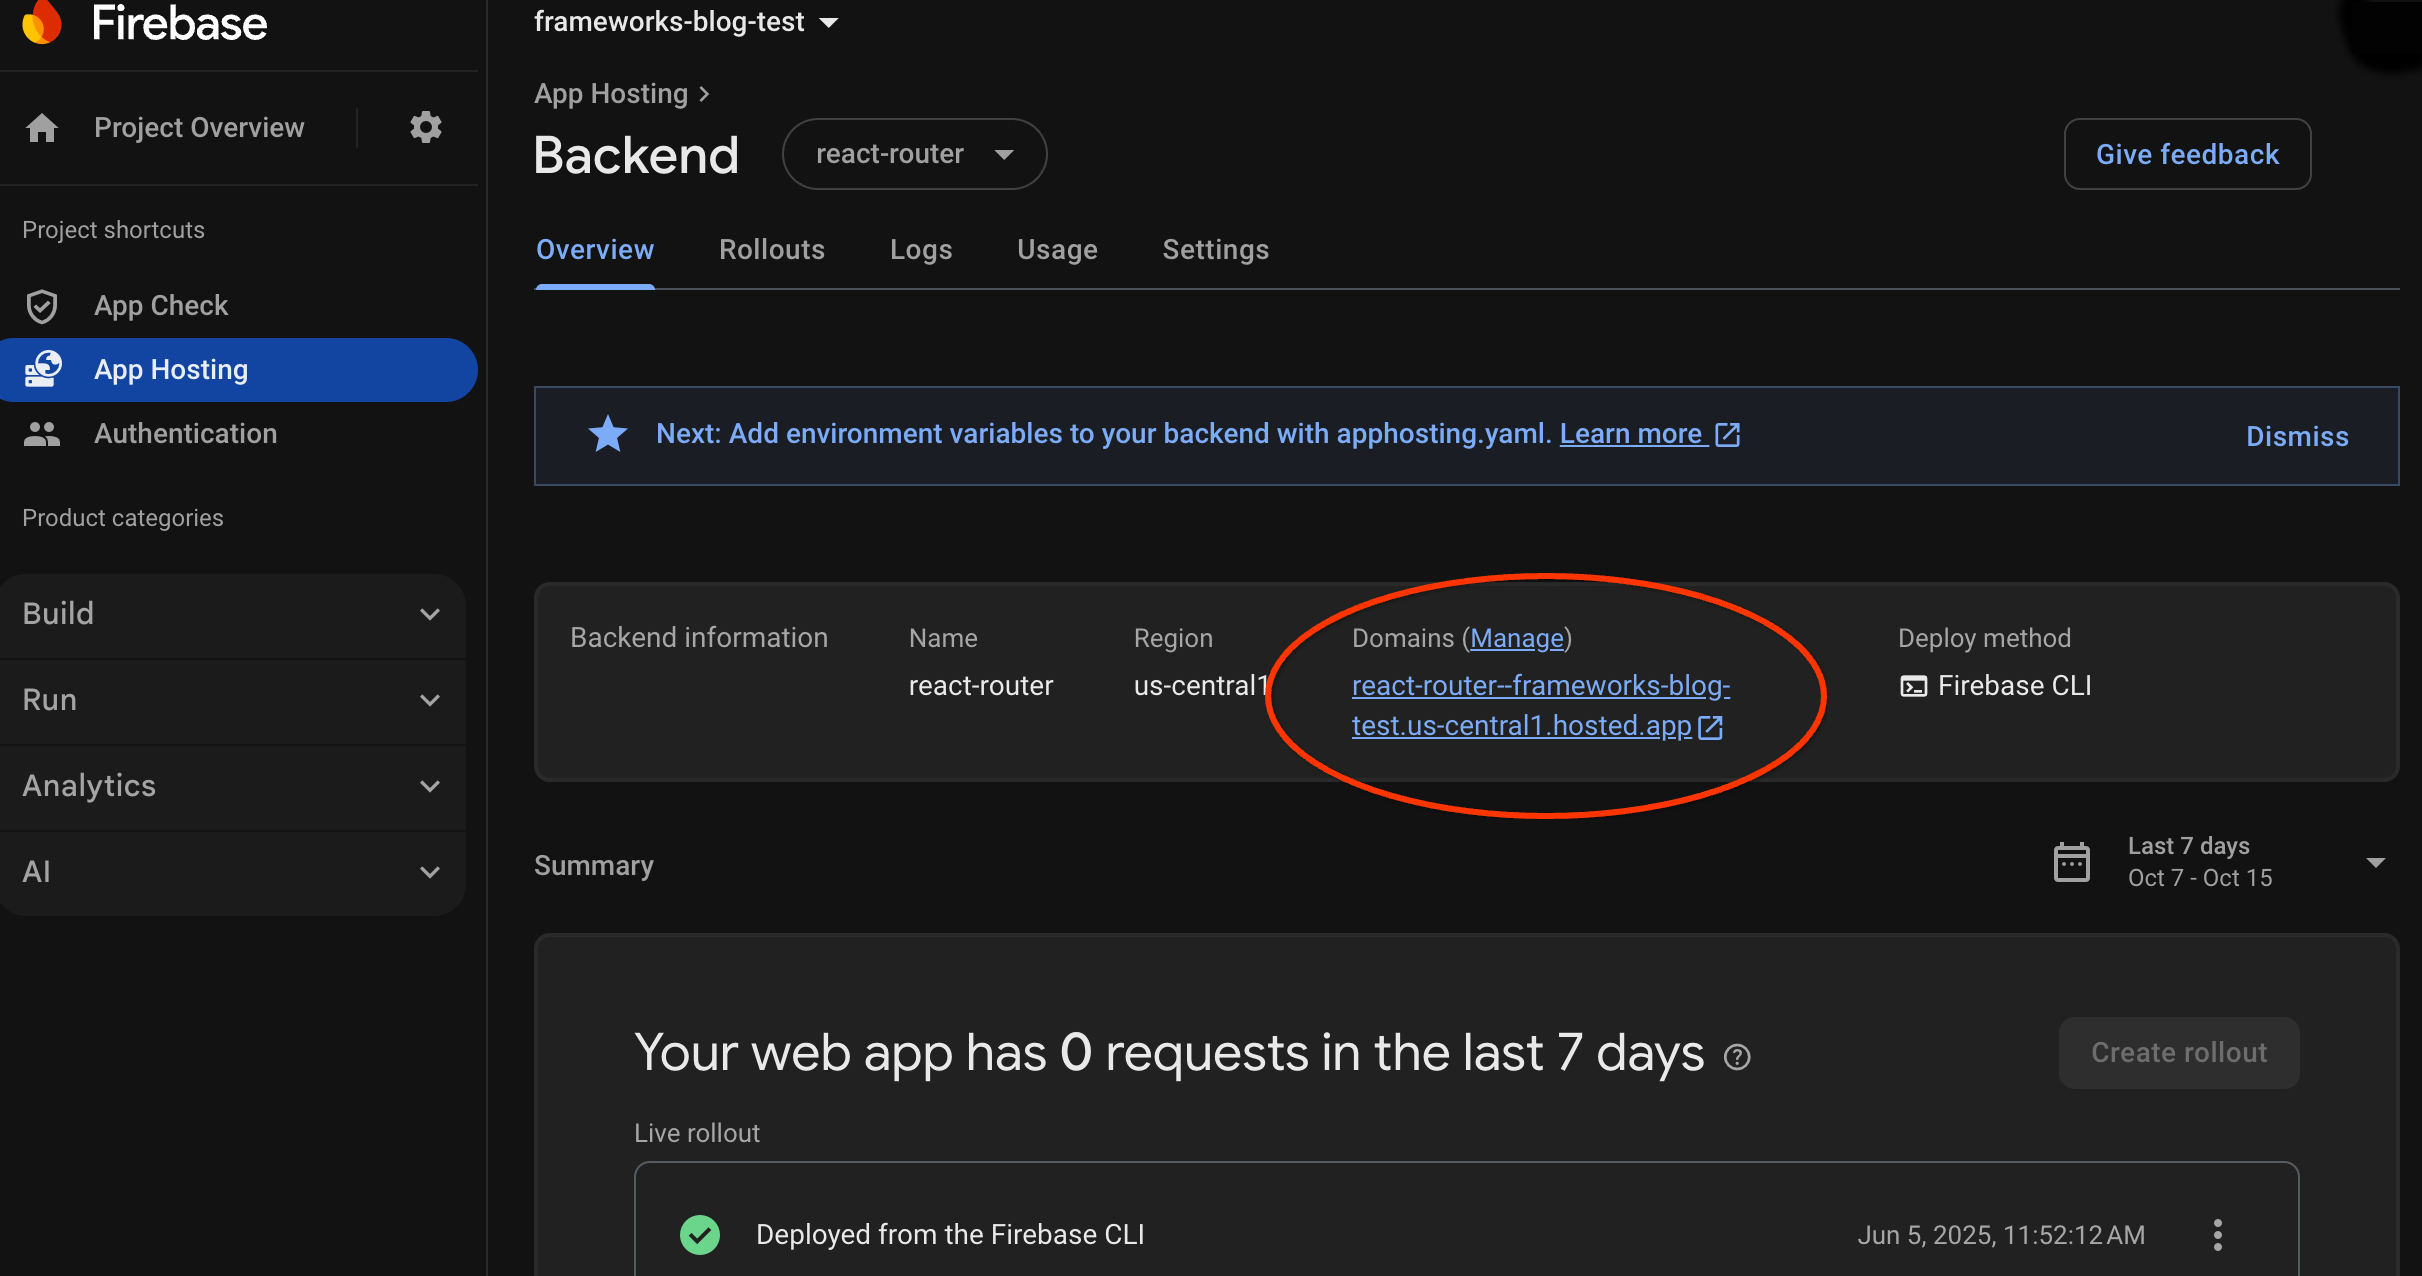
При создании бэкэнда Firebase предоставляет вам бесплатный поддомен, через который конечные пользователи смогут посещать ваше веб-приложение. Его формат: backend-id -- project-id .us-central1.hosted.app .
В строке «Информация о бэкэнде» на панели управления вашего бэкэнда выберите ссылку на работающий бэкэнд, чтобы просмотреть свой новый веб-сайт:
Шаг 4: Запустите развертывание, внеся изменения.
После создания бэкэнда и получения рабочего URL-адреса вы можете запускать развертывание новой версии вашего веб-приложения всякий раз, когда отправляете изменения в рабочую ветку вашего репозитория GitHub. Чтобы протестировать настройку App Hosting :
В вашем форке репозитория GitHub с демонстрационной версией перейдите к исходному коду главной страницы демонстрационного приложения, внесите любые необходимые изменения, а затем отправьте их в основную ветку. Чтобы найти свою главную страницу:
- Next.js:
/starters/nextjs/basic/src/app/page.tsx - Angular:
/starters/angular/basic/src/app/pages/home/home.component.html
- Next.js:
В консоли Firebase отслеживайте процесс развертывания вашего нового изменения в рабочей среде через App Hosting . После завершения развертывания вы сможете увидеть изменения на главной странице приложения.
Следующие шаги
- Углубитесь в тему: пройдите практический урок по Firebase, интегрирующий размещенное приложение с Firebase Authentication и функциями Google AI : Next.js | Angular
- Подключите собственный домен .
- Настройте свой бэкэнд — установите переменные среды, сохраните секретные параметры и многое другое.
- Отслеживайте развертывание, использование сайта и журналы событий .