
با داشتن یک برنامه Next.js یا Angular (نسخههای Next.js 13.5.x+ یا Angular 18.2.x+) موجود در مخزن GitHub، شروع کار با App Hosting میتواند به سادگی ایجاد یک Backend App Hosting و سپس شروع انتشار با ارسال به شاخه اصلی شما باشد. اگر برنامهای ندارید، از یکی از برنامههای نمونه ما برای طی کردن مراحل شرح داده شده در این راهنما استفاده کنید.
این راهنما نحوه تنظیم App Hosting در کنسول Firebase را شرح میدهد تا هر بار که یک commit جدید در مخزن GitHub ایجاد میشود، به طور خودکار مستقر شود. در پایان این جریان، شما یک برنامه نمونه Next.js یا Angular زنده خواهید داشت که هر بار که تغییر جدیدی را در شاخه main مخزن GitHub خود اعمال میکنید، مجدداً مستقر میشود.
اگرچه این راهنما بر روی جریان کنسول پیشنهادی Firebase تمرکز دارد، اما روشهای دیگری نیز برای استقرار وجود دارد، از جمله استفاده از Firebase CLI برای استقرار کد محلی بدون اتصال GitHub.
مرحله ۱: مخزن نسخه آزمایشی را فورک کنید
به آدرس https://github.com/firebase/apphosting-adapters مراجعه کنید و Fork را انتخاب کنید.
مرحله ۲: ایجاد یک بکاند App Hosting
در کنسول Firebase ، به Hosting & Serverless > App Hosting بروید.
روی شروع به کار کلیک کنید.
در صورت درخواست، برای استفاده App Hosting ، طرح قیمتگذاری Blaze را به صورت پرداخت در محل ارتقا دهید.
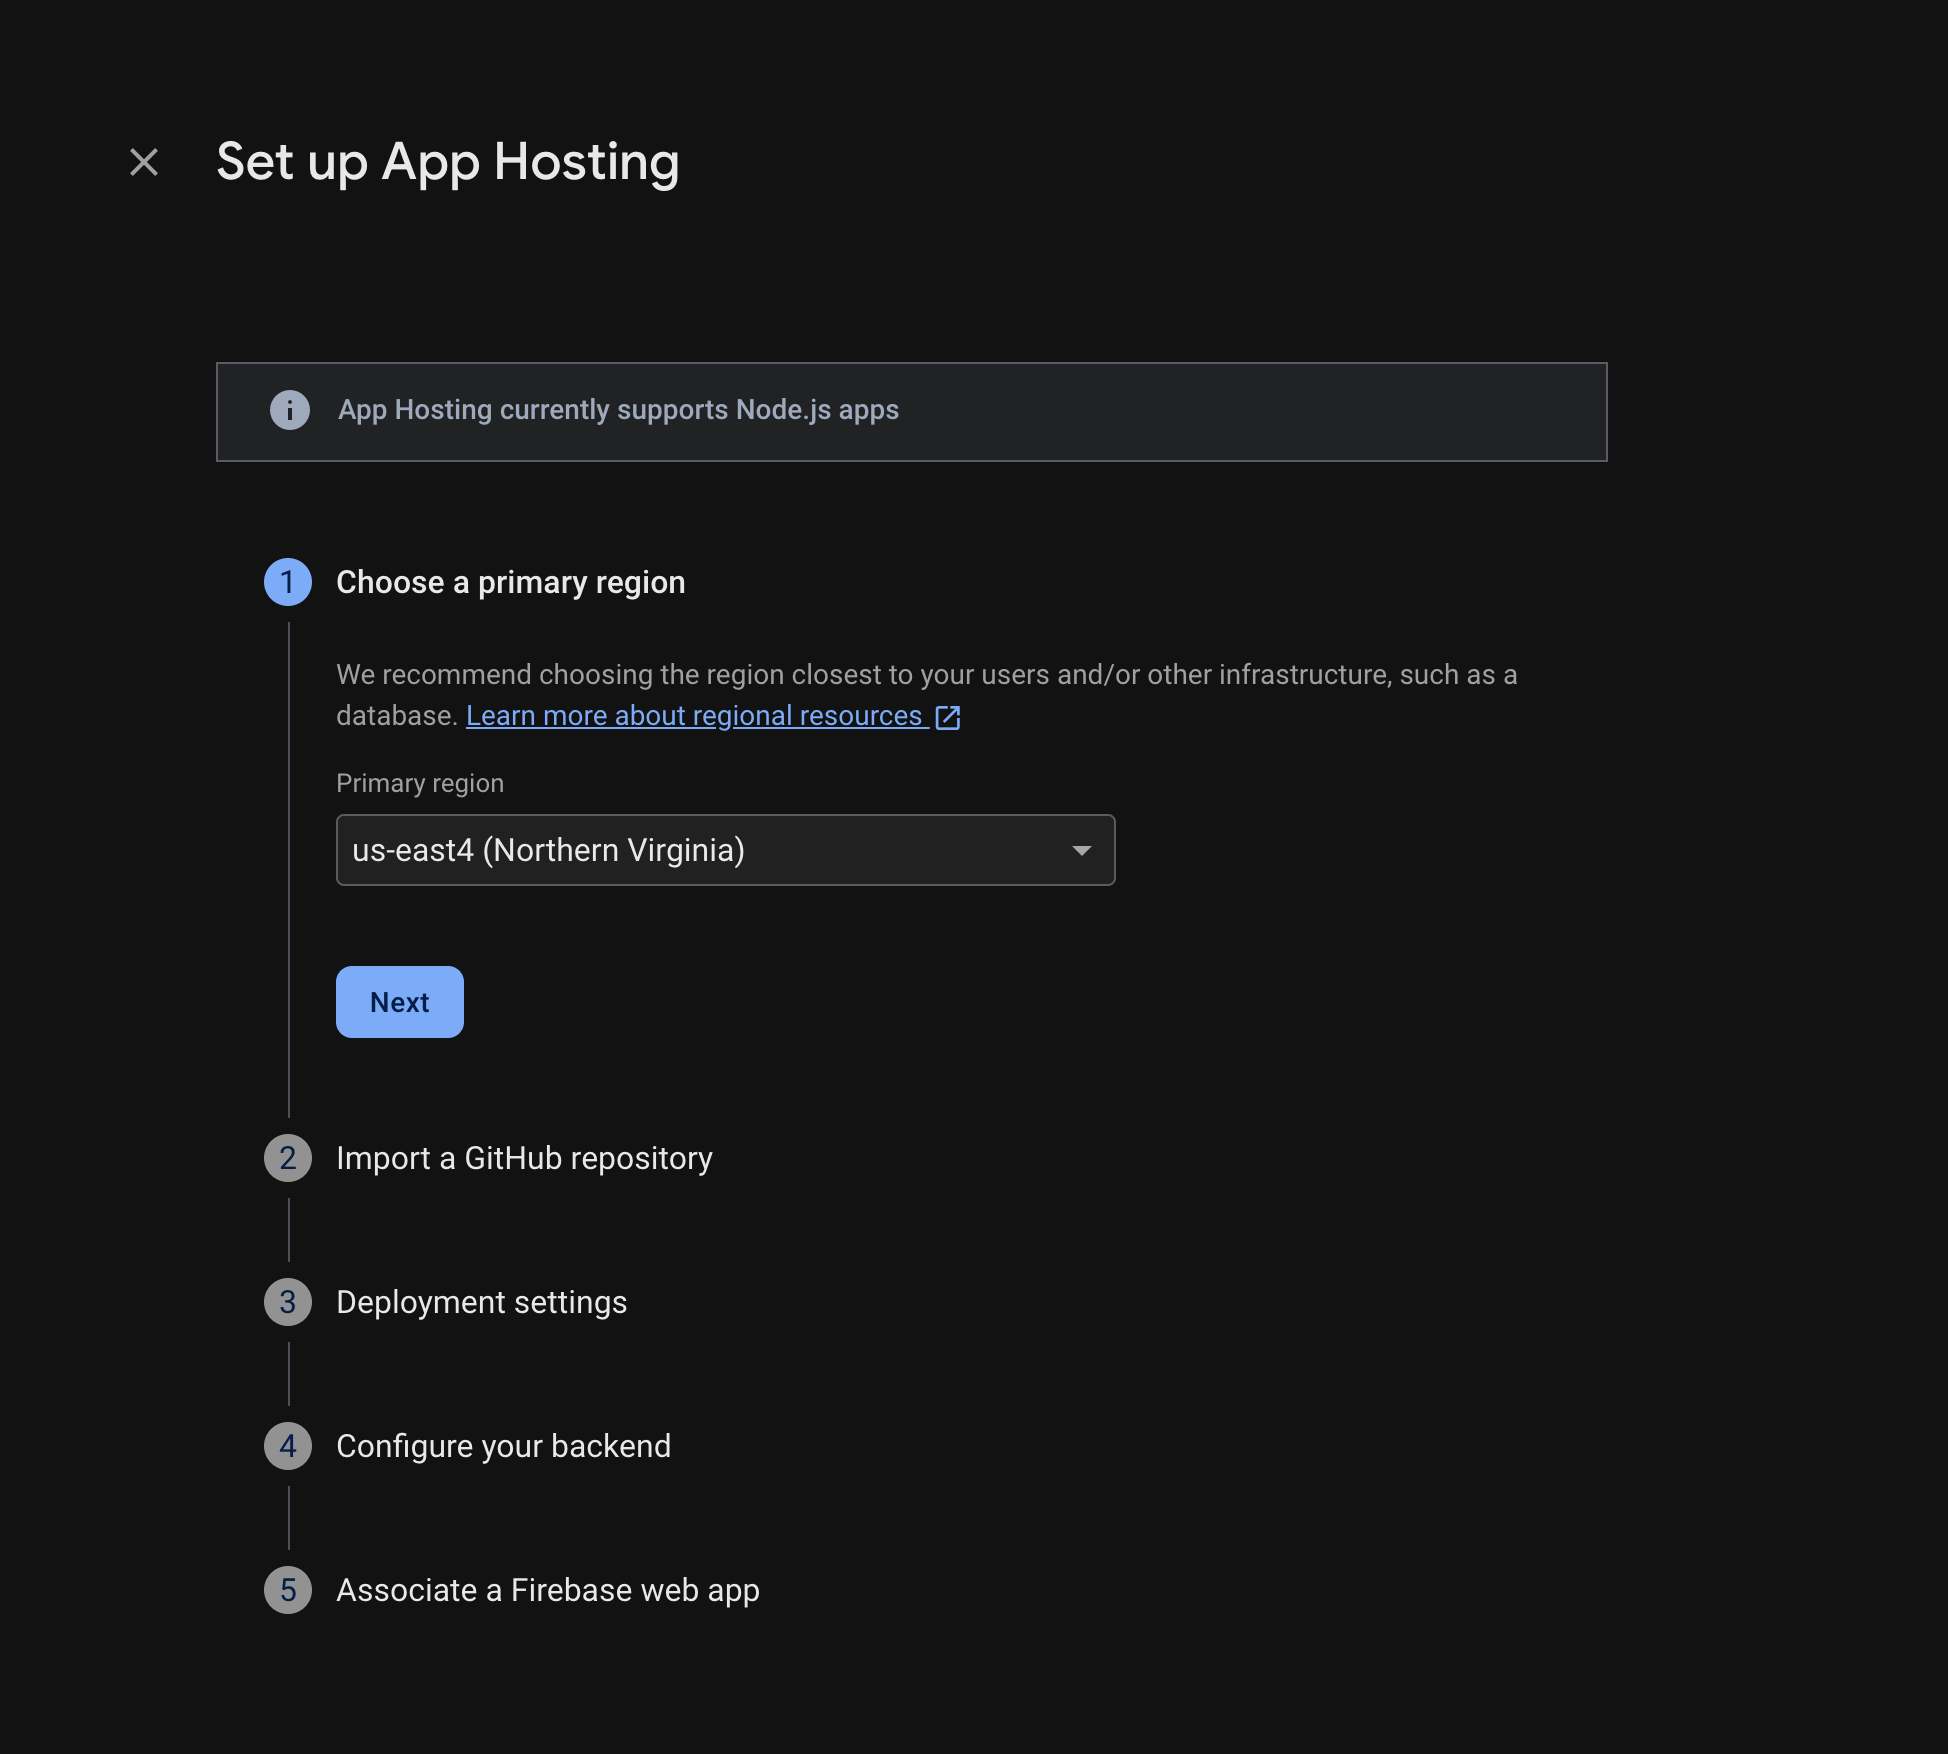
برای انجام این مراحل، دستورالعملها را دنبال کنید:
- یک منطقه اصلی (معمولاً منطقهای که به کاربران شما نزدیکتر است) انتخاب کنید.
- به گیتهاب متصل شوید. مخزنی را که با ایجاد انشعاب از مخزن firebase-framework-tools ایجاد کردهاید، انتخاب کنید.
- دایرکتوری ریشه برنامه خود را روی یکی از موارد زیر تنظیم کنید:
- شاخه زنده را به عنوان شاخه اصلی تنظیم کنید.
- فعال کردن انتشار خودکار (انتشار خودکار به طور پیشفرض فعال است).
- یک نام به backend خود اختصاص دهید.
- محیط زمان اجرا (runtime environment) خود را انتخاب کنید. به طور پیشفرض، جدیدترین نسخه توصیهشده Node.js برای شما از قبل انتخاب شده است.
- پیکربندی بهروزرسانیهای خودکار تصویر پایه (ABIU) . ABIU به طور پیشفرض فعال است و بهطور خودکار وصلههای امنیتی را در محیط اصلی شما اعمال میکند. میتوانید با انتخاب گزینه «مشخص نشده» برای زمان اجرا، از ABIU انصراف دهید.
- یک برنامه وب جدید Firebase ایجاد کنید.
گزینه «پایان» و «اعمال» را انتخاب کنید.
مرحله ۳: مشاهده برنامه اجرا شده
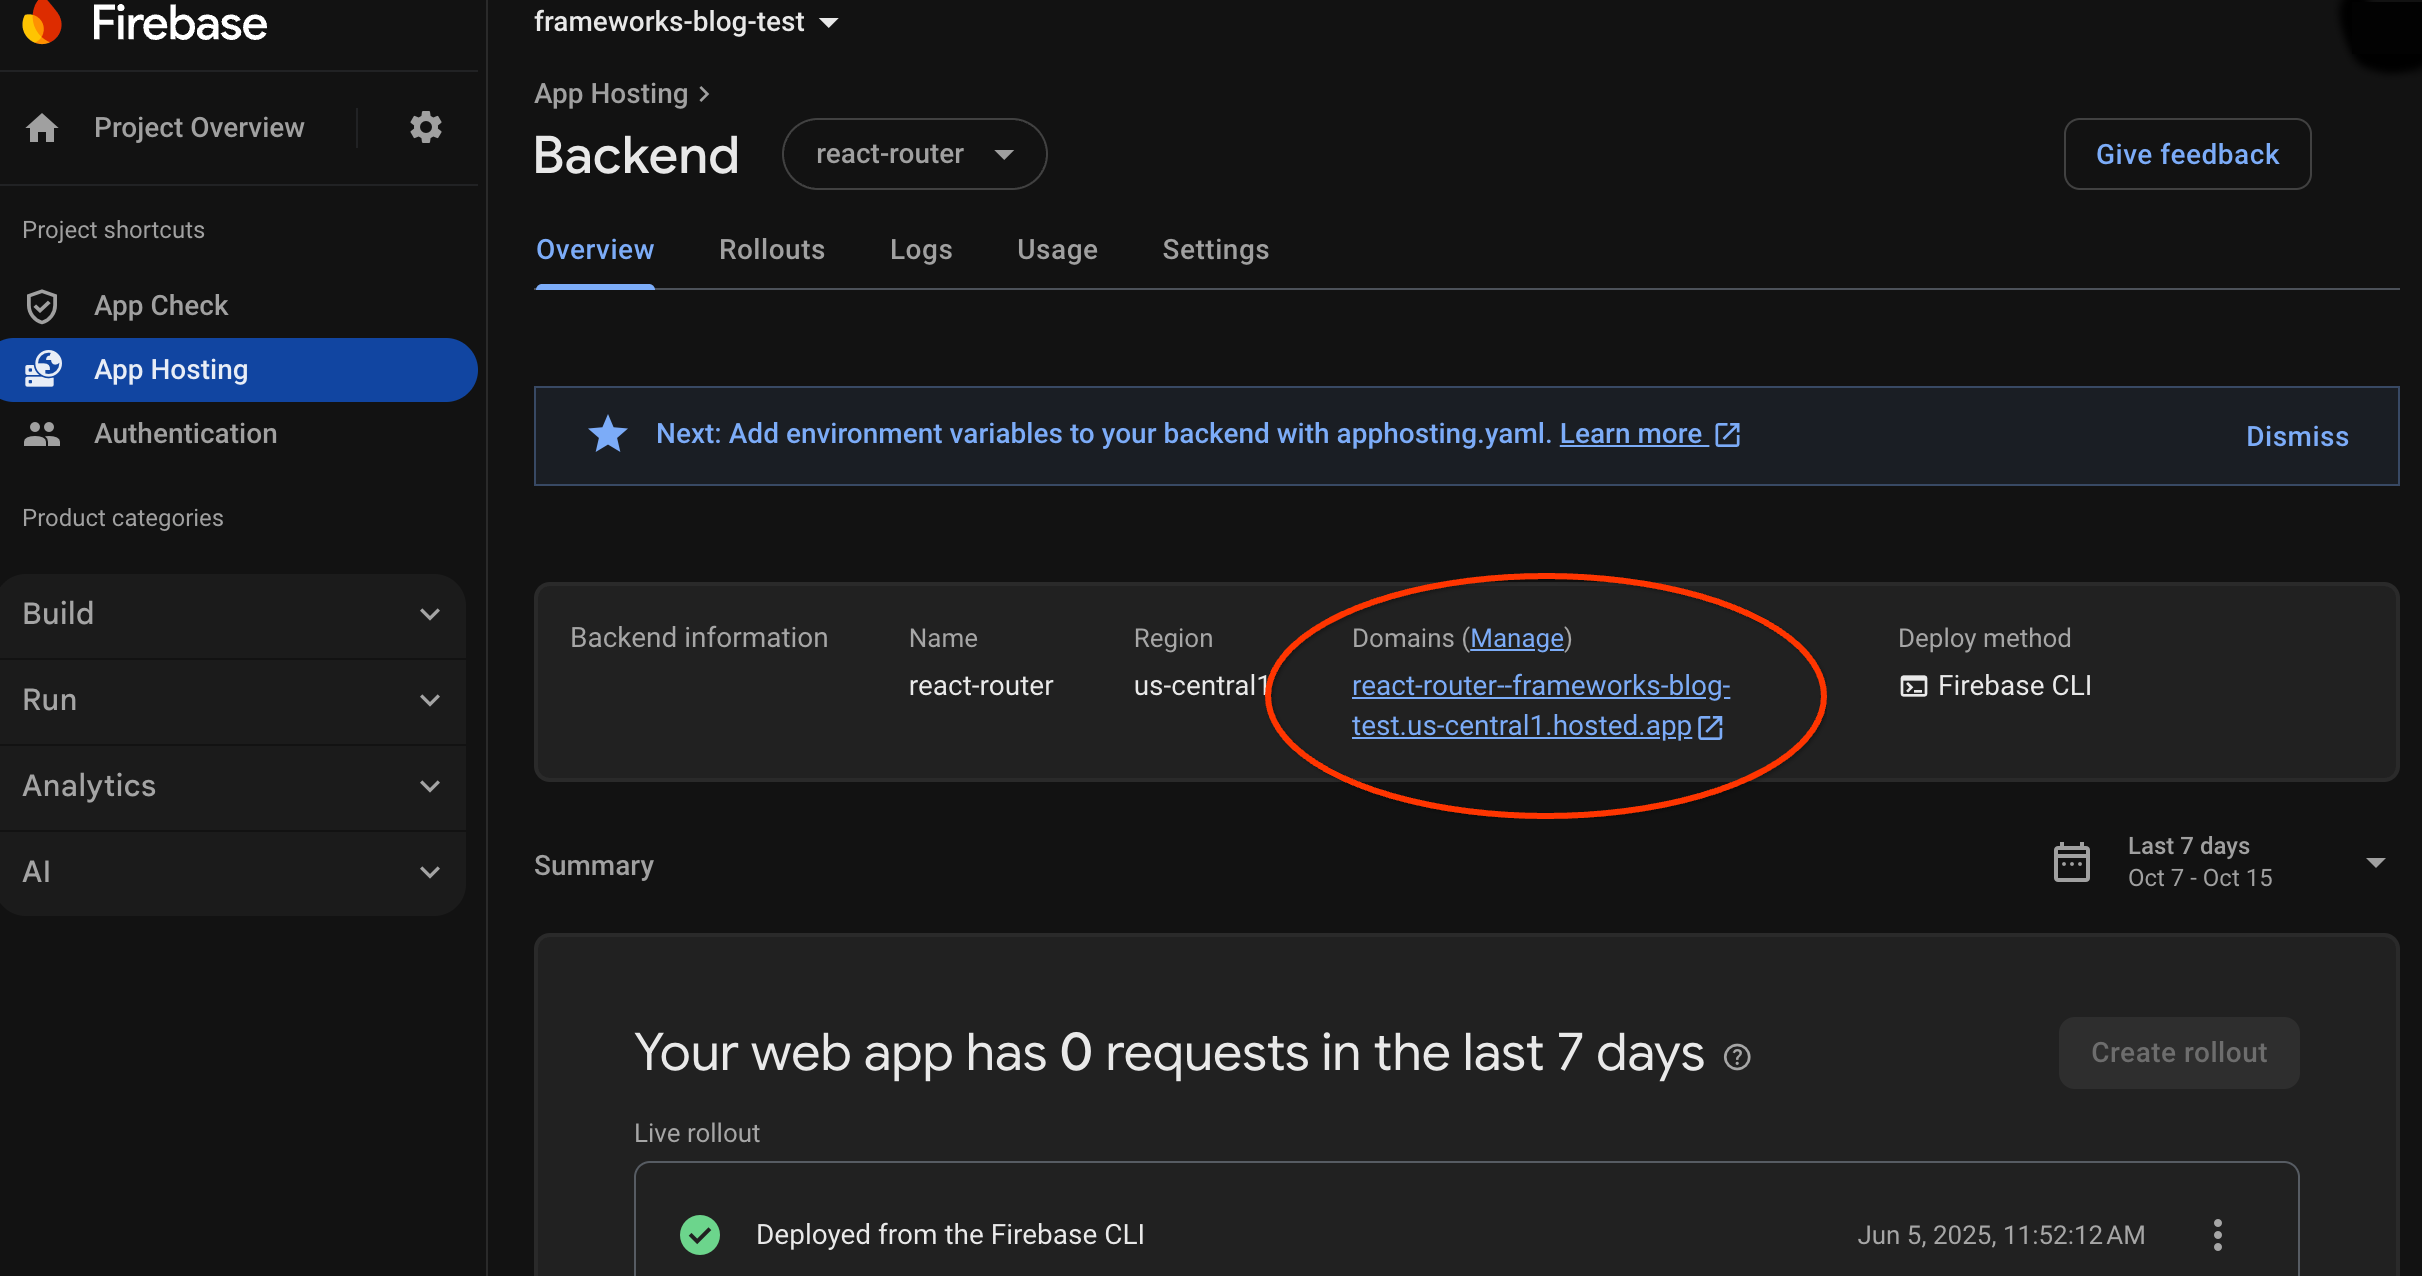
وقتی یک backend ایجاد میکنید، Firebase یک زیردامنه رایگان به شما میدهد که کاربران نهایی میتوانند از طریق آن از برنامه وب شما بازدید کنند. فرمت آن backend-id -- project-id .us-central1.hosted.app است.
در ردیف اطلاعات بخش مدیریت (Backend) در داشبورد بخش مدیریت خود، لینک بخش مدیریت زنده خود را برای مشاهده وبسایت جدید خود انتخاب کنید:
مرحله ۴: با اعمال یک تغییر، یک انتشار را آغاز کنید
زمانی که backend شما ایجاد شد و یک URL زنده داشتید، میتوانید هر زمان که تغییرات را به شاخه زنده مخزن GitHub خود ارسال کردید، نسخه جدیدی از برنامه وب خود را راهاندازی کنید. برای انجام آزمایش تنظیمات App Hosting خود:
در شاخهی گیتهابِ نسخه آزمایشی خود، به منبع صفحه اصلی برنامه آزمایشی بروید، هر ویرایش قابل تشخیصی را که دوست دارید انجام دهید و سپس تغییر خود را به شاخه اصلی ارسال کنید. برای یافتن صفحه اصلی خود:
- Next.js:
/starters/nextjs/basic/src/app/page.tsx - انگولار:
/starters/angular/basic/src/app/pages/home/home.component.html
- Next.js:
در کنسول Firebase ، App Hosting را همزمان با انتشار تغییر جدید به محیط عملیاتی، زیر نظر داشته باشید. پس از اتمام انتشار، میتوانید تغییر خود را در صفحه اصلی برنامه مشاهده کنید.
مراحل بعدی
- عمیقتر بروید: یک آزمایشگاه کد Firebase را بررسی کنید که یک برنامه میزبانی شده را با ویژگیهای Firebase Authentication و هوش مصنوعی گوگل ادغام میکند: Next.js | Angular
- یک دامنه سفارشی متصل کنید .
- پیکربندی بخش مدیریت خود - تنظیم متغیرهای محیطی، ذخیره پارامترهای مخفی و موارد دیگر.
- نظارت بر انتشار بهروزرسانیها، میزان استفاده از سایت و گزارشها .