
After App Check is enforced for a backend service, your app's features that depend on that backend service won't run in an emulator or from a continuous integration (CI) environment because these environments don't qualify as valid devices. To run your app in these environments during development and testing, you need to create a debug build of your app that uses the App Check debug provider instead of a production attestation provider.
Use the debug provider in an emulator
Here's how to use the debug provider while running your app in an emulator interactively (for example, during local development):
In your module (app-level) Gradle file (usually
<project>/<app-module>/build.gradle.ktsor<project>/<app-module>/build.gradle), add the dependency for the App Check library for Android. We recommend using the Firebase Android BoM to control library versioning.dependencies { // Import the BoM for the Firebase platform implementation(platform("com.google.firebase:firebase-bom:35.0.2")) // Add the dependencies for the App Check libraries // When using the BoM, you don't specify versions in Firebase library dependencies implementation("com.google.firebase:firebase-appcheck-debug") }
By using the Firebase Android BoM, your app will always use compatible versions of Firebase Android libraries.
(Alternative) Add Firebase library dependencies without using the BoM
If you choose not to use the Firebase BoM, you must specify each Firebase library version in its dependency line.
Note that if you use multiple Firebase libraries in your app, we strongly recommend using the BoM to manage library versions, which ensures that all versions are compatible.
dependencies {
    // Add the dependencies for the App Check libraries
    // When NOT using the BoM, you must specify versions in Firebase library dependencies
    implementation("com.google.firebase:firebase-appcheck-debug:20.0.0")
}
In your debug build, configure App Check to use the debug provider factory:
Kotlin
Firebase.initialize(context = this) Firebase.appCheck.installAppCheckProviderFactory( DebugAppCheckProviderFactory.getInstance(), )
Java
FirebaseApp.initializeApp(/*context=*/ this); FirebaseAppCheck firebaseAppCheck = FirebaseAppCheck.getInstance(); firebaseAppCheck.installAppCheckProviderFactory( DebugAppCheckProviderFactory.getInstance());
Obtain your debug token:
Run your app in the emulator or on your test device.
Look for the App Check debug token in your logs. For example:
D DebugAppCheckProvider: Enter this debug secret into the allow list
in the Firebase Console for your project: 123a4567-b89c-12d3-e456-789012345678
Copy the token (for example,
123a4567-b89c-12d3-e456-789012345678).
Register your debug token with App Check:
In the Firebase console, go to the Security > App Check > Apps tab.
Find your app, click the three-dot overflow menu (), and then select Manage debug tokens.
Follow the on-screen instructions to register your debug token.
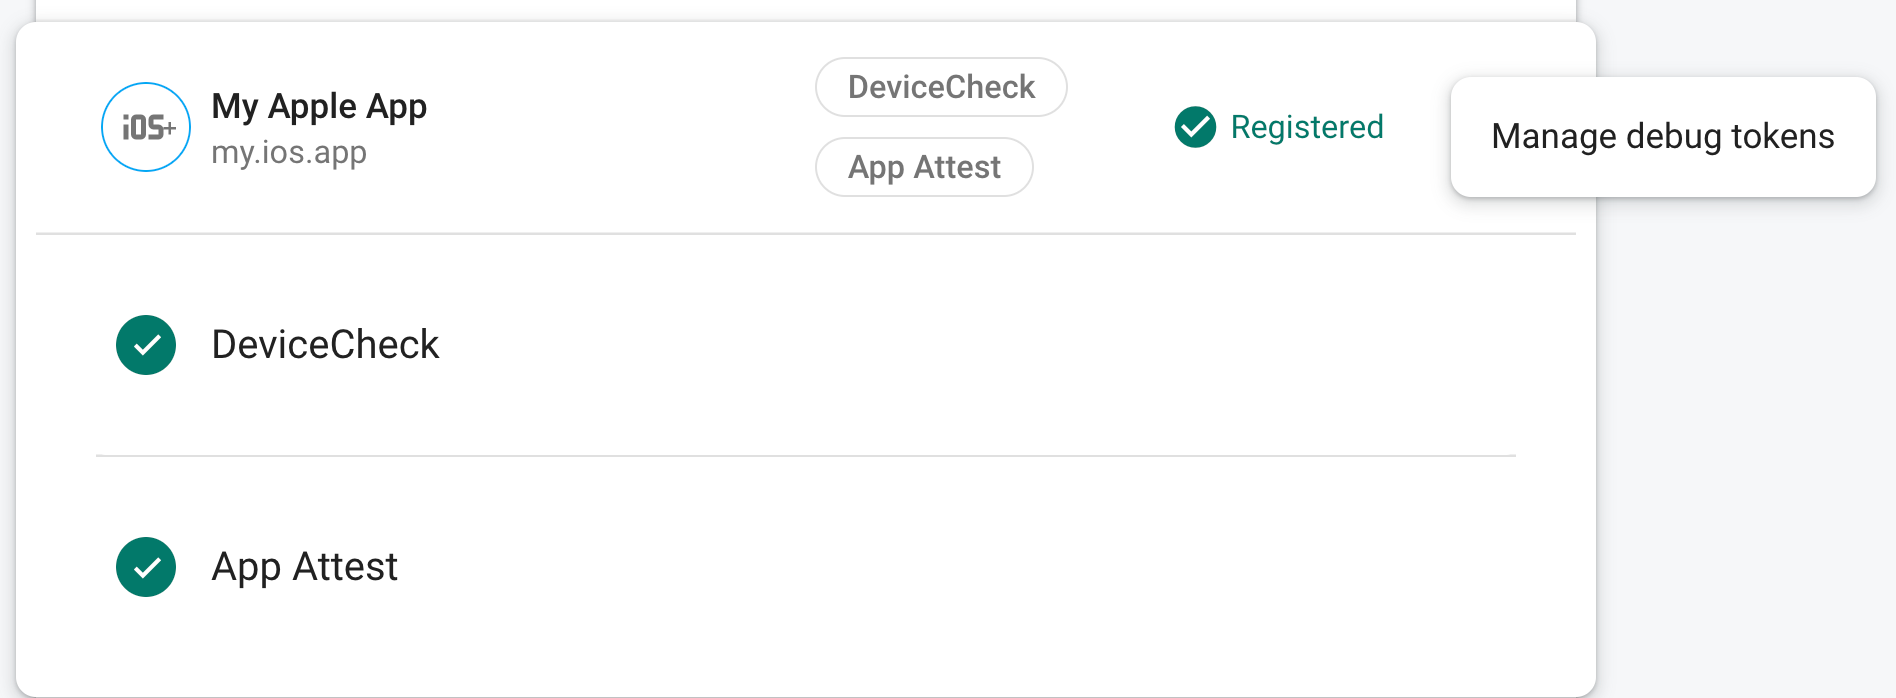
After you register the token with App Check, your backend services will accept it as valid.
This token allows access to your backend services without a valid device, so it's crucial that you keep it private. Do not commit it to a public repository or ship it in production builds of your app. If a registered token is ever compromised, delete it immediately using Manage debug tokens in the Firebase console.
Use the debug provider for unit testing in a CI environment
Here's how to use the debug provider for unit testing in a continuous integration (CI) environment:
In the Firebase console, create a debug token:
In the Firebase console, go to the Security > App Check > Apps tab.
Find your app, click the three-dot overflow menu (), and then select Manage debug tokens.
Follow the on-screen instructions to create a new debug token.
This token allows access to your backend services without a valid device, so it's crucial that you keep it private. Do not commit it to a public repository or ship it in production builds of your app. If a registered token is ever compromised, delete it immediately using Manage debug tokens in the Firebase console.
Add the debug token you just created to your CI system's secure key store (for example, GitHub Actions' encrypted secrets or Travis CI's encrypted variables).
If necessary, configure your CI system to make your debug token available within the CI environment as an environment variable. Name the variable something like
APP_CHECK_DEBUG_TOKEN_FROM_CI.In your module (app-level) Gradle file (usually
<project>/<app-module>/build.gradle.ktsor<project>/<app-module>/build.gradle), add the dependency for the App Check library for Android. We recommend using the Firebase Android BoM to control library versioning.Kotlin
dependencies {
    // Import the BoM for the Firebase platform
    implementation(platform("com.google.firebase:firebase-bom:35.0.2"))

    // Add the dependency for the App Check library
    // When using the BoM, you don't specify versions in Firebase library dependencies
    implementation("com.google.firebase:firebase-appcheck-debug")
}
By using the Firebase Android BoM, your app will always use compatible versions of Firebase Android libraries.
(Alternative) Add Firebase library dependencies without using the BoM
If you choose not to use the Firebase BoM, you must specify each Firebase library version in its dependency line.
Note that if you use multiple Firebase libraries in your app, we strongly recommend using the BoM to manage library versions, which ensures that all versions are compatible.
dependencies {
    // Add the dependency for the App Check library
    // When NOT using the BoM, you must specify versions in Firebase library dependencies
    implementation("com.google.firebase:firebase-appcheck-debug:20.0.0")
}
Java
dependencies {
    // Import the BoM for the Firebase platform
    implementation(platform("com.google.firebase:firebase-bom:35.0.2"))

    // Add the dependency for the App Check library
    // When using the BoM, you don't specify versions in Firebase library dependencies
    implementation("com.google.firebase:firebase-appcheck-debug")
}
By using the Firebase Android BoM, your app will always use compatible versions of Firebase Android libraries.
(Alternative) Add Firebase library dependencies without using the BoM
If you choose not to use the Firebase BoM, you must specify each Firebase library version in its dependency line.
Note that if you use multiple Firebase libraries in your app, we strongly recommend using the BoM to manage library versions, which ensures that all versions are compatible.
dependencies {
    // Add the dependency for the App Check library
    // When NOT using the BoM, you must specify versions in Firebase library dependencies
    implementation("com.google.firebase:firebase-appcheck-debug:20.0.0")
}
Add the following to the configuration of your CI build variant:
testInstrumentationRunnerArguments["firebaseAppCheckDebugSecret"] =
    System.getenv("APP_CHECK_DEBUG_TOKEN_FROM_CI") ?: ""
In your test classes, use the
DebugAppCheckTestHelperto wrap any code that needs an App Check token:Kotlin
@RunWith(AndroidJunit4::class)
class MyTests {
    private val debugAppCheckTestHelper =
        DebugAppCheckTestHelper.fromInstrumentationArgs()

    @Test
    fun testWithDefaultApp() {
        debugAppCheckTestHelper.withDebugProvider {
            // Test code that requires a debug AppCheckToken.
        }
    }

    @Test
    fun testWithNonDefaultApp() {
        debugAppCheckTestHelper.withDebugProvider(
            FirebaseApp.getInstance("nonDefaultApp")
        ) {
            // Test code that requires a debug AppCheckToken.
        }
    }
}
Java
@RunWith(AndroidJunit4.class)
public class YourTests {
    private final DebugAppCheckTestHelper debugAppCheckTestHelper =
            DebugAppCheckTestHelper.fromInstrumentationArgs();

    @Test
    public void testWithDefaultApp() {
        debugAppCheckTestHelper.withDebugProvider(() -> {
            // Test code that requires a debug AppCheckToken.
        });
    }

    @Test
    public void testWithNonDefaultApp() {
        debugAppCheckTestHelper.withDebugProvider(
                FirebaseApp.getInstance("nonDefaultApp"),
                () -> {
                    // Test code that requires a debug AppCheckToken.
                });
    }
}
When your app runs in a CI environment, your backend services will accept the token it sends as valid.